

I thought I’d make a post about the different ways to make stereoviews with a single lens. It’s usually the same method that the Victorian pioneers of stereoscopic photography used, but a bit quicker, and more digital in some cases!
Stereoscopic photography is about taking a left photo for the left-eye perspective, and a right photo for the right-eye perspective, and letting your brain work its magic (sometimes with the aid of a stereoviewer) to fuse the two into one 3-D image. It’s a little extra work than just taking one mono photograph, especially with processing afterwards, but the reward of seeing your images come to life, feeling so real that you want to reach out and touch them, is definitely worth the effort.
This post will show you that you don’t need specialist equipment to take 3D photos, you can use almost any camera.
TAKING TWO PHOTOS TO MAKE YOUR 3D IMAGE
I thought it would be best to start by explaining what you’re trying to capture with your two photos, so you understand why you might eventually be busting some silly moves with your camera. As I mentioned before, stereoscopy relies on two separate images, from two slightly different perspectives, displayed to your left and right eyes separately. I’m going to talk mainly about taking sequential photos for this, but there is also the option of using a beam splitter, which I’ll mention towards the end.
To make sure your image is interesting and has a depth which works well in 3-D, you don’t want to be too close or too far away from your subject. A very general rule of thumb is to slide or move the camera from left to right 1/30th of the distance between you and the subject when taking the shots. For example, if the subject is 3 metres away, you move the camera 10cm from left to right, or if it’s 15 metres away, you move your camera 50cm from left to right. Also, watch out for movement in the scene between photos as this may be distracting and affect the fusing of the two images. These are general rules and rules are made to be broken, or ignored, if you wish. Do whatever brings you the most enjoyment from your 3-D photos with how you want to view them.
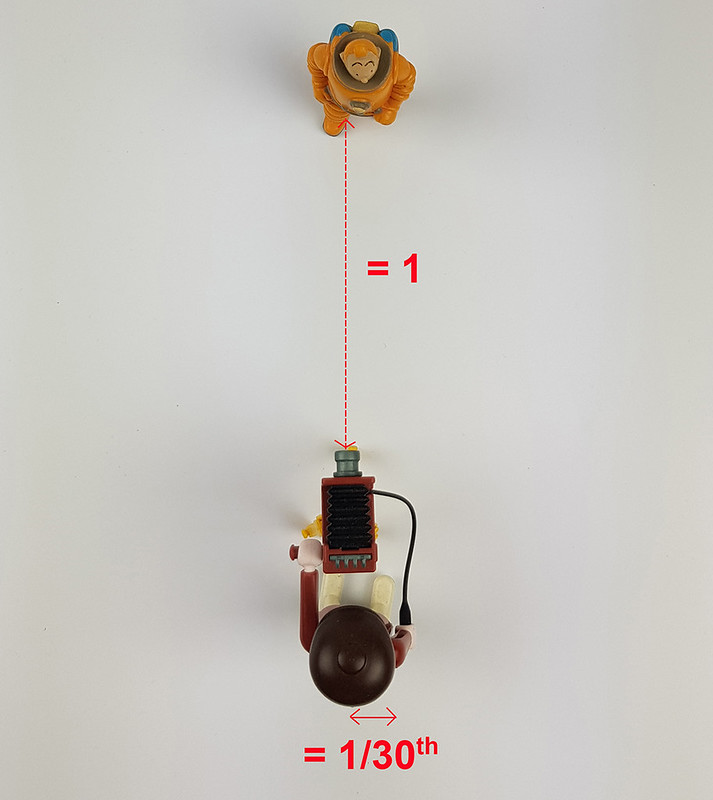
Image 1: Movement of camera from left to right should be about 1/30th of the distance you are from the subject. Use of toys for demonstration is entirely optional
If you’re taking a stereoview of a more distant object, such as a building, tree, etc., some people recommend a rocking method, also called the ‘cha-cha’ method (see the image below). It involves standing with your feet slightly apart, but well balanced, and your elbows tight to your sides, with the camera held in the middle. You move your weight to your left foot, so the camera is on the left, to take the first photo. You then transfer the weight to your right foot, which will also move the camera to the right, allowing you to take the second photo. You can exaggerate this movement, or decrease it, depending on how far away you are from your subject.

Image 2: Moving the camera from left to right, to make sequential photos, using the ‘Cha-Cha’ technique
One thing to watch out for with taking sequential photos for the left and right images, is that you should try and keep you camera level between shots, making sure not to skew it either, as this will help with alignment and comfortable viewing later. There are things you can use to aid you with this, which I’ll explain below. You should also try and keep all the camera settings the same for both shots, including the focus, which isn’t always the easiest thing with a smartphone.
For further tips on taking good quality 3-D photos, please see this post.
SMARTPHONE APPS AND SEQUENTIAL PHOTOS
The quickest and easiest way to make a stereoview is with your smartphone using an app. You can either import the images already taken with your phone, or take images through the app itself. The apps I use and recommend are i3DSteroid for iPhones and 3DSteroid Pro for Android. They are inexpensive, easy to use and enable you to make stereoviews in seconds. They offer free versions to try, however, you cannot save the images.
For full step-by-step tutorials, please see these posts for i3DSteroid and 3DSteroid Pro. If you prefer things at a quicker pace, please see this video tutorial. There are other 3-D photo apps available, check out the Apple or Play stores and remember to have a look at the feedback from the users.
Usually, you take the left and right images free-hand, but if you feel you need help with stability, you can also use a tripod with a slider bar (see below) and a phone cradle, or place the phone on a flat surface and push it along (keeping it level).
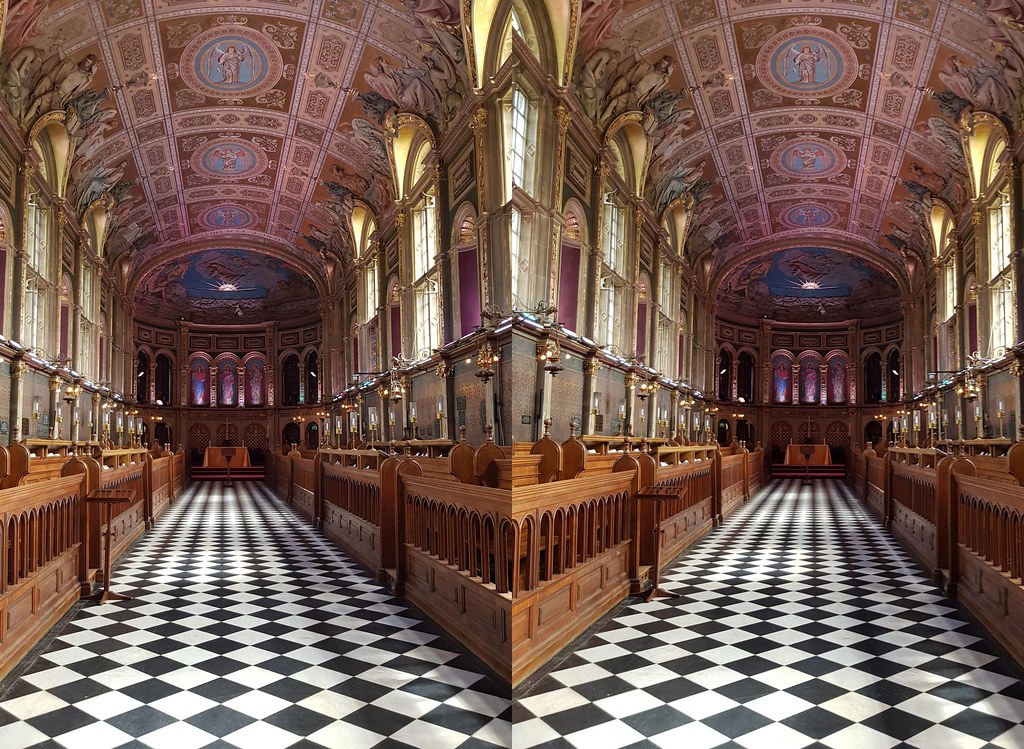
Image 3: Sequential stereoview with an Android smartphone and the 3D Steroid Pro app. I certainly moved a lot for this one and completely ignored the 1/30th distance recommendation
SINGLE LENS CAMERAS (DSLR, compact, micro 4 3rds, digital, film, pinhole, etc.) AND SEQUENTIAL PHOTOS
Almost any single lens camera can be used, especially with the ‘cha-cha’ technique described earlier. Unless you insist on using a camera similar to the one below; then, my friend, I wish you luck:

(please click here to find the original article at PetaPixel about the camera)
The cha-cha technique is great if you don’t want to carry a lot of equipment with you and you just want to grab your camera and get shooting for 3-D, it also gives you a lot of freedom for your baseline between your left and right images. You might find, however, that it’s difficult to keep your camera level and not to skew it between shots.
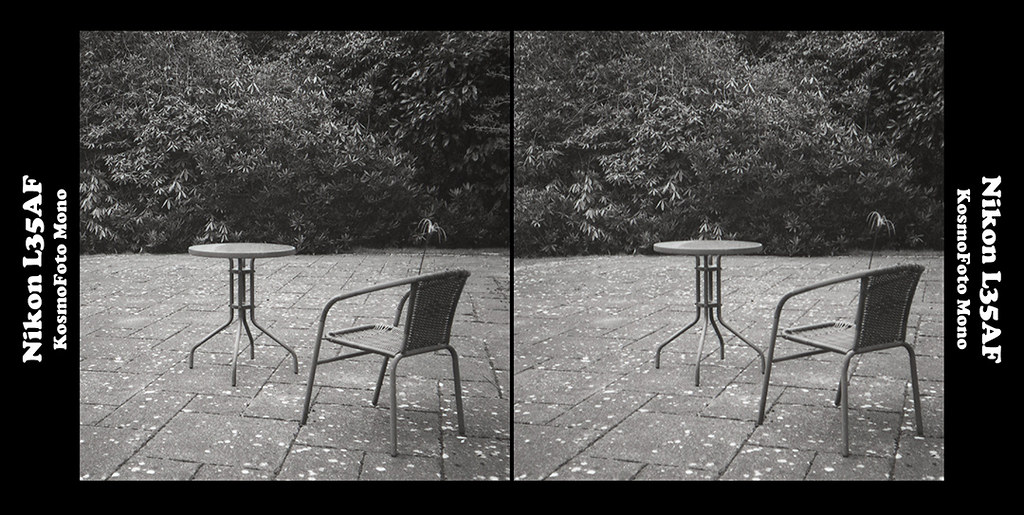
Image 4: Sequential stereo taken with a Nikon L35AF 35mm camera. Hand-held, featuring too much movement between the left and right shots, and a nice bit of skewing for good measure. I was excited about the camera, which came free with a Nimslo, sorry.
You can try using just a tripod and moving the whole thing for the left and right photos, but this relies on the floor being level and you keeping the tripod facing in the exact same direction. Instead, I recommend a slider bar, which I often use myself for studio work. The separation between the left and right images can only be as big as your slider bar allows, so keep that in mind if you order one. A quick search on Amazon UK shows that there are lots of macro rail slider bars, which are great for close-up stereos which need only a little movement. There are also really long slider rails available, which are great for hyper-stereos and subjects quite far away; they’re not so good, however, if you want to carry all your equipment for miles, or to the pub.
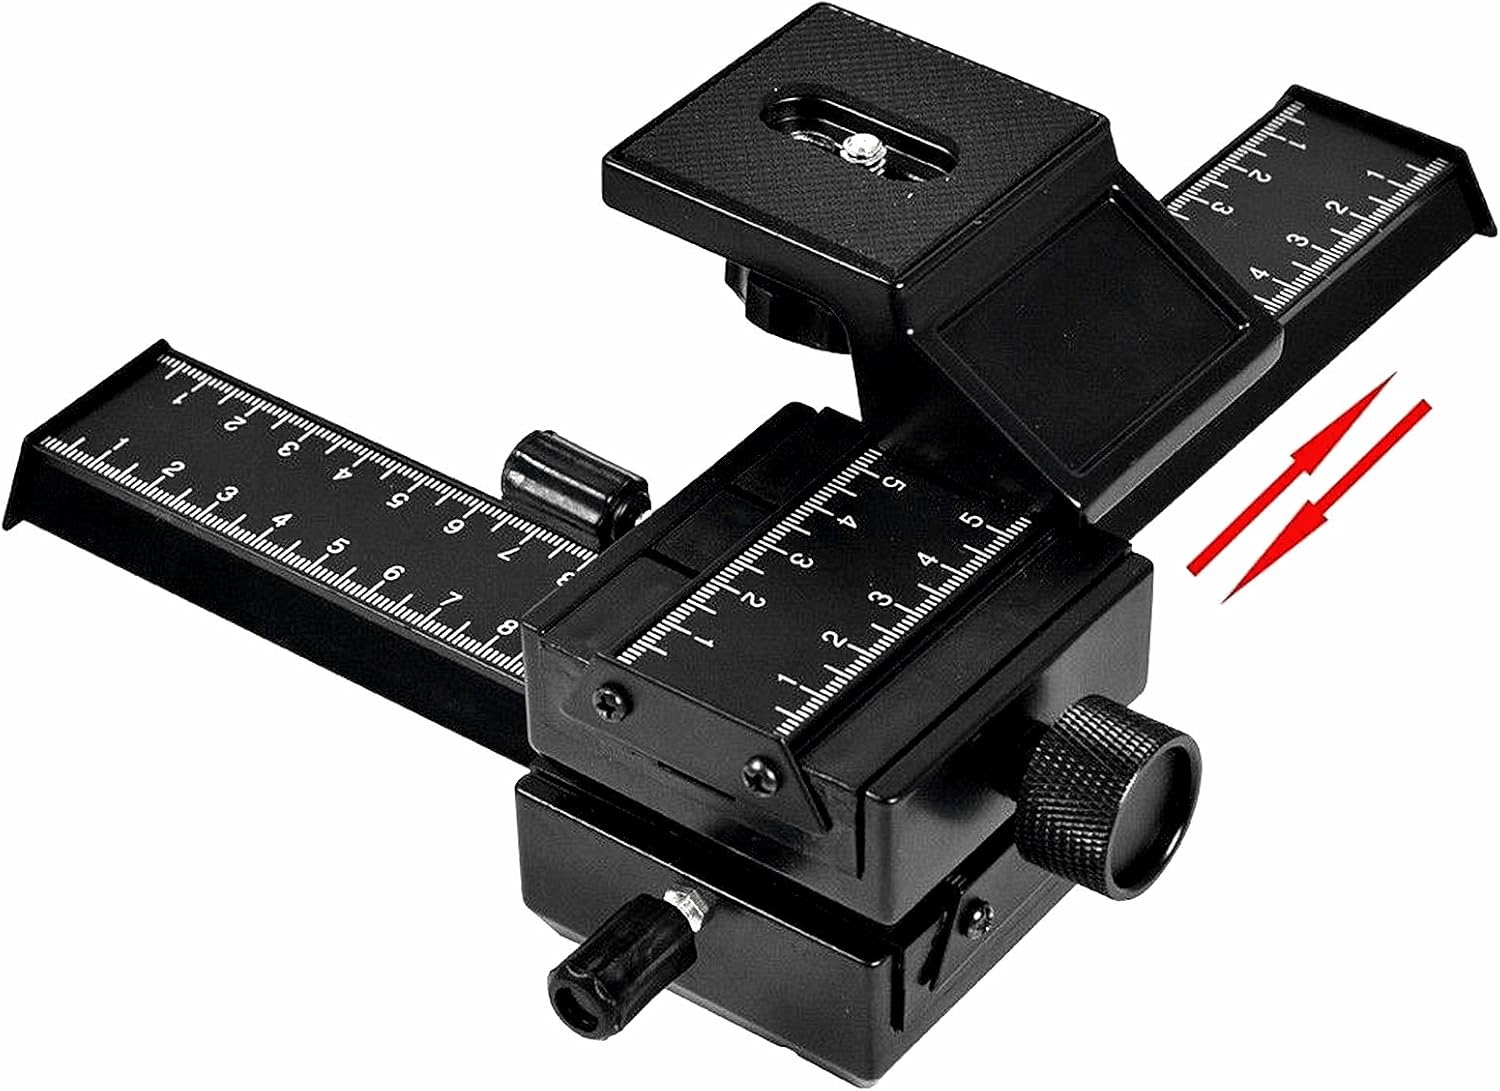
Macro slider on Amazon, similar to the one I used to take the stereo photo three images below (click here to follow a link to Amazon UK)
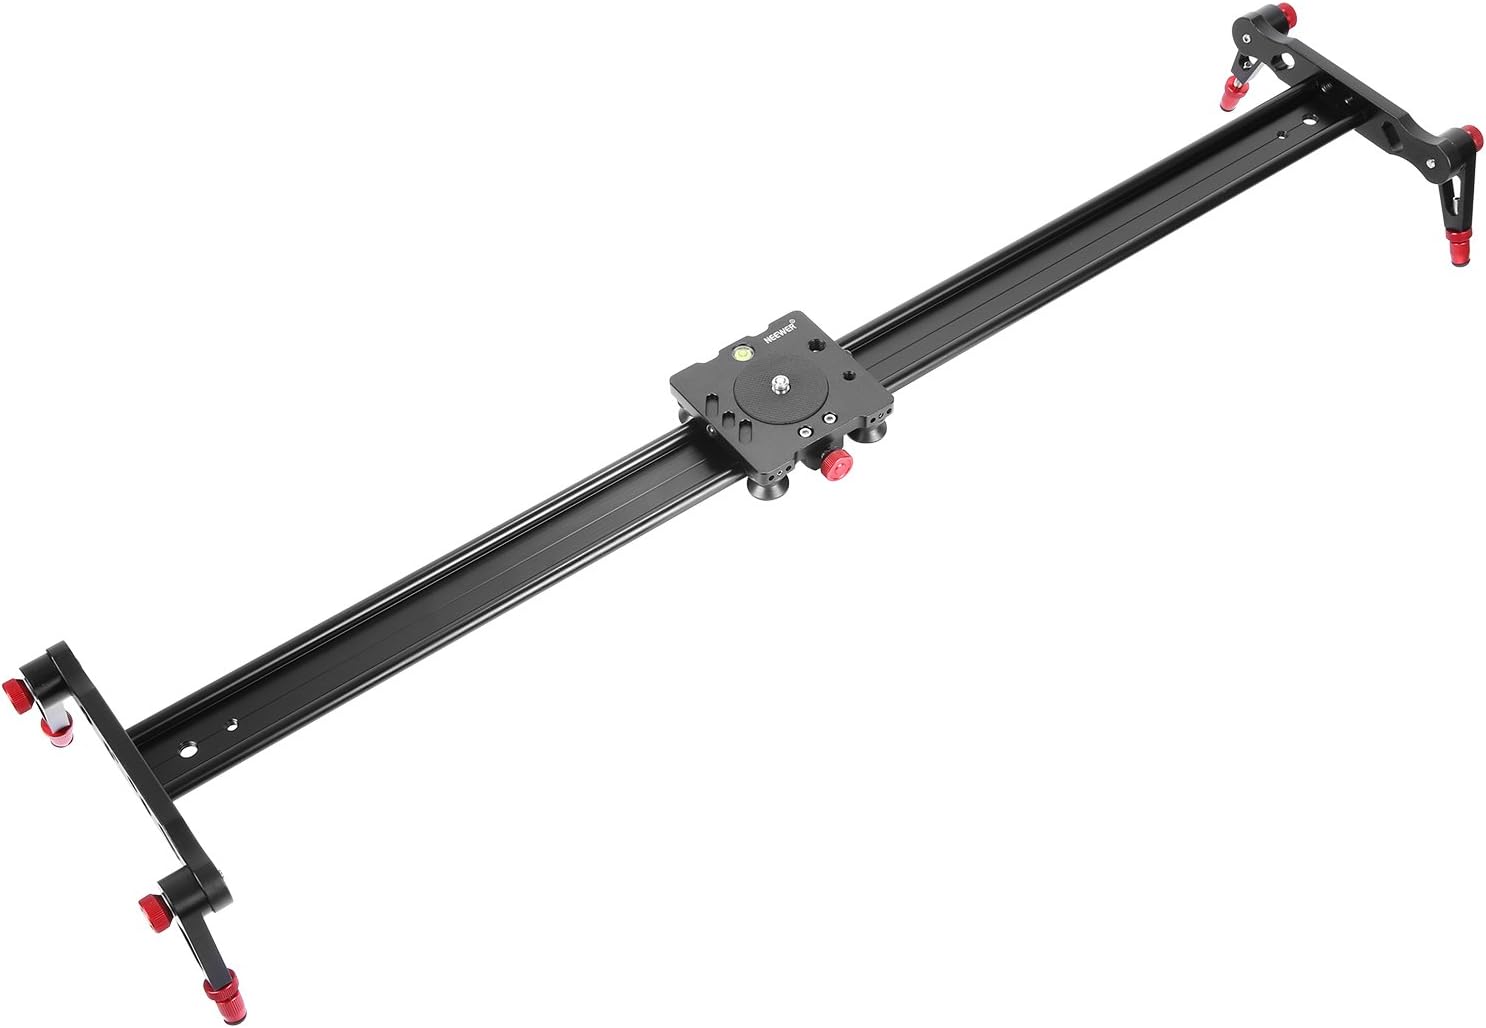
Larger rail slider bar (click here to find the details for all sliders on Amazon UK)
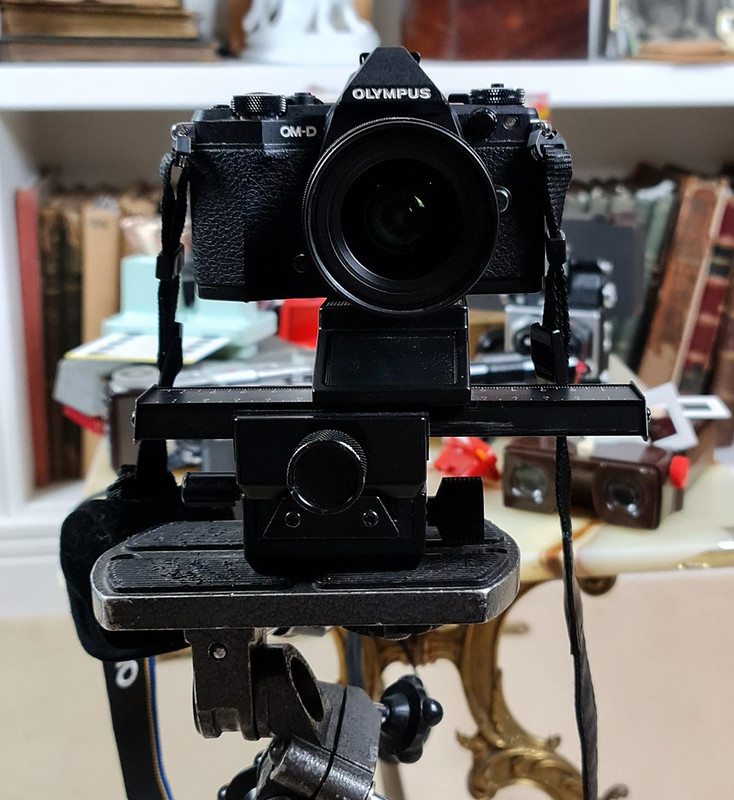
Image 5: Macro rail slider and Olympus camera setup, used to take the image below

Image 6: Sequential stereoview, taken with an Olympus OM-D E-M5 Mii and a macro slider. Processed with StereoPhoto Maker.
There are also tripod attachments which move using hinges as pivots. They are a way of moving the camera from left to right, with a fixed distance and whilst keeping the camera level. They have been produced both commercially and through DIY. They usually carry a brand name, otherwise I’m not really sure what to call them! The DIY one was made by Denis Pellerin, who I am nudging to write about it. The brand one is called a ‘Stereo Simplex’, but others were made commercially too with different names.

Image 7: Stereo Simplex stereo attachment for tripods, which moves via its hinges, allowing you to take the left and right shots.

Image 8: The DIY-version of the tripod attachment, using hinges as pivots. This one was made by Denis Pellerin and Mecanno

Image 9: The pivoting tripod-attachment, in this case attached to an iPhone
There’s also the option to let something else do the movement for you for the left and right images. One of my favourites is on an aeroplane (which I remember fondly before the world went a bit bonkers) and taking two photos in quick succession through the window. This relies on the plane moving in a straight and level horizontal line, which the pilot doesn’t always get the memo for. Using this technique, you can make some fab hyper stereos of clouds, or even topography if the pilot is having a bad day.

Image 10: Sequential stereoview of clouds from a plane, made by taking two photos in quick succession.
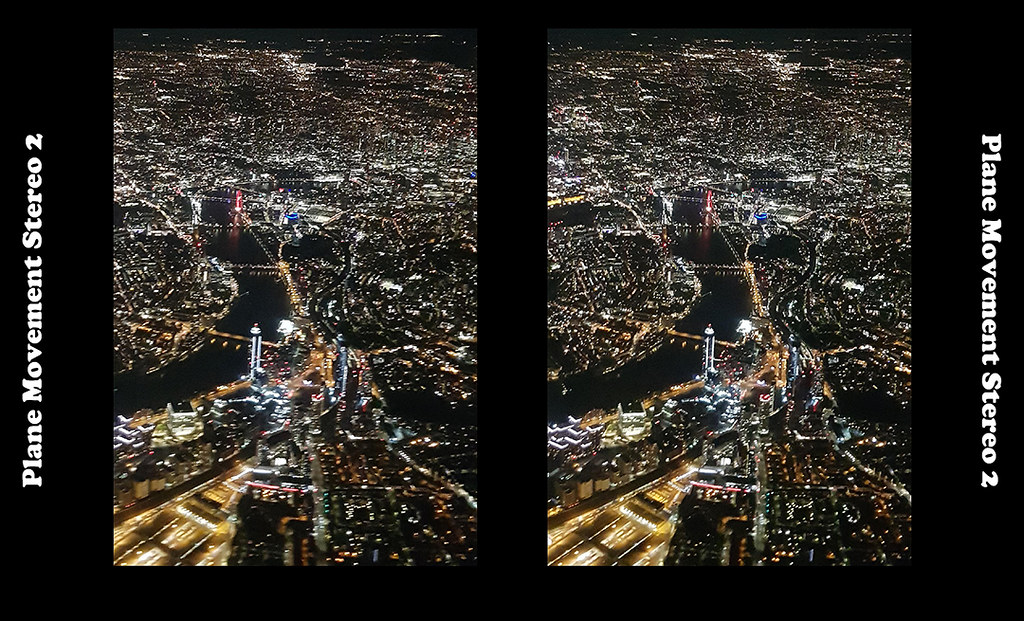
Image 11: Sequential stereoview of London from a plane, made by taking two photos in quick succession. Left image is a bit blurred, but works ok in 3-D.
You can use this motion in any moving vehicle, such as a car or train. If you’re the driver though, please skip this section. You can also try taking sequential photos of a rotating object, depending on what it is, which can also work in 3-D.

Image 12: Sequential stereoview from a car, made by taking two photos in quick succession. This is super-hyper and may make you feel a bit sick! I apologise to your brain for trying to fuse this one! Blame the driver.

Image 13: Sequential stereoview from a train, made by taking two photos in quick succession
Beam Splitters
Beam splitter attachments, also called ‘stereo attachments’/ ‘3D lens attachments’, use mirrors to enable a single lens to capture both the left and right images simultaneously.
I nearly bought one which is made specifically for my digital camera, however, I was fortunate that someone had already reviewed it on Youtube. I decided that because I have other stereo cameras, this particular beam splitter wouldn’t bring anything new to the table for me personally and I couldn’t justify the cost. Review video: https://youtu.be/xoViIQ3Ryqg
I have to say a huge thank you to Paul Maclean for providing me with the information and photos of his 1930s Leica beam splitter system ‘Stereoly’. It’s the Rolls-Royce of beam splitter attachments, way out of my league, and he says it works really well:
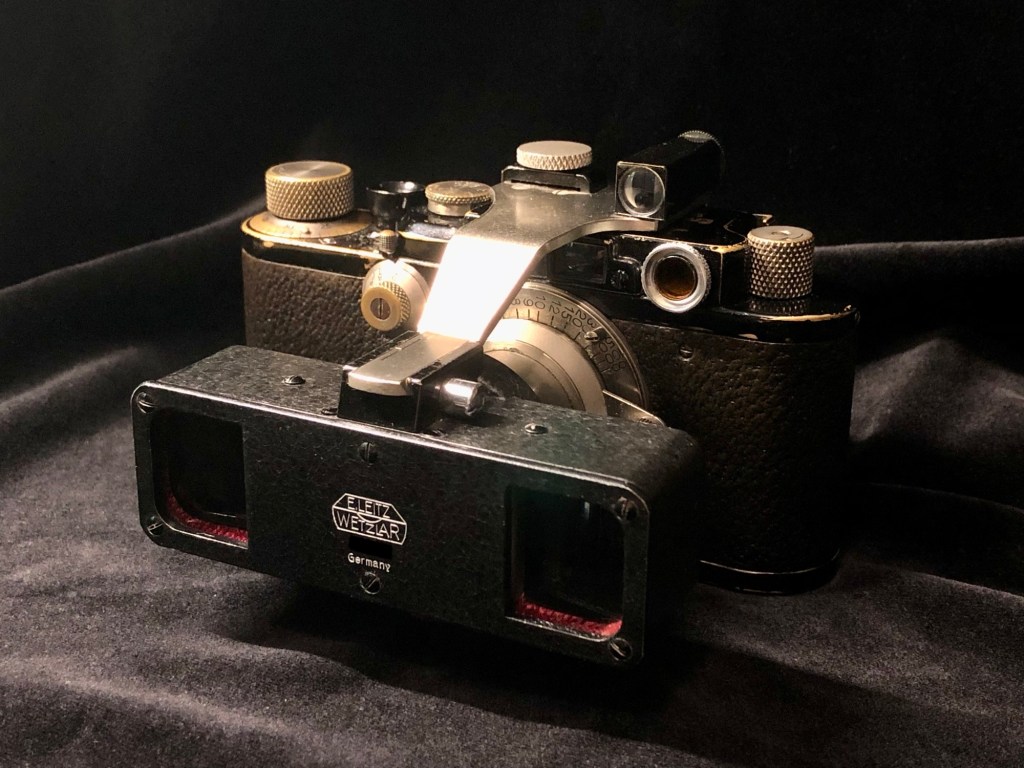
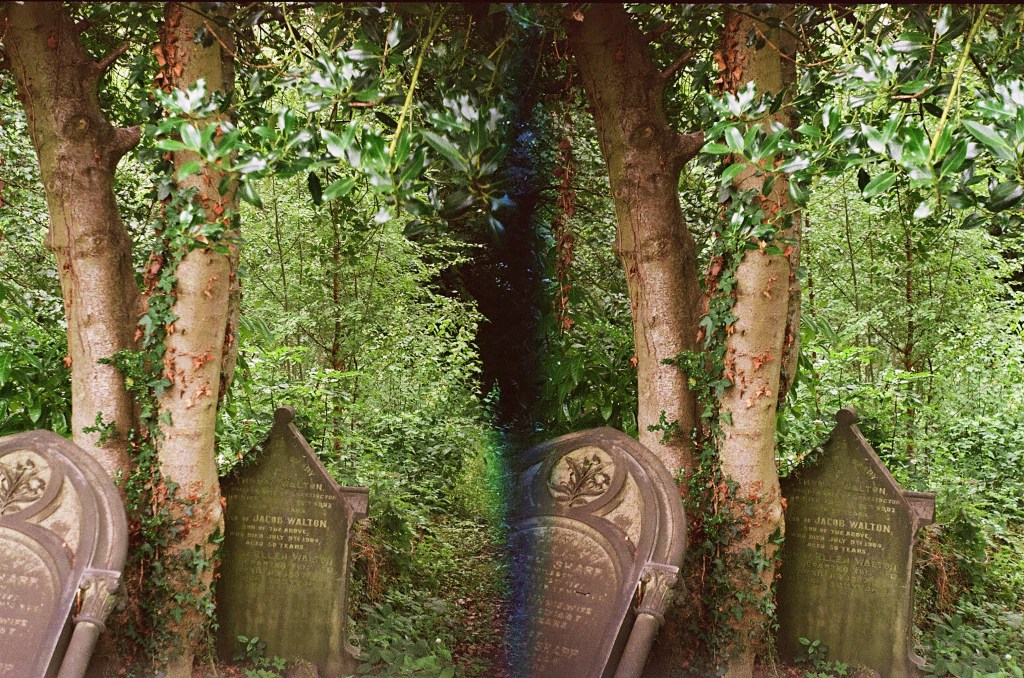
Image 15: Unedited 35mm frame from Leica III with Stereoloy (VORSA) attachment. Image credit: Paul Maclean.

Image 16: Cropped and aligned 35mm frame from Leica III with Stereoloy (VORSA) attachment. Image credit: Paul Maclean.
I have also tried different modern commercial beam splitters for my smartphone, both branded and made in China, and haven’t been impressed with the results. The mirrors usually seem to be cheap and distort the image, or cause strange reflections, or both if I’m lucky. One offered an accompanying app, however, at the time it didn’t allow any editing of the stereoview, so it was always out the window and just generally looked weird. These are just my own experiences though! I have seen some very good results from commercial beam splitters made in the 1970s for specific cameras.
I’ve got to mention that there are also ways to make a DIY mirror beam-splitter, including with just a plain-old mirror and brackets to hold it in place.
I’m going to bend the rules of this post a bit and quickly mention a 3-D camera attachment which has recently been released. I’m bending the rules because it has two fish-eye lenses for VR. It’s the Canon RF 5.2mm F2.8L DUAL FISHEYE lens. I can’t comment on how it performs or the quality of the images in 3-D, because the attachment costs more than my kidneys and so far, I’ve never seen one over here.

Here’s the press release for the lens: https://www.canon.co.uk/press-centre/press-releases/2021/10/canon-revolutionises-180-vr-with-its-innovative-3d-vr-system/ and here’s a guide how to process the images from it, including examples: https://www.diyphotography.net/shooting-3d-vr-photos-with-the-canon-5-2mm-dual-fish-eye-lens/
Processing and Preparing 3D Images
Now you have your two images, what next? That really depends on what you want to do with them and if it’s film or digital. For film stereoviews, I’ve mentioned a few ways of preparing them for viewing towards the end of this post. You can develop them, scan them and make digital stereoviews. You can also make prints, and in the case of colour reversal film, make stereo slides too: https://stereoscopy.blog/2021/01/26/getting-started-in-stereo-film-photography/.
For digital files and scans of film, I really recommend the free software StereoPhoto Maker. Its recent update means that it can even be used on newer Macs. A step-by-step tutorial for StereoPhoto Maker can be found in this post. If you wish to use Photoshop instead, I’ve written a step-by-step tutorial in this post.
Now you’ve made a stereo-pair, of course you’ll want to see them in all their immersive glory. For tips on how to view the images in 3-D, please see this post. Don’t forget to show your new spangly 3-D images to your friends and family too, I’m sure they will be impressed. Or call you a nerd (I get called a nerd).
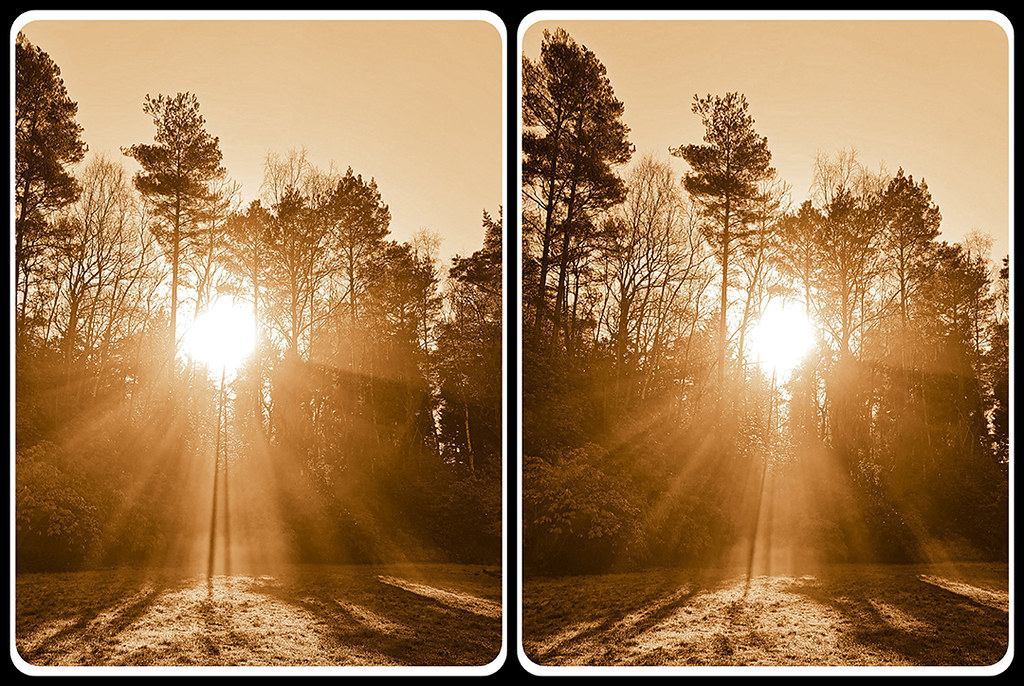
Image 17: Sequential smartphone stereoview. Hand-held, edited with 3DSteroid Pro, and more filters used than by an Instagram influencer
Have fun and enjoy your single-lens stereoviews!
Copyright © The Stereoscopy Blog. All rights reserved.

NICE! 3D-Greetings from Rotterdam
LikeLike
Thanks a lot for this hugely helpful guide. After dabbling over the past 10-ish years between a Fujifilm W3 and a Revere 33, and now rediscovering the “3D” mode in some Lumix cameras I have – in the interests of making images viewable on a 3D monitor, or duplicated on a View Master type reel, it’s good to know the secrets and rules of thumb to building a better mouse trap!
LikeLike