

I frequently get asked about stereo film photography because I adore it. It’s definitely a lot more difficult now to know how to get started, as compared to when stereo film cameras were newly available and film processing was offered at almost every chemist. I hope this guide will help anyone interested in taking their first steps into stereo analogue joy.
To start as completely new to analogue photography, there are some really great general guides online to get you on your way. I recommend this post for a complete beginner’s guide to analogue and these videos for: beginners guide to film cameras, a beginner’s guide to film and a beginner’s guide to film developing by Analogue Wonderland and If We Film.
I’m based in the UK so a lot of the recommendations are going to reflect this, but I’ve added a few international links too. Always check online for camera stores, film sellers and film processing labs in your country, and email them for information to find out what services they offer. I’ll explain why this is especially important for film in the processing section below.
I’m also going to look at a very specific group of cameras because these are the ones I find are the most readily available/ accessible/ relatively inexpensive and popular. You can find even more listed in this post.
The first part of this post will look at the cameras, further down is all about films, processing and mounting/printing, so please feel free to skip to whatever interests you.
STEREO FILM CAMERAS
Buying Stereo Cameras
Stereo film cameras themselves are quite expensive now, and second-hand ones are prone to having problems, such as one lens out of focus or unsharp, or both if you’re lucky, winding problems, seals deteriorated, etc. I try to buy ones which have been serviced where possible; they’re usually a bit more expensive, but in the long-run it’s cheaper than finding out the camera has problems after buying a film and developing it, although even this doesn’t come with a guarantee. Remember that many stereo film cameras are around 70 years old now, so always try to inspect them before buying if it’s possible.
I have to admit that I’ve been caught out a couple of times buying online, but luckily I managed to get refunds. Try to make sure the seller has a returns policy if possible, if they don’t have good photos on their listings, don’t be afraid to ask them for more detailed ones. Also, don’t be afraid to ask them questions and don’t feel pressured into leaving feedback until you’ve thoroughly tested the camera, especially with places like eBay.
Film cameras are definitely a commitment and an expensive hobby now; once the cost of the camera is out of the way, then there’s the cost of the films, developing, prints and/or scans, mounts, etc., all depending on what you can do at home. I’ve always bought my cameras to use, so I worry less about the cosmetic condition, and this can help keep the price down.
Stereo cameras can be readily found online through stores such as Etsy, eBay and sometimes Amazon, especially from sellers in the States. There are also UK film camera specialist shops, which are always worth checking for stereo cameras, as their stock is updated regularly. These include: SoPerfect Images, West Yorkshire Cameras (now sadly closed), and PPP Repairs (who is also fantastic at repairs). Outside of the UK, some specialist stereo camera sellers are: Dr. T (who also sells mounts and other accessories) in Ohio, USA, and 3D World in Belgium (website no longer working).
There are UK vintage camera fairs, such as the annual London Photographica Fair, and the Frome Wessex Camera Fair. There are also regular vintage camera auctions in the UK, which you can often bid on online, but be aware of the risk of not testing the camera before you bid on it, and there are usually high fees from the auction houses too, such as the buyer’s premium.
If you need any original instruction manuals for stereo film cameras, I recommend visiting Butkus.org.
Taking Stereos with Binocular Cameras
I’m going to mention the distance between the lenses of the cameras; it’s not because it’s a weird fetish of mine, it’s because it indicates the best distance from the subject for 3D depth. The 1/30th rule is dismissed by some, but it’s a good indication when you’re starting out: The distance between the lenses x 30 is an indication of how far away from the subject you should be. For a standard stereo camera with lenses 7cm apart, for example, the best distance would be 2 metres 10 cm.
You need to be careful if there’s anything in the foreground and try and avoid it if possible, as it will appear too hyper and ruin the stereo window. If you’re too far away from the subject, however, there will be very little depth. This information depends on how far you want to get into the geeky technical aspects, just remember to have fun first, and there’s a whole post to give a few helpful pointers here if you want to dive in.
______________________________________________
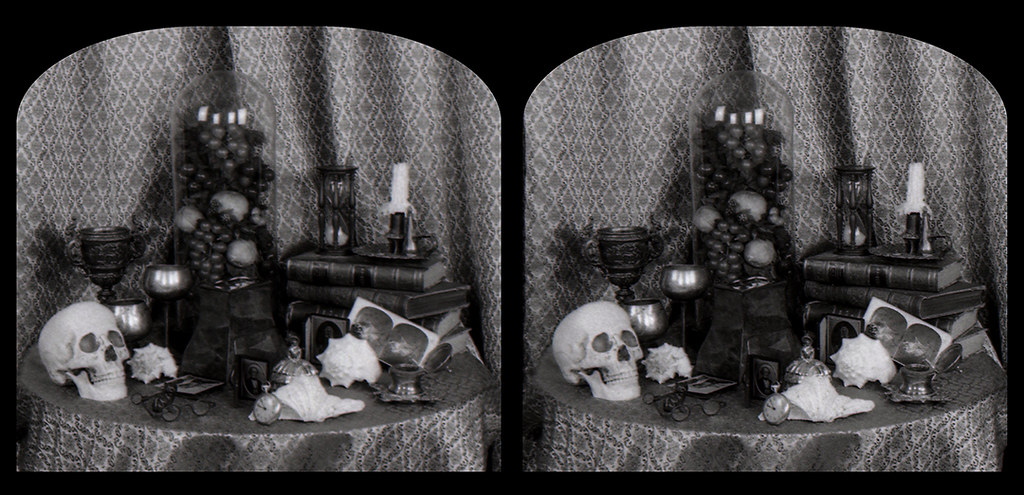
All of the 35mm and 120-film stereo cameras I’m going to show a still life image from have used Kosmo Foto Mono 100 ASA black and white film, and all were processed the same with Adox Rodinal 1+25 for 4 minutes to try and standardise it (yes I’m a science nerd). I really enjoy using this film and processing it afterwards as it gives great results. I did note down the camera shutter speed and aperture settings but they are not entirely accurate. The longer you use the camera though, the better you get to know its individual quirks!
The quadrascopic cameras in this post were used with other film (mostly because I didn’t think to use them as part of the same test, doh!).

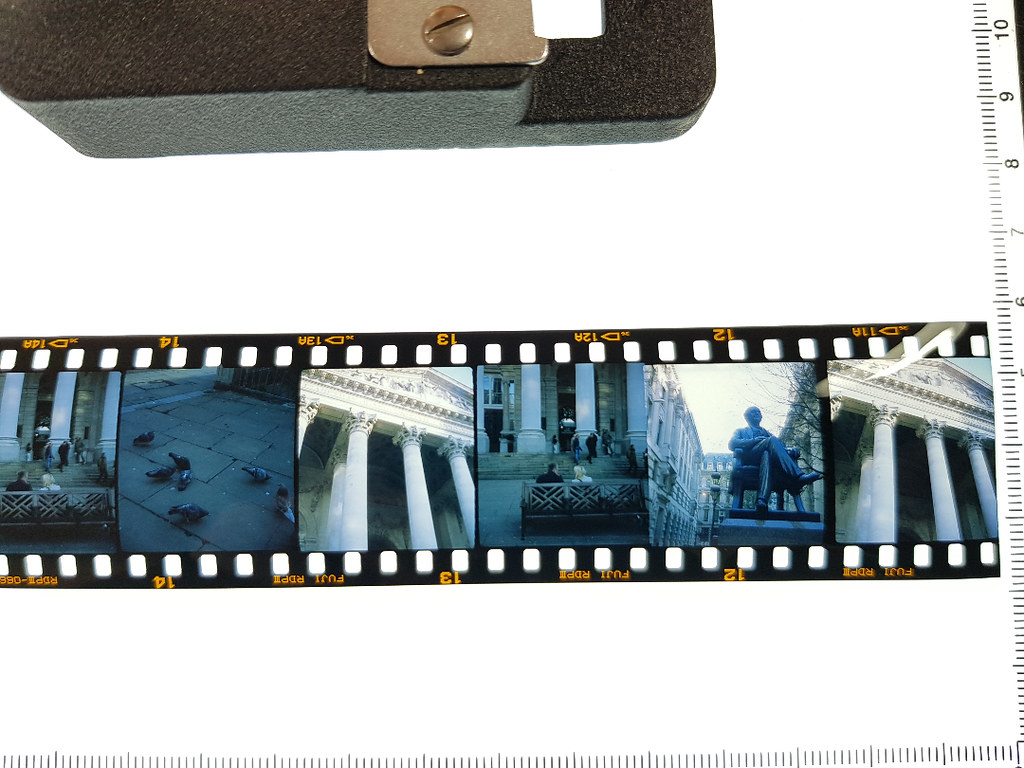
Frame Formats of Stereo Film Cameras
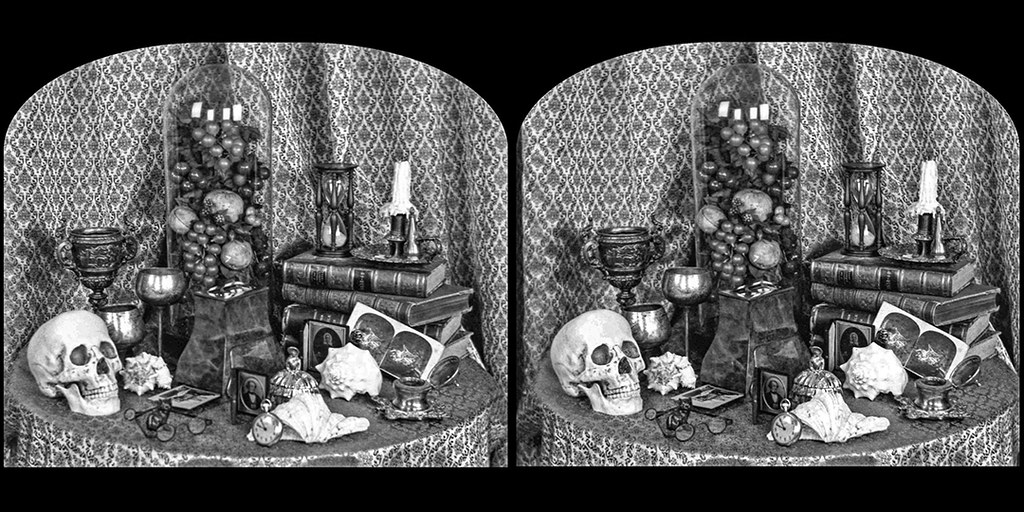
The different film and frame formats can be seen below (please note that the Iloca Stereograms has a problem with some of the frames slightly overlapping – this is specific to my camera).

Frame format size (each individual half of a stereoscopic image): Sputnik 120: 6 x 6cm (full 120 frame). Duplex Super 120: 24 x 23mm (1/4 120 frame). Iloca Stereograms 35mm: 5 sprockets, 24 x 23mm. Nimslo 3D 35mm: 4 sprocket, 24x18mm.
35mm STEREO FILM CAMERAS
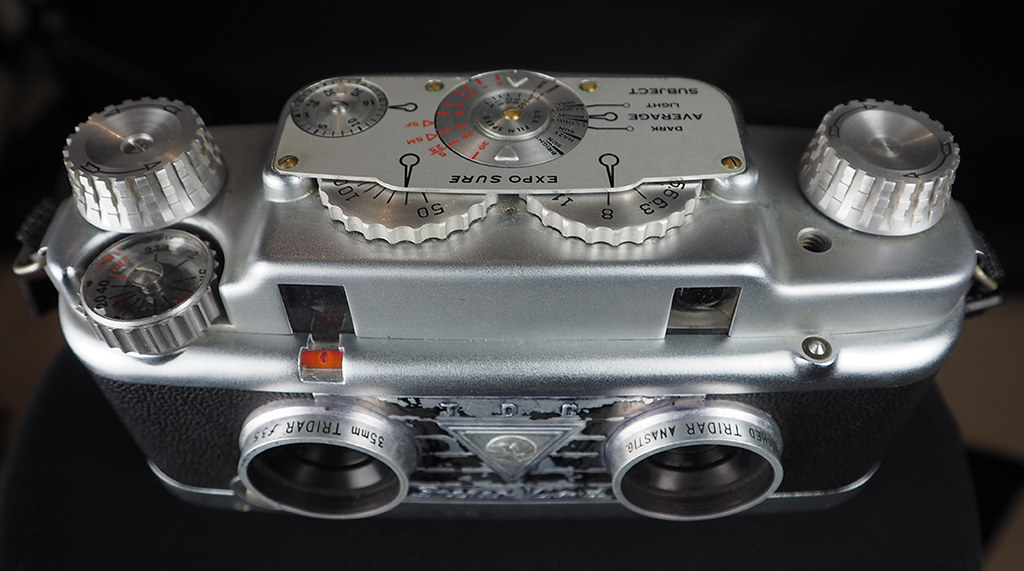
Stereo Realist User Experience
For a 35mm smaller-frame stereo film camera, many people seem to opt for a standard Stereo Realist camera to begin with. I personally wouldn’t go for one right at the start because, from my experience, and comparing them to the other 35mm stereo cameras I’ve used, I find them quite fiddly to wind on, and looking through a separate viewfinder and rangefinder, whilst also manually focusing and remembering to cock the shutter….all takes some time to get used to. Others will of course disagree with me, especially as the Stereo Realist f3.5s are quite inexpensive and easy to find, as they were the most popular stereo camera, the image quality is relatively good, and the cameras are fairly robust. One of my friends has only ever used a Stereo Realist as a stereo film camera and he swears by them, so it is definitely a personal opinion. If you can try before you buy, I really recommend having a go with one.
Realists are quite prone to winding problems now, but remember that many are around 70 years old, and this is usually a straight-forward issue to fix. Once the camera is running smoothly, and how to use it has become second-nature, it can be an enjoyable camera to use – as seen from the thousands, if not millions, of holiday slides taken by them at the height of their popularity. Stereo Realists are also great to use as doorstops or dumbbells.


Stereo Realist 2.8 camera and Kosmo Foto Mono 100 ASA Film (scanned negatives).
Stereo Realist Technical Info
The manufacturer’s booklet says the f2.8s are superb, rare-earth lenses with shutter speeds up to 1/200 (although I have seen some up to 1/150), apertures from f2.8 – f22. The f3.5s have microscopically matched lenses, and shutter speeds up to 1/150. The lenses are 7cm apart, and the manufacturer recommends a distance from the subject between 10 and 25 feet (approx. 3 – 7.5 metres), and to omit anything closer than 10 feet (3 metres). From a 36 exposure film, you get around 29 stereo pairs. The frame formats are 5 sprockets (24x23mm). More specifications can be found here.
If you take the plunge with this camera, I recommend buying a copy of the Stereo Realist Manual by Willard D. Morgan and Henry M. Lester as it’s very helpful and has clear explanations. You will also find a great guides on the Butkus website and Dr.T’s website.
There is also a later model, the Stereo Realist 45, which is a stripped-down version of the Iloca Stereo Rapid (see below).
Iloca Stereograms and TDC Stereo Vivid Comparisons and User Experience
Two of my favourite smaller-frame 35mms are the Iloca Stereograms (the UK name) f2.8 / Iloca Stereo Rapid (American name), and the TDC Stereo Vivid, not least because I find them both much easier to wind on and focus than the Realist f2.8. The TDC SV even has a spirit level, which you can see through the viewfinder. They both have combined viewfinder/rangefinder windows, so you don’t need to swap between them. This, for me, is a big improvement on the original Stereo Realists. I also like that the Stereograms 2.8 has quite a wide range of aperture and shutter speed settings compared to others. The TDC Stereo Vivid gives you recommended settings on its top panels, however, it’s not as good at double exposures as the Iloca; it’s a very dodgy process with the TDC. From a 36 exposure film, you get around 29 stereo pairs.
Iloca Stereograms
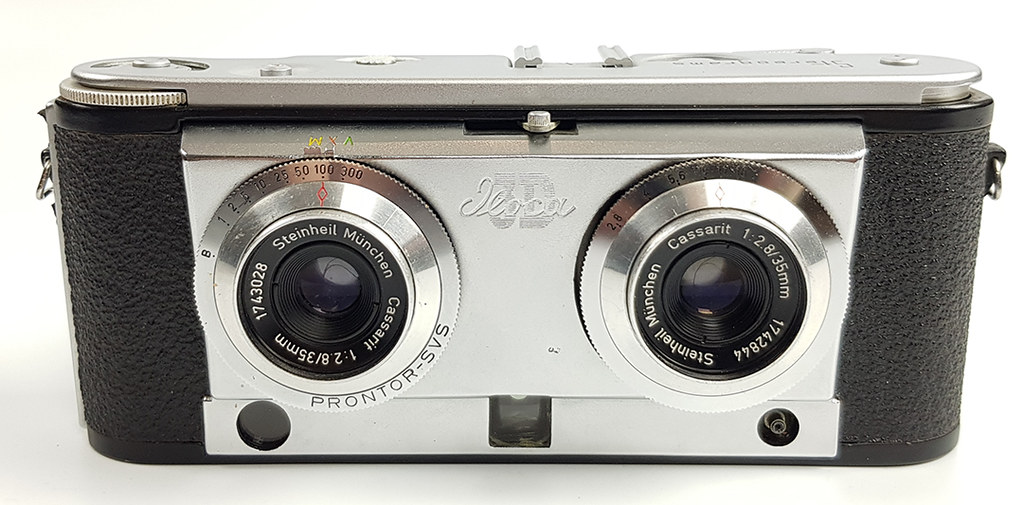

Iloca Stereograms 2.8 camera and Kosmo Foto Mono 100 ASA Film (scanned negatives).
Iloca Stereograms Technical Info
The Iloca Stereograms f2.8’s I use has eight shutter speeds (up to 1/300) and a coupled rangefinder. The f3.5’s have scale-focusing and four shutter speeds. The f2.8 has apertures from f2.8 – f16. The lenses are 7cm apart and the manufacturer recommends being between 4 to 25 feet from the subject (approx. 1.2 – 7.5 metres). Only being 1.2 metres away from the subject, however, is going to make the stereoview quite ‘hyper’ if you’re using the standard lenses, which may not work so well in stereo. I recommend being about 2 metres 10cm away. The frame formats are 5 sprockets (24x23mm).
My favourite feature of the Iloca Stereograms/Rapid is the rapid film winder, it’s a dream to use after using a Stereo Realist!
TDC Stereo Vivid

TDC Stereo Vivid Camera and Kosmo Foto Mono 100 ASA Film (scanned negatives).
TDC Stereo Vivid Technical Info
The TDC Stereo Vivid has five shutter speeds, up to 1/100, apertures from f3.5 – f16 and top exposure dial film speed recommended settings up to 100 ASA (quite slow for the UK in winter…and most of the summer come to that!). The lenses are 6.5cm apart, and I recommend a distance from the subject of at least 2 metres. The frame formats are 5 sprockets (24x23mm). I’ve found that they’re quite prone to film drag because of how the film is loaded. You can correct this with Photoshop if you’re scanning them, if you’re printing them directly from the negatives or making slides, however, it’s not so easy to hide.
They also make the most satisfying mechanical noise when you wind them on enough for the shutters to be primed and ready for the next stereo to be photographed (when you hear it, you’ll understand).
_________________________________________
120-FILM STEREO CAMERAS
The two 120-film (or medium format) stereo cameras I’m going to share for this post are the Sputnik full-frame and the ISO Duplex Super 120 quarter-frame. I must admit that I really enjoy both of these, they have quite basic functions, are fully manual, and produce really nice images. I enjoy both of the formats too, but especially the full-frame Sputnik negatives for contact printing.
Sputnik Camera
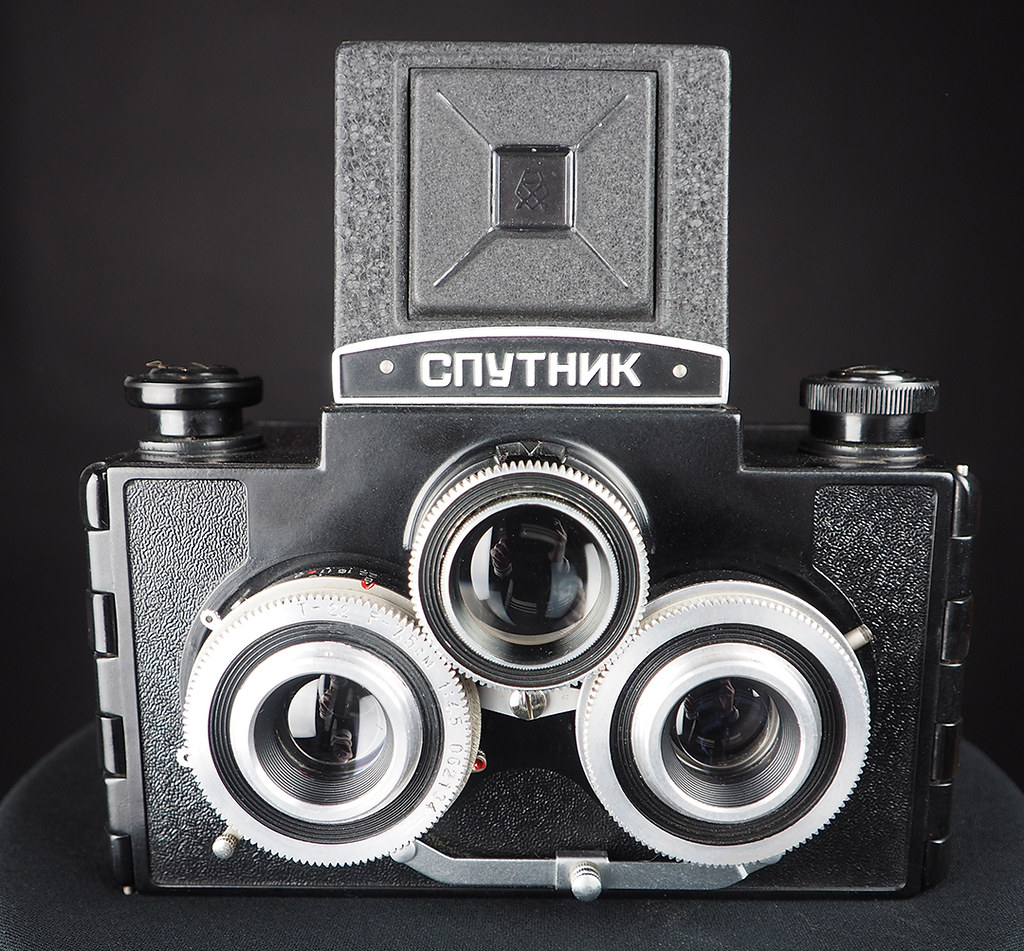

Sputnik 120 camera and Kosmo Foto Mono 100 ASA film (scanned negatives).
Sputnik Technical Info and User Experience
The Sputnik 120 has apertures from f4.5 – f22 and four shutter speeds up to 1/100. The lenses are 6.5cm apart, so great for subjects just less than 2 metres away. The lenses are great quality and because the prints are full-frame, I’m always blown away by the results.
One of the things to look out for with these cameras is that one of the lenses is commonly out of focus; I have managed to fix mine myself though. They are also apparently prone to light leaks through the back doors.
The one I have also smells amazing, like a classic car, and I think that’s definitely a buying point!
From a 12 exposure 120 film, you get six stereo pairs. When you’re taking stereos, it’s important to remember that you want to use the odd frame numbers, i.e. through the window at the back, you want to make sure you use frames 1, 3, 5, etc., as you’re taking two full-frame (frame format 6x6cm)exposures per stereoview.
ISO Duplex Super 120
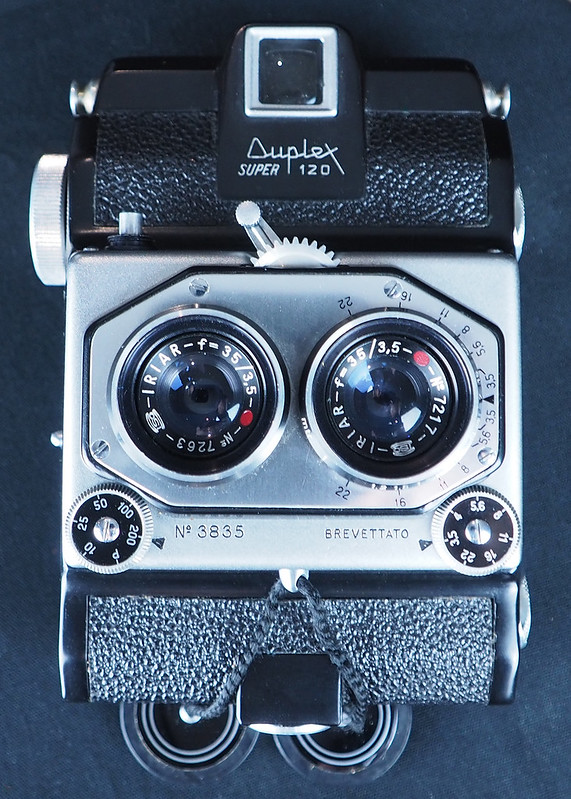
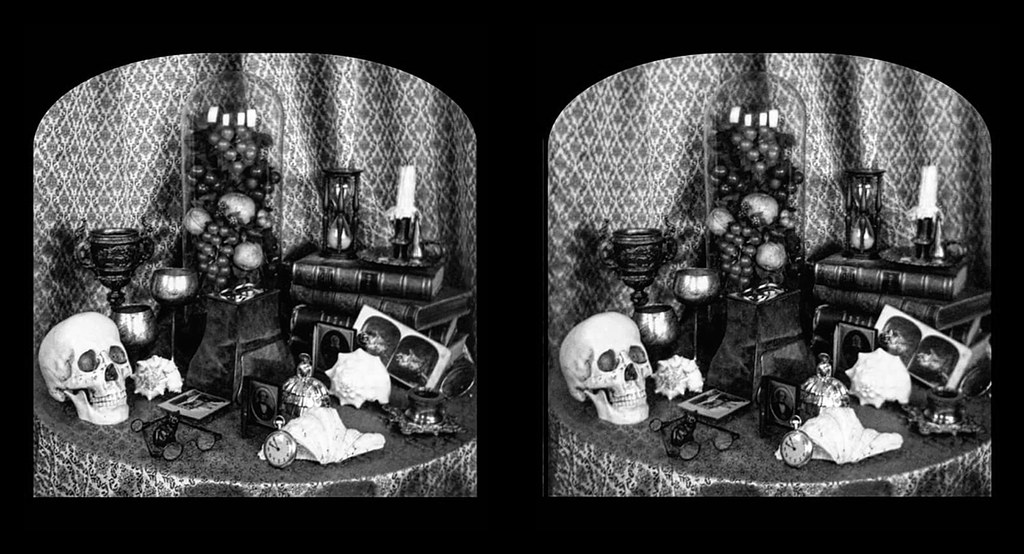
Duplex Super 120 and Kosmo Foto Mono 100 ASA film (scanned negatives).
Duplex Super 120 Technical Info and User Experience
I’m sorry to spoil the technical details, but the ISO Duplex Super 120 is the most adorable camera I’ve ever had. It’s seriously beautiful, and even better than that, it takes great images to boot!
The model I have has apertures from f3.5 – f22 and five shutter speeds up to 1/200. The lenses are only 3cm apart, so the best distance from the subject is about 90cm away. This is great for cats and portraits (definitely portraits of cats). The quality of the lenses is fantastic, and I’ve got some great slides from this camera.
The only problem I found with mine was that the shutters weren’t opening at the higher speeds, but PPP repairs fixed this for me by repairing a broken shutter arm, removing the old grease and servicing the camera.
From a 12 exposure 120 film you get 24 stereo pairs (frame format 24x23mm), and the film, unusually, winds up the camera.
35mm QUADRASCOPIC FILM CAMERAS
Some might moan at me for including these, but you can use two of the four frames to make a stereoview (I’ll add examples). The two I own are the Nimslo 3D and the Nishika N8000; both are automatic and easy to use. They are not the best quality cameras money can buy, but I find them so much fun, and they are popular cameras on Instagram.
Nimslo 3D User Experience
The Nimslo 3D camera is the older of the two, first made in the 1980s, and I’ve found it to be a better camera overall for build and image quality. They are, however, prone to having the shutters failing due to the micro electro magnetic controllers breaking, and also main circuit board failure from corrosion.
If you ever get to inspect one of these before buying, always check all the shutters are firing and that the battery compartment is free from corrosion of old batteries.

Nimslo 3D Technical Info
The Nimslo’s lenses are 1.9cm apart and the lenses at either end are 5.5cm apart. If you use frames from the end lenses to make a stereoview, it is best to be about 1.65 metres away from the subject; the manufacturer’s booklet, however, recommends nothing closer than 6 feet (1.83 metres) and nothing further than 25 feet (7.62 metres) away when making the lenticular prints it was originally intended to.
The film speed options you can choose on the camera itself are 100 ASA or 400 ASA. There are four fixed-focus glass lenses, apertures are f5.6 – f22 and shutter speeds from 1/30 – 1/500; the camera is fully automatic once the film speed is set, and the aperture and shutter speeds are automatically operated in tandem.
From a 36 exposure film you get at least 18 sets of images, so 18 stereo pairs if you are using the end frames (frame format: 4 sprocket, 24x18mm). It’s important to note that the Nimslo 3D camera’s shutters will not operate without 3 x LR43/386 silver oxide button batteries.

Nimslo 3D camera and Yodica Films Vega 400 ASA film (scanned negatives).
Nishika N8000 User Experience and Technical Info
I’ve often found that the Nishika N8000s have at least one lens which isn’t sharp. Their build quality is best described as a plastic shell with a weight inside. For more information, please see this review which I made earlier.
The image quality from the plastic lenses isn’t as good as the Nimslo, but I actually prefer how they feel to hold. The manufacturer recommends using this camera with 100 ASA film. They have three settings on the front to choose from: sunny, cloudy, or shade/indoors, which set the apertures to f19, f11, or f8 respectively. Once you have selected the aperture, the camera is fully automatic.
You do not need to have batteries installed in this camera for it to take photos, however, they will operate a red low-light warning inside of the viewfinder. The four lenses have a distance of 1.85mm between each one, or 5.55cm between the two end lenses. If you use frames from the end lenses to make a stereoview, it is best to be about 1.67 metres away from the subject. The manufacturer states, however, that the cameras are pre-focused to provide optimal depth of field from as close as 170cm away.
From a 36 exposure film you get at least 18 sets of images, so 18 stereo pairs if you are using the end frames (frame format: 4 sprocket, 24x18mm).

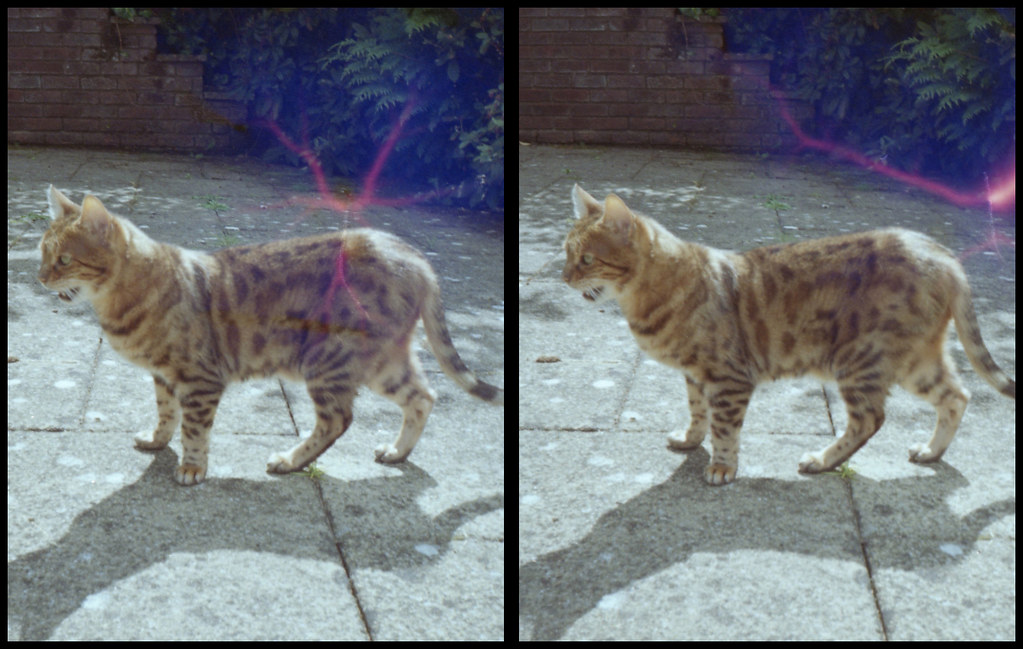
Nishika N8000 camera and Revolog Films Tesla II special effects film (scanned negatives).
_______________________________________
Looking for Recommendations and Camera User Results
I really recommend you look for specific camera reviews online, such as on YouTube. On the Lomography website, they have searchable galleries specific to the cameras, Examples include the Nimslo 3D camera, the Stereo Realist, the Sputnik. With Flickr, you can also do a search for a specific camera (although people REALLY like taking photos of analogue cameras instead of with them).
________________________________________
CAMERA ACCESSORIES
Most of my cameras came with cases and these really help if you carry them around with you, especially if you do want to buy a Stereo Realist as they are quite heavy. I don’t often use a tripod, except with the Sputnik, however, they help if you’re in low light and you need to take a long exposure and are vital for pinhole cameras. It’s important to try and keep the camera level, and some tripods include a spirit level if the camera doesn’t have one.
A light meter is usually a good buy when you’re first getting used to manual cameras. They will tell you the recommended settings for your film speed and lighting conditions, although you can also get decent light meter apps on your smartphone, which sometimes work just as well.
I’ve found it’s best to try and use the correct flash for the Nimslo 3D cameras, especially as using one which is too powerful may fry the electronics; they are super difficult and expensive to find now though.
You can buy other accessories for various cameras, such as lens filters and macro lens converters. If I was just starting out with analogue, however, I would only stick to what I need first to get me going. If you find you don’t enjoy using the camera or there’s a fault, it’s a waste to buy everything at the start.
CAMERA FILM
There are three main types of film which can be readily processed: colour negative, black and white negative, and colour slide (also called reversal) film. There are several guides to camera film formats online, and one I’d recommend is by the Darkroom Photo Lab. There are also great beginner’s film guides by another retailer, Parallax Photographic Coop. They have guides to film speed and a beginner’s guide to film photography, which includes films.
There are plenty of specialist film shops online. My personal favourites, who I use often in the UK, are: Analogue Wonderland (distributor based in England of all kinds of wonderful films for different format cameras and a great 35mm subscription box), Kosmo Foto (England-based manufacturer of 100 ASA black and white films for 120 and 35mm), Yodica Films (Italy-based manufacturer of 400 ASA special effects 35mm films), Lomography (Europe-based manufacturer of 120, 35mm and 110 weird and wonderful films).
A search online will show that there are many sellers of film, and I recommend you check the reviews too. My personal favourite physical-shop retailer of films in London, UK, is Mr Cad; they are so knowledgeable about everything analogue that I could spend the whole day in their shop.
I’ve often found that you can pick up bargain films at photography fairs when they are being held, they are usually out of date film, but so far I’ve not had any problems. You can also find film on Amazon, Etsy and eBay.

Nishika N8000 camera and Yodica Films Pegasus 400 ASA rainbow effect film (scanned negatives).

Nimslo 3D camera and Revolog Films Volvox special effects film (scanned negatives).
You can also search galleries of photographs taken with specific films on the Lomography website. On the Analogue Wonderland website, they show images taken with the film in the product pages, and also write film reviews themselves.
FILM PROCESSING
You can be as involved with film processing as money, time, and space allows. There are still a few places processing films, definitely a fraction of how many there used to be though! Again, it’s a case of searching online for your country. There are several things to take into account: Colour negative film is usually processed with C-41 chemistry, colour slide (or reversal film) is usually processed in E6 chemicals, black and white negative film is processed with specific black and white developing kits.
You can buy kits for each type of film and develop at them home, but you may need a darkroom or a light-proof bag/ daylight loading tank, all the chemicals, and the rest of the kits. For guides on home developing, I recommend Parallax Photographic Coop, who also sell supplies. I also buy darkroom chemicals and paper from First Call Photographic (based in the UK).
I develop my own black and white films using Paterson developing tanks and (currently) Adox Rodinal developer, and get good results. There is still a chap in England, John Salim, who develops black and white film and will leave it uncut for you so you can scan it. This is especially useful for the half-frame format and the quadrascopic cameras, otherwise the frames may be cut in half. He can also make prints but I have not used this service. It’s best to contact him about the frame-format of your camera.
I use John to process my colour slide films in E6 and always request that he leaves them uncut so I can first scan them before I mount them. He is a real diamond and will advise you on anything he notices with the slides which may indicate a fault or quirk with the camera/film (such as slow shutter speeds causing over-exposure, or film which is being retailed as ‘creative’ when it’s actually just repackaged expired film and a bit..crappy!) My colour negative films I have processed by England-based Kirklees Photographic (who also process black and white film), and they always leave them uncut for me to scan as I request it. They also offer a scanning service, and he can now scan quadrascopic-format and half-frame negatives on request, yeay!
I scan all of my own films, mount slide-film, and also make prints from black and white 120 format negatives. The scanner I use is my Epson Perfection V800 Photo, and it allows for both negative film and slides, automatically turning the negatives into positives, if required. When scanning negatives, you must remember that the images are usually untransposed, so they will appear inverted, or cross-view. I use StereoPhoto Maker to change them to parallel-view and align them, I’ve previously written a tutorial for this. You can also use Photoshop, which I’ve written a tutorial for. There are less expensive scanners available, always check, however, that they will be able to scan the different formats and size of film which you are using.
I haven’t found a processing lab who will make prints directly from the 35mm films now (apart from the Loreo 3D Stereo camera, which produces the correct format directly from the camera). A way round this is to either order prints from your digital files, when you’ve made them into a stereocard (check the size fits the prints), or align them into an image file, so they are a standard photo-size format, such as 6×4″. Just watch they aren’t too big, or they will be difficult to view.
Duplex Super 120 camera and Kodak Ektachrome E100 slide film, original untransposed film (cross-view).

Duplex Super 120 camera and Kodak Ektachrome E100 slide film, transposed and aligned film (parallel-view).
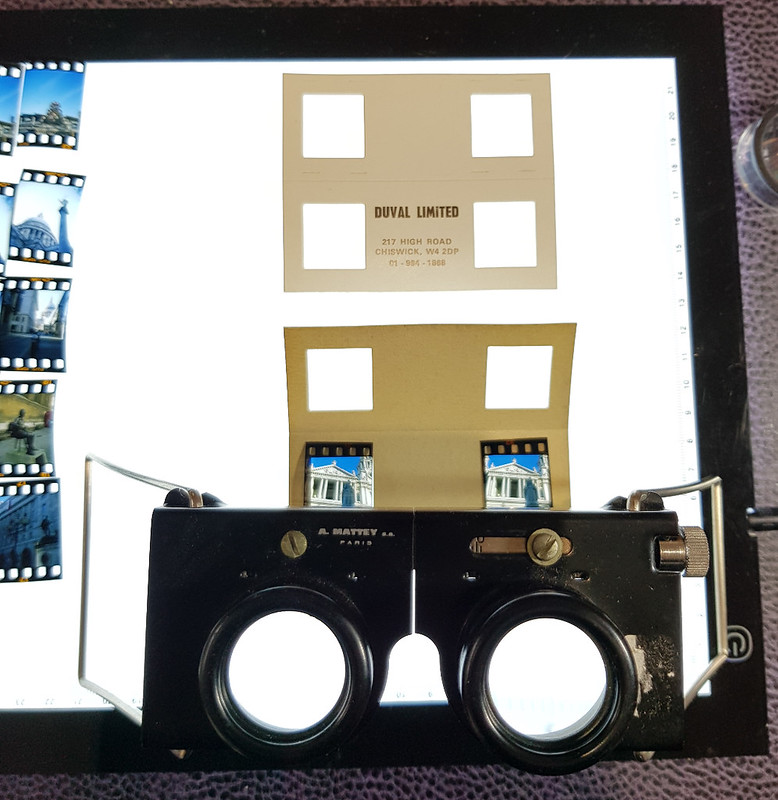
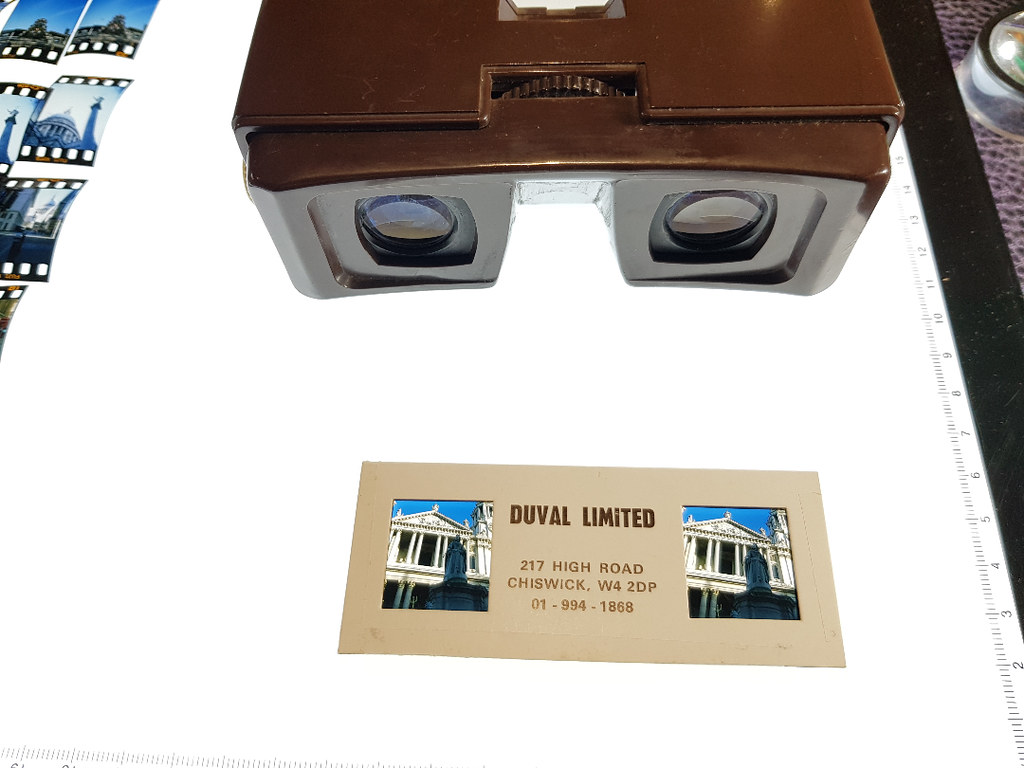
Mounting Your Own Slides
I really recommend mounting your own slide film as this is how the stereo-slides were intended to be seen. Some folk are disappointed with the lack of sharpness of some of the stereo film cameras when they’ve scanned the film and enlarged the images, You’ve got to remember what these cameras and slides were intended to be used for originally though. Viewing them mounted in a stereo mask through a stereoscopic viewer, such as the Stereo Realist viewer, as they were intended to be seen, is the best feeling! I find it feels so much more immersive than viewing the scans, and it feels much more rewarding to me. I don’t use the most expensive equipment either.
Iloca Stereograms 2.8 camera and Fujichrome Provia 100F 100 ASA slide film, processed in E-6.

I buy second-hand 35mm mounts inexpensively from camera fairs (usually people are desperate to get rid of them as they sit in cupboards gathering dust), however, I’ve found that 120 format mounts are like gold-dust, so you may need to make your own. The 35mm mounts come in different formats, often according to the camera – some even say that they’re for the Nimslo format, or Stereo Realist; they can also vary for the distance from the subject. In Europe you can buy RBT mounts from Belgium (these are quite thick plastic ones so check they fit your viewer) from here (website no longer working). In the USA you can buy mounts from Dr. T (Ohio) and 3DStereo.com (Nevada).
I use a Lightbox and either a slide cutter, or a pair of scissors, to cut the individual slide frames out. With the mount on the Lightbox, I place the left and right images over the correct windows so it’s in the parallel-view format, and use a stereoscope to view and enlarge the stereoview in 3D.
You can sometimes find second-hand mounting rigs which are a smaller light box with a stereoscope attached, they’re helpful but not essential. I usually move the right slide frame until the stereo image is in the stereo-window. When I’m happy with the result, I use either sellotape or glue dots to fix the images in place. I’ve also read recommendations of using a transparent grid guide to help with the alignment and avoid skews. I also read that you should first put the slides on top of each other, so you can judge which is the closest part of the image to the viewer, and align them to this point to keep it in the stereo window.
Some of the mounts I use used to be self-adhesive, however, by now they’ve lost all sticking ability, so I use sellotape to close the mounts (I realise I will have curators and conservators throwing things at the screen right now sorry!) There are more refined ways to do this, including mounts which seal with heat; there is a great guide on the heat-sealing mounting process online by Ugo Capeto, which can be found here.

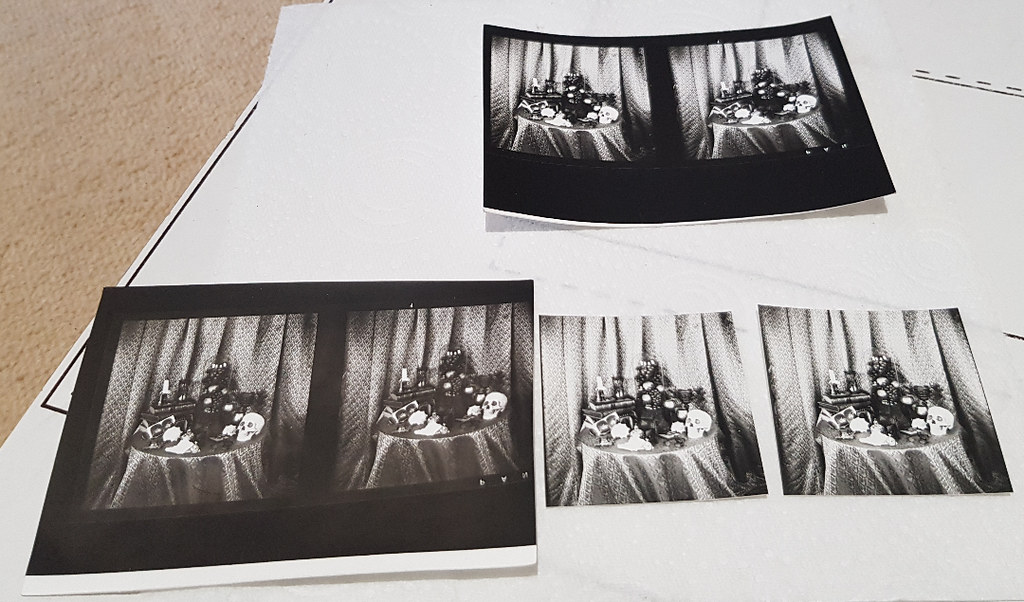
Making Prints and Mounting Them
I usually use an antique printing-frame for my 120-format Sputnik negatives, and a mobile phone light to produce the short exposure to print onto photographic paper, which I cut to size beforehand. I also use a 1950s enlarger with 120-format mask and lens to print on to photographic paper.
For a beginner’s guide to the darkroom, please see this post by Parallax Photographic Coop and they have another one about how to make a darkroom print. I use them and First Call Photographic to purchase my darkroom chemical and paper supplies. My darkroom equipment, such as the Paterson tanks and enlarger, I mostly bought from local selling sites, as people often have a clear out when they no longer use them (which apparently is quite frequent!)
When I’ve made prints, I first cut them out and align them by eye to get them into the stereo window, cutting them at the sides as needed. In the example below, I then used a tin-can lid to make the stereo arch at the top of each image, and glued them onto a cardboard mount. I never claimed to be the most refined!

Wigglegrams and Stereoviews from Quadrascopic Cameras
With the quadrascopic cameras, as I mentioned before, I usually use the two end frames, depending on how close I was to the subject, to make a stereoview. I either use the scans or the slide film to do this. You can also use all four frames to make a wigglegram, which I’ve made a separate tutorial for.

Nishika N800 camera and Kodak Color Plus 200 ASA film (scanned negatives).

Wigglegram made from scanned negative film using Photoshop.
___________________________________________________
I’m definitely very much an enthusiastic amateur, and I never claimed to be the best photographer, but I hope this guide will help anyone interested in taking their first steps into stereo analogue joy. To me it really is a great joy, which also feels magical when you see your own images appearing in the darkroom. Seeing them finished in a mount, and in stereoscopic 3-D definitely feels very rewarding and exciting. Just expect your digital stereo friends to think that you’re crazy.

Copyright © The Stereoscopy Blog. All rights reserved.

I use a FED Stereo M. Used to have the non M version (which needs a 1.35v cell rather than 1.5v but you can get a gizmo that will reduce 1.5v to 1.35v) My brother left that on a sandy (?!) beach as the tide was coming in. so that was the end of that. Hence the Stereo M that takes a normal 1.5 cell. I got it from a dealer in the Netherlands via a Belgian Camera dealer.
It takes pairs that are 7 perorations wide, which is pretty good. I mount the sides myself. Its a very basic camera but it takes good photos. Been at it since about 2001 !
LikeLiked by 1 person
Good morning Steve,
I’m sorry to hear about your first FED Stereo’s demise, but I’m pleased you’re happy the FED M. I’ve also got a standard FED (you can see a photo here: https://stereoscopy.blog/2022/06/21/stereoview-stereo-3d-camera/ ) but it’s prone to light leaks as the back isn’t flush with the body – that’s what I get for buying dodgy cameras off eBay. Otherwise, I really like the settings on the camera and I can see why you enjoy using it. It’s always good to hear someone is still committed to analogue stereo joy.
LikeLike
That’s the same as the first one I had. (which I made my brother keep and use as a door stop. If you want to the the back of that on yours I could get that part back I would think.
I cured the light leaks on the “new” one by threading black wool into the groove around the body that the back located in. avoiding the exposure counter reset lever at the top right and replacing the worn out felt on the left hand edge of the back with some self adhesive “brush” type draft excluder (because I happend to have some laying around !
I’ve not had any light leeks since. And it cost nothing.
That said to see if it worked you need to buy a slide film and pay for processing… so there is that to consider.
I gave my eldest the stereo pairs i too when she was about 5 minutes old on her 18th this August gone. The I had to give my other daughter her ones on her 15th. Best presents ever !
LikeLike
Hello Steve,
I tried to fix the light leaks too with some foam light-sealant, but it still didn’t make it flush, the back is sadly too wonky, so I’m just careful how I use it.
And I agree about the slide film, just the cost of the film itself now is shocking.
Whilst the FED stereo cameras appear to be quite inexpensively made, they certainly have faired well over the years! I wonder how many of the current digital stereo cameras will be working as well in so many years?
It must be amazing for your daughters to see themselves in 3-D when they were so young.
Take care,
Rebecca
LikeLike