

StereoPhoto Maker (SPM) is a program for editing and viewing stereo images and can be downloaded for free from this website. It runs easily on Windows operating systems and thanks to a new update, on Macs too.
DOWNLOADING THE NEW SPM FOR MACS
Update from developer 2024: The Windows 64bit version of Stereo Photo Maker now runs on Apple MacOS, Silicon M1 or Intel Macs with MacOS High Sierra, Mojave, Catalina, Big Sur, Monterey. There are some problems, such as the function to use the built-in browser does not work, but the basic functions seem to work.
ALTERNATIVES
If you’d like to try an alternative way, making stereoviews is possible in Photoshop. It’s not as easy as with SPM, but here’s a tutorial in case anyone who can’t use SPM needs it. If you’d like to make stereoviews with your smartphones you can also find tutorials on this blog for Android and iPhones.
______________________________
Please note images in this tutorial can be enlarged by clicking on them and viewing in Flickr so you don’t need to hold the screen REALLY close to your face to see them. Please also note this tutorial uses a pair of red and cyan anaglyph glasses, which can be found easily on Amazon or eBay.
OPENING SAVED IMAGES
For beginning this tutorial I will be using images taken with my Fujifilm W3 camera, which produces MPO files (a stereoscopic image that consists of two 2-D JPG images). The SPM program, however, also allows you to import images taken with any camera, which I will also explain. This includes images from your smartphone, and most image file formats. You can use scans of photographs including Victorian stereoviews, scans of film, screenshots, etc. I’ll also be explaining how to edit a single stereoview at a time, but please note that SPM can edit batches of images to save time.

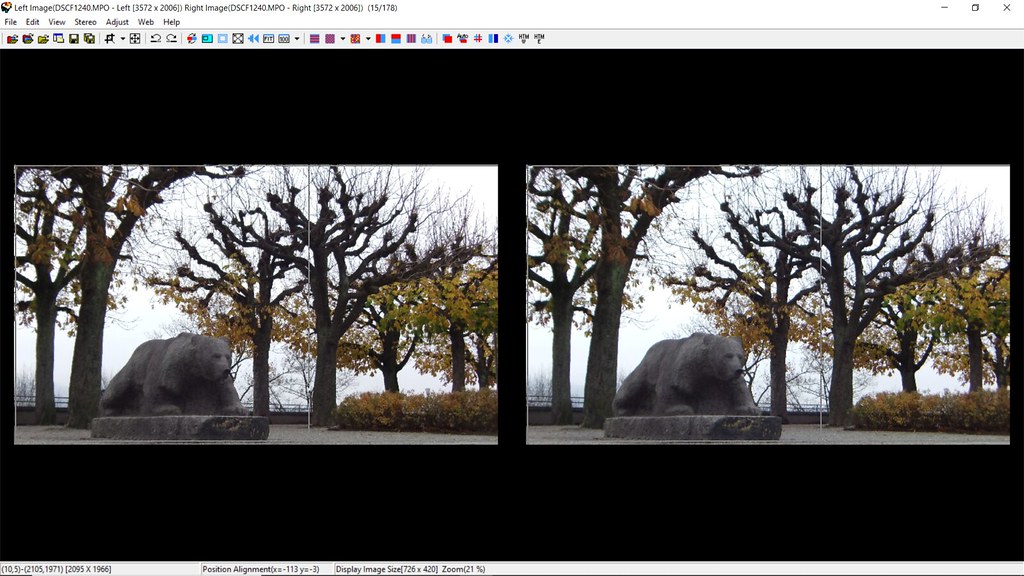
Once you have SPM downloaded, click on the app logo and it will open to a blank screen. To open a file that consists of both the left and right views, click on the top left menu File and Open Stereo Image.

The file I’m using, as I mentioned before, is an MPO file taken with a Fujifilm W3 camera, so opening it will display both the left and right images. This will also work with scanned and previously saved stereoviews which have a left and right image in the same file.
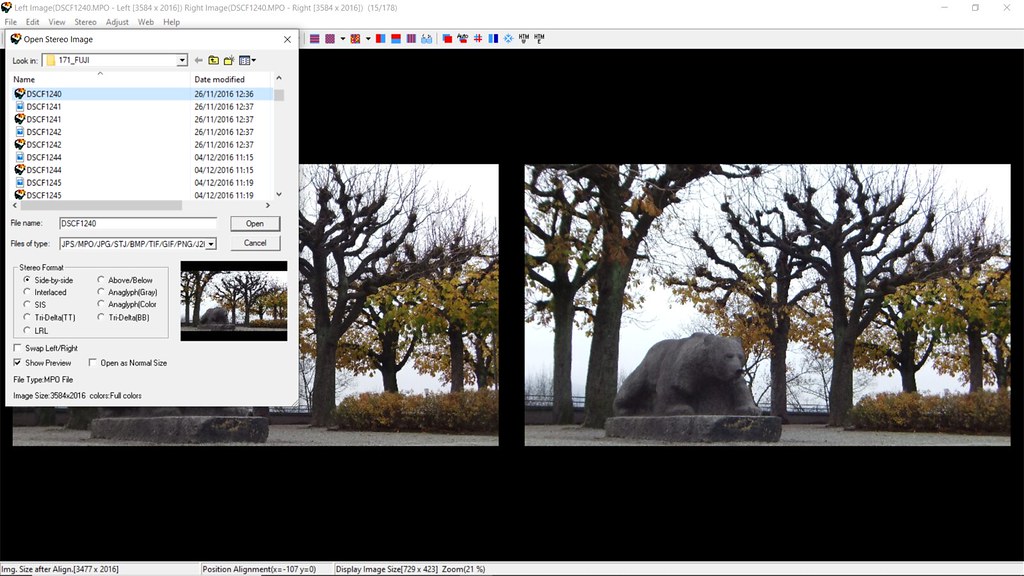
If you wanted to open separate JPG files, such as ones taken sequentially with a camera/ smartphone, you can also open the left and right images individually. Click on the File menu, then Open Left/Right Images…
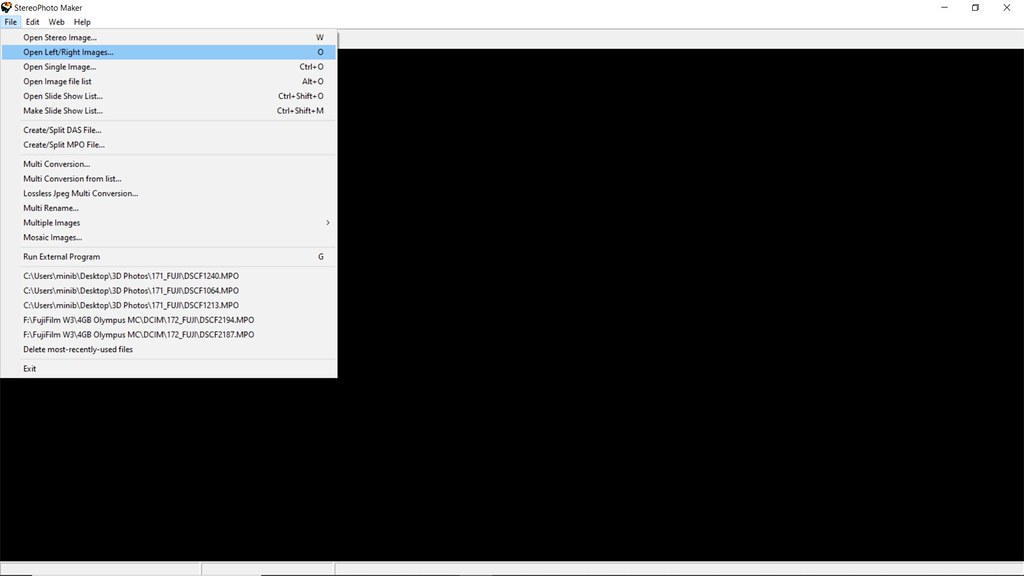
As the files I’m using were taken sequentially they’re conveniently found one after the other; however, it’s a good idea to keep your files organised and name them accordingly (such as left and right) so you can find them easily. Having said that, my PC is about as organised as my office so your life won’t depend on it. You open the left image first and then, unsurprisingly, you open the right image.


This will give open your stereoview, which can now be edited.
ALIGNING YOUR IMAGES – AUTOMATICALLY
I use StereoPhoto Maker to help prepare stereoviews for projection, and I must mention that it is very important to ensure that the left-eye image is on the left and the right-eye image is on the right (the parallel-view format) so it projects correctly. This is also important to keep in mind when you want to align the stereoviews as my explanation for the ‘Easy Adjustment’ tool is based on working with a parallel-view image. If you prefer to view your images in the cross-eyed/pseudoscopic format (right-eye image on the left, left-eye image on the right), you can work on the images following this tutorial in the parallel-view format, then change to cross-view when the alignment is complete.
If you’re unsure if your image is in the parallel-view format (the left eye image on the left side, and right eye image on the right side) or pseudoscopic format (right eye image on the left side, and left eye image on the right side), you can check this with the Adjust menu. Click on the Adjust menu and choose the ‘Easy Adjustment’ tab. This will show an anaglyph of the images and it’s important that you are wearing your anaglyph glasses the correct way round. The red lens must be on the left eye and the cyan/blue lens must be on the right eye.
Sometimes people find it difficult to tell the difference between parallel and pseudo stereoviews. I’ve found an easy thing to look for is to find the closest part of the image to you, the viewer, to test with (e.g. in the image below it would be the tree in the bottom left foreground). Wearing your glasses correctly, the part closest to you in the image must be in the foreground, and in front of the other parts of the image, which are in the background. If you have any doubt you can cancel out of the ‘Easy Adjustment’ anaglyph, click on View, then Swap Left/Right and then go back to the Easy Adjustment menu to check again.

Now you’re sure that you’ve got the images automatically aligned and the right way round, you can start editing them.
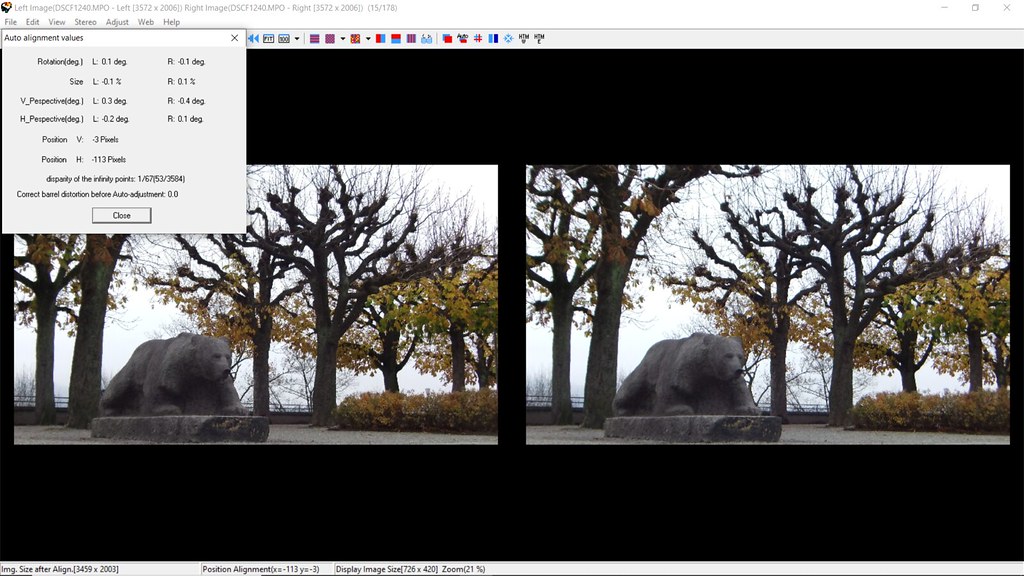
The first editing I do to the images is to align them, especially with sequential photos because I’ve usually moved slightly up or down between them. The alignment can be found in the ‘Adjust’ menu and then ‘Auto Alignment’.

You will get a report for the Auto Alignment values and one of the most interesting values (if you’re a geek) is the ‘disparity of the infinity points’. This value is the depth separation between the two images, and the second number should ideally be 30 or more for comfortable viewing. This is important when enlarging and projecting your images, as the depth in your stereoview may be too much and make viewers feel a bit ooky (technical term) as the brain tries to fuse them. If you’re just viewing the images on a small screen, however, don’t feel you have to get too caught up with this, as they are more forgiving on the old noggin.
CROPPING IMAGES
After my initial auto-alignment, I then crop the images. Cropping can be especially useful if:
- you need to remove something from the foreground which is near the edge
- there is some unwanted overlapping of camera film frames/beam splitter frames
- you want to remove the old stereoview mount
- you want to use a specific ratio for a specific reason, e.g. for certain projections or stereocards,
- you want to cut out people or things that have moved near the edge
- to avoid window violations from too-near objects, etc.
You’ll find the option for cropping in the ‘Edit’ menu, then ‘Crop’, then ‘Free Cropping’ for choosing your own size; there are, however, also options to choose set ratios.
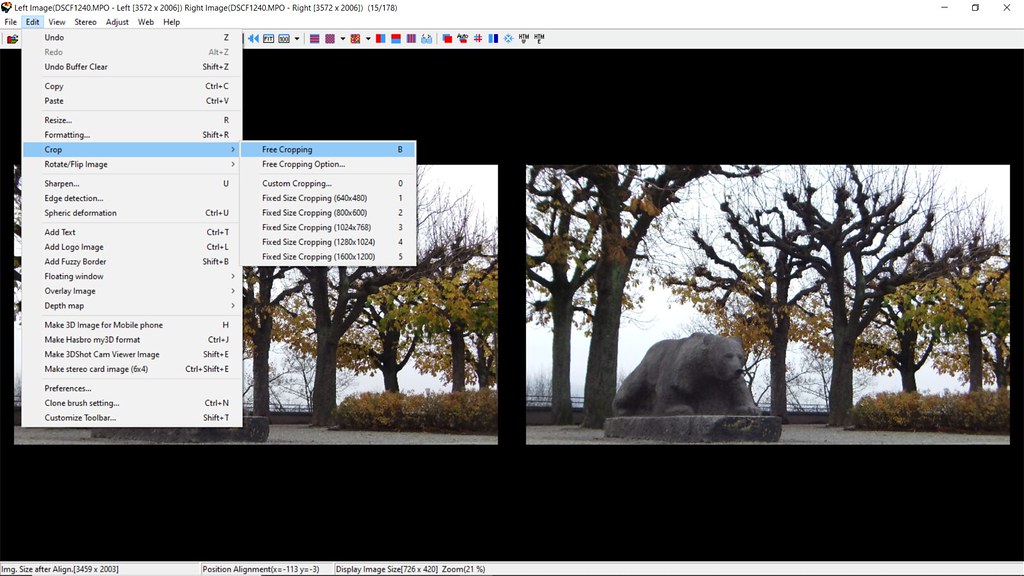
A set of rulers will appear over both images, and you move the cursor to find your first top-left point for cropping. Be careful to look at both the left and right images to see how the crop will affect each one. Something cropped out of the left image may still be slightly visible in the right and could be distracting.

When you’ve chosen the left point, hold down the left mouse button and drag the rulers to the bottom right point where you want to crop. Again, be aware of what’s happening in both images.
When you’re happy that you’ve got the crop correctly in place, click the left mouse button again and both images will be cropped.

ALIGNING IMAGES – MANUALLY
I would now use the manual alignment tool, especially if it was automatically aligned before to something which has been cropped out of the image since.
In the ‘Adjust’ menu choose ‘Easy Adjustment’.
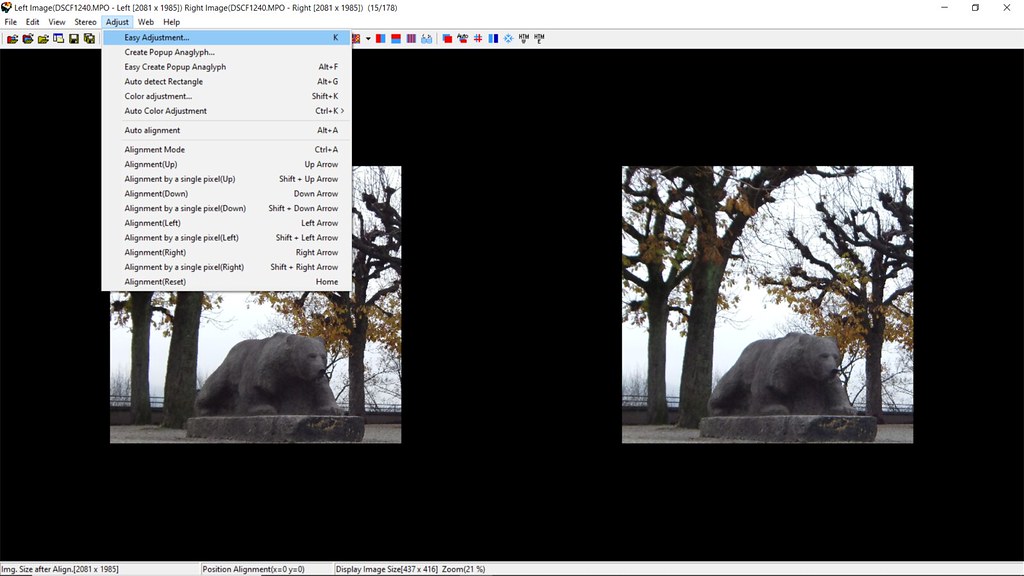
This will display the Easy Adjustment window, and it’s time to wear your groovy red and cyan glasses. Remember: the red lens on the left eye, and the cyan lens on the right eye.

I recommend that before you do any editing, you make this window as large as possible for more accurate alignment and judgement of depth. You drag down the right-hand corner of the Easy Adjustment window to enlarge it.

There are many options on this screen, but for now, we’re sticking to the basics.
You can use the sliders above and at the side of the image to move the right image up or down, and left or right. As we’re working on the parallel-view image, it is the right image that the sliders are currently affecting.
A very nice way of remembering how to manually adjust the stereoview’s depth is by using the 3 Rs: Moving the right image to the right will make everything in the fused image recede.
To try and make sure the image is in the ‘Stereo window’, I find the closest part of the image to the viewer and make sure the two images are perfectly aligned at that spot. It may be a branch of a tree, or the bottom of the foreground, etc. If you’re interested in the stereo window, you can find a tutorial on it here. If this isn’t your enjoyment in stereoscopy though, please don’t get too worried over this.
MAKING IMAGES COMFORTABLE TO VIEW
If you want to get into projecting good-quality 3-D images like a true geek, you also have to consider the background of the images. Please don’t sweat about this and be put off by it though, if you’re just viewing the images on a small screen, it’s not essential.
A nice way to judge whether an image will be comfortable to view when projected is to use the grid in the ‘Easy Adjustment’ tool window. In this window, you click on the ‘show grid’ box and set the spacing of the squares to 30 (1/30th) (found on the upper left of the window).

The background of the images shouldn’t be more than a square apart (1/30th). If it is more than this, then the disparity between the images is too great, and the final stereoview will not be comfortable to view in 3-D when projected or enlarged, as your brain may struggle to fuse the two images.
If you then decide to slide the backgrounds closer together to compensate, keep in mind that you’re also affecting the foreground. Now the image foreground may come out of the window too much, doh!
Usually, when I’m taking sequential stereoviews, I get over-excited about a sleeping cat and exaggerate the distance between the left and right shots. This means I can’t really use the stereoview for projection (which is not something I do often anyway), as the separation is too much. I’ll stick it on Instagram, because smaller screens are more forgiving, and pretend it wasn’t a failure.
Some Victorian stereoviews also have too much disparity between the left and right image backgrounds and you have to make a judgement of whether it’s too important not to project. If it is necessary, then maybe don’t leave it on the screen for very long so the audience doesn’t go running for the hills.
Once you’re happy with your alignment, and your image is in the ‘stereo window’, you can press OK. I do a final check on my parallel-view stereo images on the computer screen with a stereoscope designed specifically for this purpose. Please see my blog post ‘How to View Stereoscopic 3-D Images: Basic Tutorial‘.
SAVING YOUR STEREO-IMAGES

Now you can save your stereoview, and you have plenty of options to choose from. In the ‘File’ menu you can save a separate left and right image, a single stereoview JPG, an MPO file, a wigglegram or gif, etc.

MAKING A STEREOCARD
You can also make a stereocard if you’d like to print it out to view in a stereoscope, and this option includes a nice frame for the image.
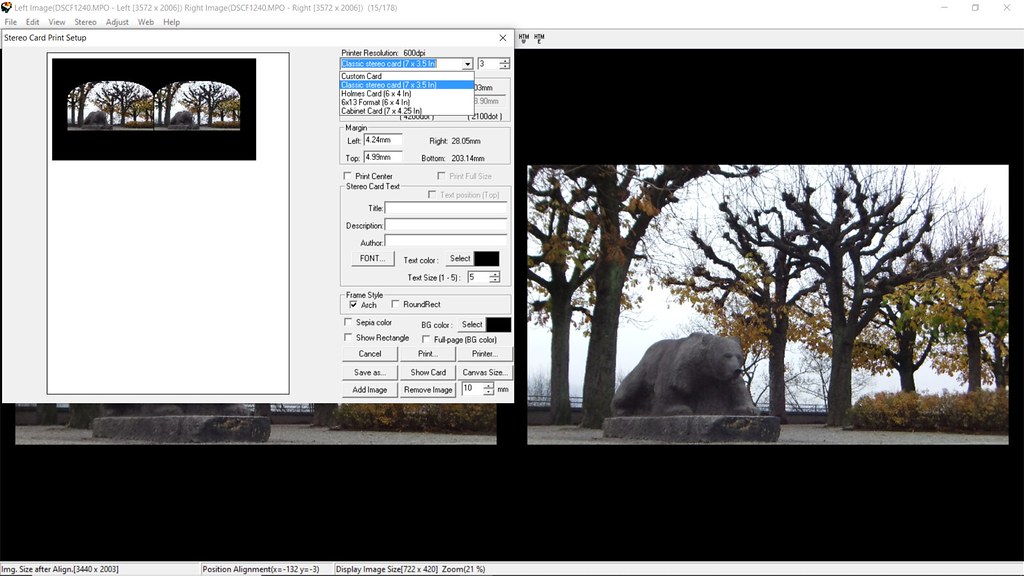
In the ‘File’ menu go to ‘Print Stereo Card’.

In this menu, you can change the format of the frame, such as the classic stereo card or a Holmes card. The best frame format to use usually depends on the size of the images themselves, switch between them to get a preview. You can also add arches, text, change the colour of the mount, etc.
CHANGING THE STEREO-FORMAT
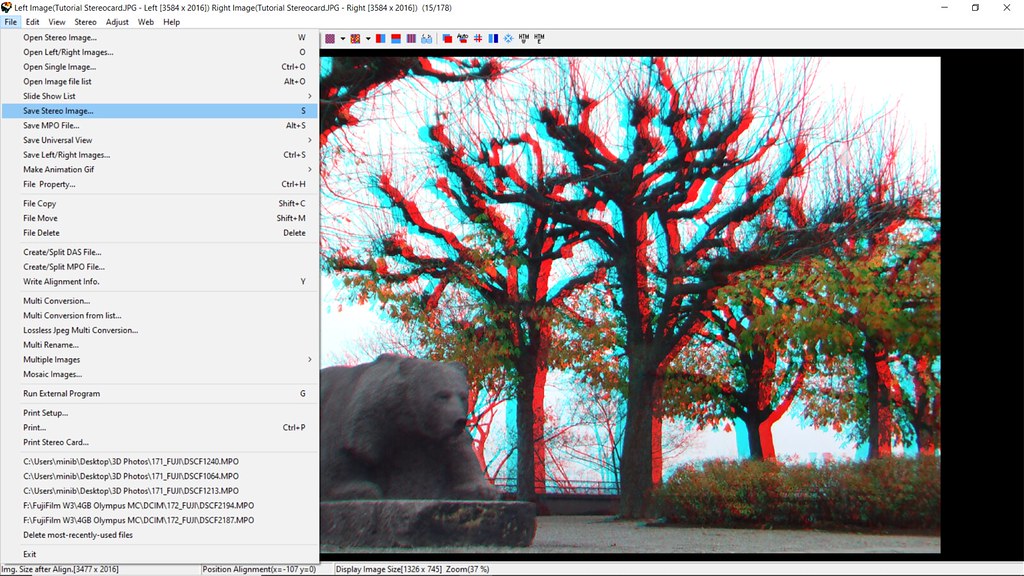
You can also change the format of the stereoview, such as into an anaglyph.
Go to the ‘Stereo’ menu, choose ‘ColourAnaglyph’, and then choose whichever type of anaglyph takes your fancy. Make sure it is compatible with the anaglyph glasses you have available. Also note that anaglyphs often distort the colours in the image, so try clicking through the different types to see which one you think fits the image best.

This stereo can now be saved in the anaglyph format.
You can also use the ‘Stereo’ menu to convert the stereoview into a pseudoscopic/cross-view image if this is your preferred viewing method, and save it.
There are other programs that allow you to make and edit stereoviews, and some people just crop the images themselves using basic editing software. I find SPM to be an incredibly powerful and useful tool for any level of stereo photographer and we’re lucky that Masuji Suto, the developer, has made it free to use.
There are also many more ways to edit your stereophotos with SPM; I recommend visiting the developer’s website which includes tutorials for all levels.
I hope you have fun trying this program, I look forward to seeing your results!

Copyright © The Stereoscopy Blog. All rights reserved.

Hi when I save it as a jpeg and emaill it to myself so I can open and post on instagram it does not show 3D quality. The Image is flat. Also what does edit to make 3d image for mobile phone? What is the procedure for that? Thank you! MG
LikeLike
Thank you for useful tutorial. I suggest one small correction regarding the installation procedure “sudo xattr -r -d com.apple.quarantine/Applications/SPM_Mac.app” near the beginning: there must be a space between the attribute and the application installation path (after “quarantine”).
LikeLike
How create move for image SBS and create tags 3D in YouTube mp.4 ?
LikeLike
Hello, I’m not sure if this is what you mean, but you can use SPM to make moving and panning stereoviews: https://stereoscopy.blog/2021/05/31/create-your-own-panning-stereoviews/
And I don’t upload to Youtube myself, but this advice about uploading 3D videos might help: https://www.tridimensional.info/2023/01/how-to-properly-watch-3d-youtube-videos/
LikeLike