

I’m aware that not everyone will be able to use StereoPhoto Maker to make stereoviews and anaglyphs, especially some Mac users, so I thought I’d write a tutorial to explain how to align images and turn them into a stereocard which can be printed off – all whilst only using Photoshop.
For this tutorial, I used Adobe Photoshop CC 2019, but older versions will work the same. All you need is a pair of anaglyph glasses, which you can find easily on Amazon or eBay, and maybe a stereoscope designed especially for use with computer monitors, but this isn’t vital. Some examples include the mirror stereoscope made by nvp3d, or the ‘Pixie 3D Viewer‘ made by Loreo (see my How to View Stereoscopic 3-D Images tutorial).
MAKING A LEFT AND A RIGHT IMAGE
The first and most important step depends on which images you are using but it is to make sure that you have high-resolution images to make the best possible stereoviews. For this tutorial, I used 35mm slide film from my Iloca Stereograms analogue camera. I scanned it using an Epson V8000 Photo scanner at a high resolution (4000 dpi) so I can make high-quality slides for projection or stereocards.
All you need is a left and a right image. You can also use digital files which you have taken sequentially with a single-lens camera or one file which includes each half of the stereoview and cut them into a right and left file.
You can also use old stereoviews. I typically scan the standard-sized 17.5cm x 8.5cm Victorian stereocards at 1200 dpi which is adequate for projection, but the higher the better (but please note that the highest possible resolution scan may take until Christmas). For smaller originals, like Verascope glass slides, View-Master or Stereo Realist slides, I’d scan at a minimum of 2400 dpi. Once you have a scanned file, cut out each side, save them as two separate files, and name them so you can identify each side easily as the left and the right image.
For later projection, or to make a standard stereoview, the parallel-viewing format must be used – that is the left eye image is on the left side and the right-eye image is on the right side. So in a nutshell: know which image is for which side, and also if you use low-resolution images your stereoview won’t look great and I’ll chase you with a big stick.
CREATE A BACKGROUND TEMPLATE FOR A STEREOVIEW
You will need a template for the stereocard backing, so I’m showing one I created which is the same size as a standard Victorian stereoview. Skip this step if you’re making an anaglyph only.

In Photoshop I went to File – New – and set the presets on the right-hand-side as width 17.5cm, height 8.5cm and resolution 4000 dpi – the same as my scans, however, if you feel this is too much please set it to what you feel is best (but remember that if your final image is low quality I will be chasing you with a big stick). I chose black because I’m a bit of a goth and also feel it shows the image well, but feel free to choose your own colour.
Save the file as a PSD file somewhere where you’ll find it easily, then you can reuse it for future stereocards too (unless you overwrite it, it happens!).
AUTOMATICALLY ALIGNING THE LEFT AND RIGHT IMAGES
Open the left and right images in Photoshop. On the left image file click Cmd A to select all, then Cmd C to copy and Cmd V to paste this as a layer on top of the right image.

Now you have the two layers in the Layer panel, select them both (click on one, hold the SHIFT key and click on the other), and get ready to align them…
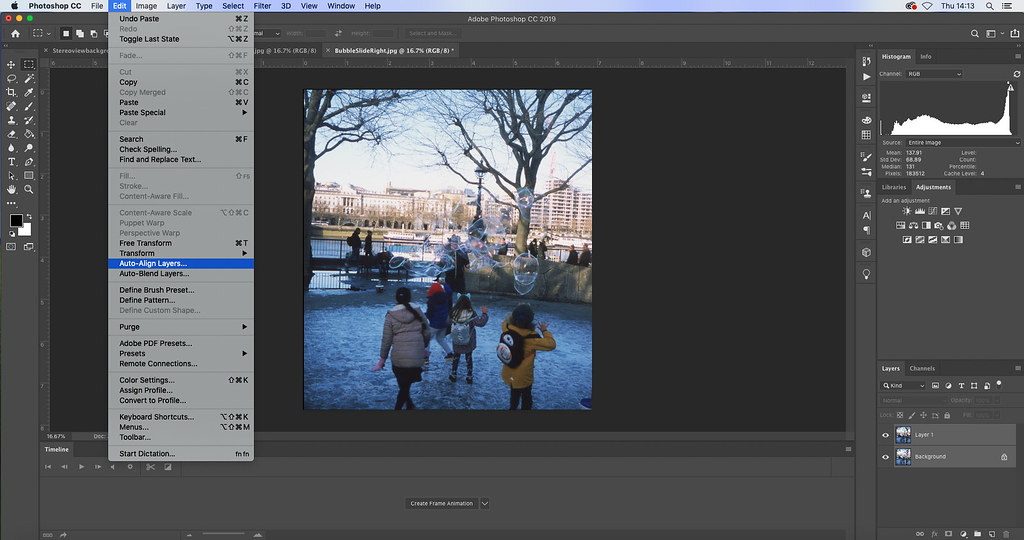
Go to the ‘Edit’ menu and choose the ‘Auto-Align Layers’ option.
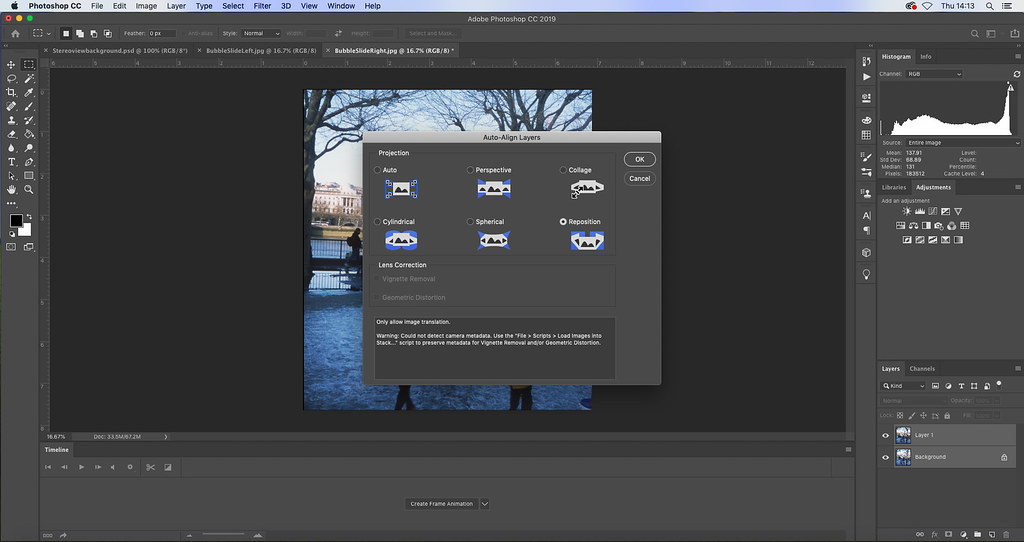
The best alignment option is usually ‘Reposition’ (using the Auto option sometimes distorts the images), so click on ‘Reposition’ and OK.
Now you want the check the alignment; click on the top layer (layer 1) and make the opacity 50% so that you can see both layers.
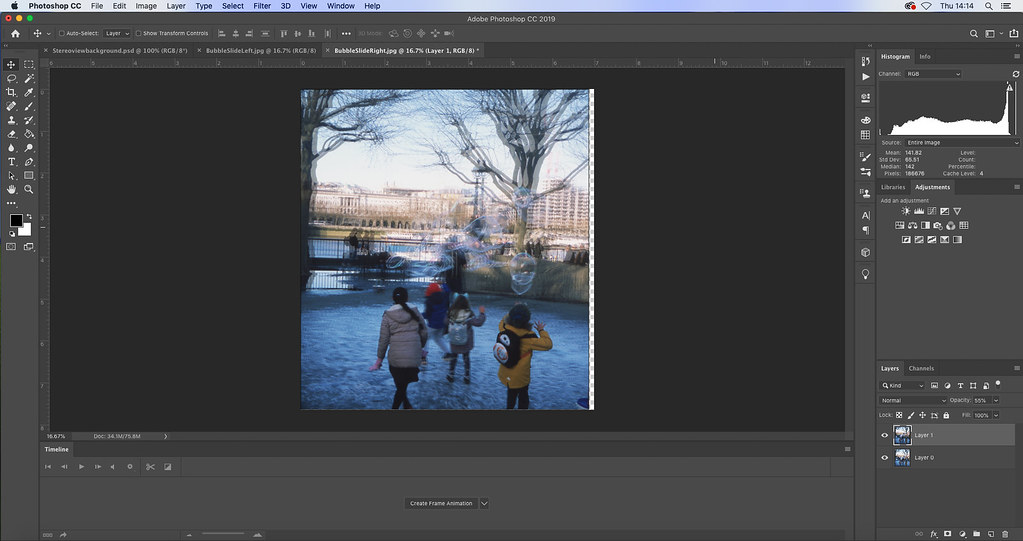
I could see that the top image wasn’t aligned when looking at the closest person in the image, so I used the ‘Move’ tool to nudge the image to align them until I was happy (I am mostly happy BTW!). The easiest way to remember if it’s going to be ‘in the stereo window’ is to find the closest part of the image, in this case, the two girls in the foreground, and make sure they are exactly aligned. If you don’t feel confident yet about judging whether it’s aligned to make a good stereoview, don’t worry, we’ll also check it with anaglyph glasses, so you can skip this step for now.
CROPPING THE IMAGES
The opacity also allows you to see where the borders don’t overlap so we need to crop these areas of the images.

Using the Rectangular Marquee tool select the area which belongs to the two images and click ‘Crop’.
The pictures should now be aligned and cropped, but you still need to find out whether everything is in the window. You can now, finally, unleash the groovy anaglyph glasses.
CREATING THE ANAGLYPH, AND CHECKING THE ALIGNMENT MANUALLY
Even if you’re making a stereocard, you will still need to follow this step to check the alignment; just don’t save it as an anaglyph if you don’t want one.
Set the opacity of the top layer back to 100%. Remember the top layer (Layer 1) should be your LEFT image and the bottom one (Layer 2) your RIGHT image. In the layer box, click on the top layer (LEFT image), then double click on the thumbnail image. A new window appears. Uncheck the Green and Blue Channels and click OK.
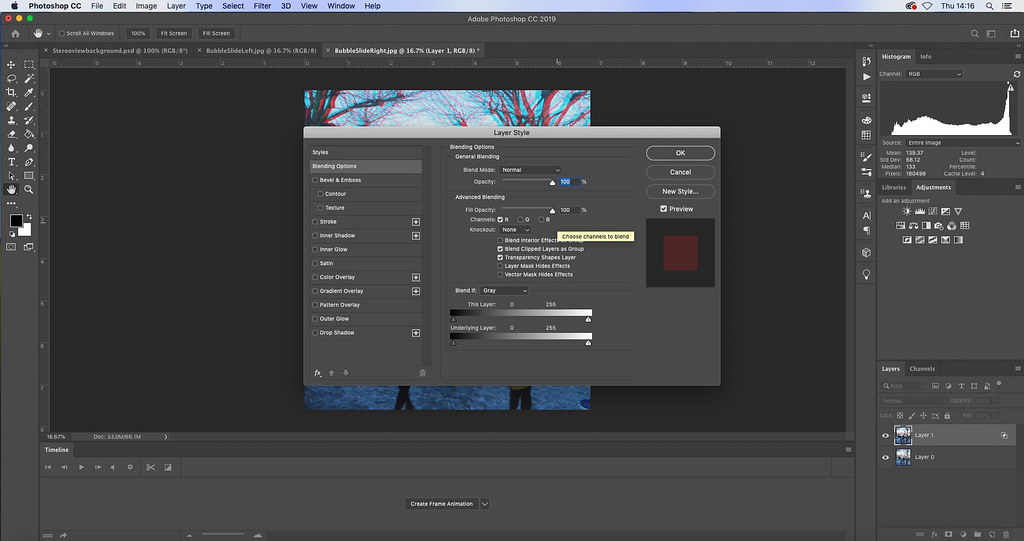
In the layer box click on the bottom layer (RIGHT image), double click on the thumbnail image. A new window appears. Uncheck the Red Channel and click OK.

If you put your anaglyph glasses on (just a quick note that when wearing anaglyph glasses the red filter should be on the left eye), you should see your image in 3-D. If you think the background seems to be coming out while the foreground seems to be receding to the back, it means you are dealing with a pseudoscopic picture (the left and right images are the wrong way round). In that case, the bottom layer is the left image and the top one is the right image; make sure you swap them in the Layers panel and change the Colour channels as above.
To make sure everything is in the window, first select the top layer. If things come out of the window which shouldn’t, click the Move tool and, using the left arrow key of your keyboard, move the top layer to the left until everything is inside the window. If you’ve moved it, you’ll now see a black strip on the right of your picture. You need to crop both images again so that this part of the picture disappears and they are both the same size. If you’re interested in more information about the ‘stereo window’ please click here.
If at this point you want to save the image as an anaglyph, just go to the ‘File’ menu and ‘Save’ as a JPEG, or whatever file type you prefer.
If you’re going for a full stereocard, all you need to do now is to go back to the top layer, double click on the thumbnail image and make sure all three channels are ticked. Do the same with the bottom layer.
SAVING YOUR FILES READY TO USE ON THE STEREOCARD
Copy your top layer and create a new file. That will be your LEFT IMAGE. Save it with –L (for LEFT) at the end of its name. Copy the bottom layer and create a new file. That will be your RIGHT IMAGE. Save it with –R (for RIGHT) at the end of its name.
You have your two halves and you can now resize them and paste them onto your black template to create the two parts of your stereoview. I resized mine so they were just smaller than the stereocard itself. In the ‘Edit’ menu and ‘Image Size’ I set the height to 7.5cm for both the left and right images.
ASSEMBLING YOUR STEREOVIEW
Now you have all your components ready, all that is left is to arrange them nicely and make a beauty of a stereoview.
Copy the left image (Cmd A, Cmd C) and paste it onto the background template (Cmd V), and do the same for the right image, ensuring you know which is which.

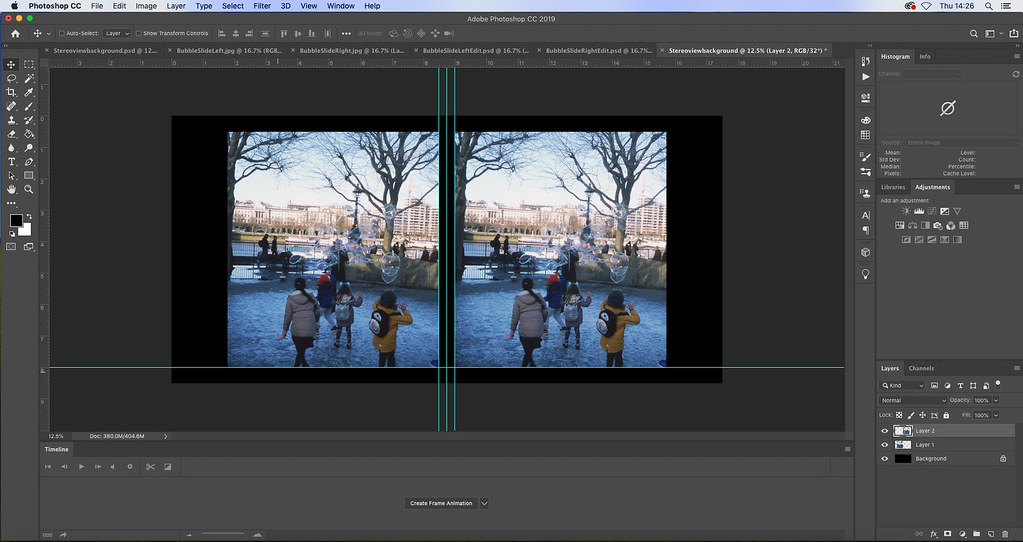
To make sure I was aligning everything correctly, I pulled several rulers from the left-hand side. I placed one in the middle of the stereoview background and two the same distance on either side of this, so I knew where to align my images on the horizontal. I didn’t leave much of a gap in the middle, otherwise it can be difficult to fuse the two images into a single 3-D one.
I then dragged a ruler to measure a distance from the bottom of the stereoview, so I could align the images vertically too. I used the move tool and dragged each image to their aligned areas and then dragged the lines back to remove them. I used my computer monitor stereoscope here to check the depth and alignment were OK.
Now it’s time to put your name and a title to the stereoview (if you want to!). I used a font colour that can be seen against the background and a size to make sure it would fit on the sides.

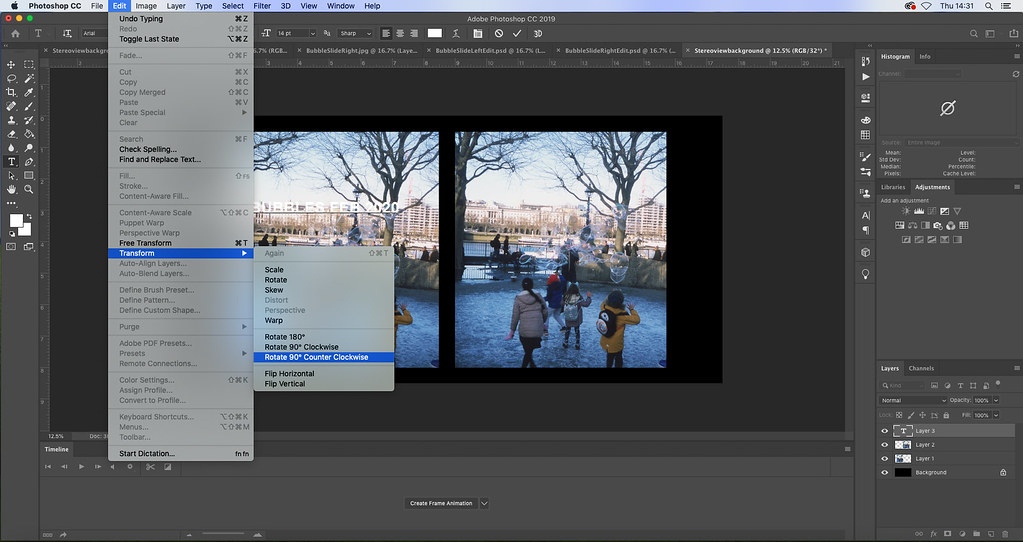
To rotate just the left-hand-side text (I made this side the title), make sure only that layer is selected and click on ‘Edit’ – ‘Transform’ – ‘Rotate 90o Counter Clockwise’. I made a new text layer for the right-hand-side text (for my name) and rotated it 90o Clockwise. I moved them with the ‘Move’ tool until they looked nicely aligned (you can check this again with the Rulers).
I saved this as a PSD file before the final step, just in case I wanted to change anything at a later date. The final step is to flatten all the layers: ‘Layer’ – ‘Flatten Image’. My file size was now ginormous and Photoshop wasn’t happy about me wanting to save it as a JPG, so I went to ‘File’ – ‘Export’ – ‘Export As’ and used this to save it as a JPG.
And here’s the final stereoview:

I would just like to point out that I also used the slide film which I had scanned for this tutorial to make cardboard-mounted slide stereoviews, just so the purists can stop cursing me and sleep at night if they read this tutorial.
Have fun making your stereoviews with Photoshop and please get in touch if you have any questions.

Copyright © The Stereoscopy Blog. All rights reserved.

I’d love to see the red-blue anaglyph image that you created in this blog post. The screenshots of the image have the dialog boxes blocking the final red-blue image.
LikeLike