

Yesterday some of us were lucky enough to watch the National Stereoscopic Association’s Keynote Speaker Denis Pellerin, from the London Stereoscopic Archive, give a very interesting talk entitled ‘Ghosts in the Stereoscope and Other Special Effects’. He showed mostly Victorian stereoviews from Dr. May’s collection and the special effects were just incredible considering how long ago they were made. You could see through transparent 3-D ghosts and sometimes witness the terrified reactions of the other people in the scene making it all look very convincing; they were quite rightly extremely popular at the time and still are today.

I decided now would be the perfect time to show how you can make your own modern ghost stereoviews using digital cameras, analogue cameras and Photoshop or other image editing software/apps. The London Stereoscopic Archive’s Instagram page was also asking for people to make their own ghostly stereoviews and submit them for the LSC’s October 2020 gallery, which you can view here.
DIGITAL CAMERA GHOST STEREOVIEWS
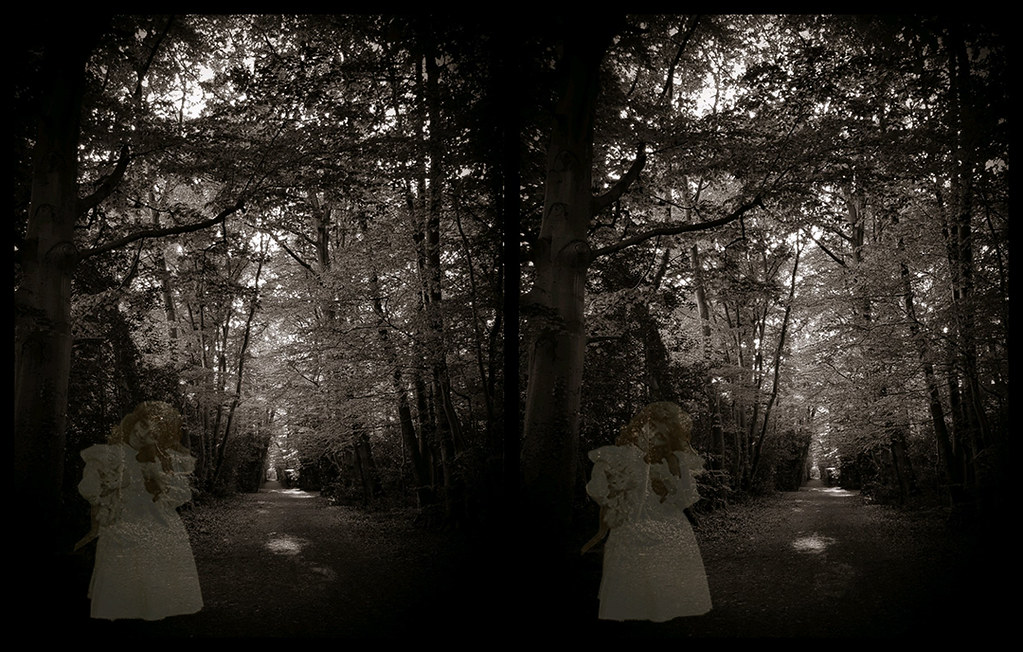
A great way to make them with digital cameras is to use a long exposure and for the model to run away/hide part-way through the long exposure to produce a ghostly image of them. I used a synchronised twin-camera rig with the exact same manual settings and lenses on identical cameras to do this to ensure both the left and right images were the same. You could also use a digital twin-lens stereoscopic camera as long as it allows you to use manual settings to make the long exposure. I used the cameras’ delayed shutter release and manual camera settings, including an eight second exposure so I could quickly crouch behind the crinoline after four or five seconds of exposure. The resulting images were left with a ghostly impression of the spirit after it buggered off.

To make the ghost appear more solid you can get the model to stay for longer in the shot, if, however, they just look like a solid person covered in a bedsheet, you can get them to move away sooner. Definitely experiment with different exposure times, camera settings and length of the model being in shot to find your happy ‘medium’ (teehee).
And to show you that this took some experimenting to get right I’m adding a fail below – you can see I crouched in the wrong place on one of my first attempts, didn’t have a long-enough exposure so you can see some odd movement and also a lump of a hiding ghost on the floor. With no real background and because I stayed too long in the shot, the nearly-transparent ghost wasn’t exactly amazing:

I aligned the stereoviews and almost put them behind the stereo-window using StereoPhoto Maker; a tutorial on using this free program can be found here.
You can also make two or more separate sequential stereoviews with a single camera, one for the background and the others for the ghostly effects on top and use photo editing software to combine them – see further below under the Photoshop section.
Using a long exposure and a beam splitter attachment is another possibility.
THE PEPPER’S GHOST TECHNIQUE
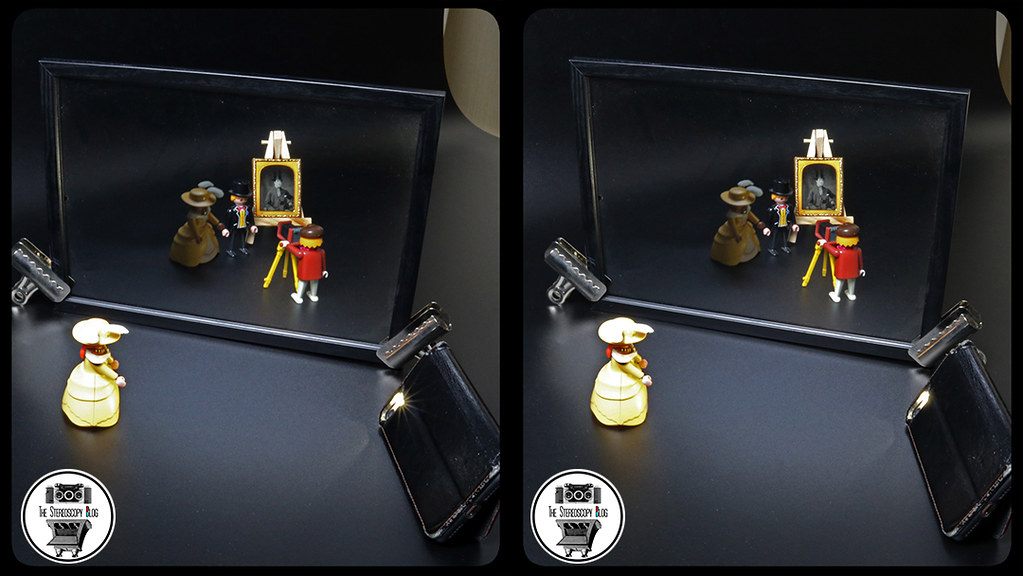
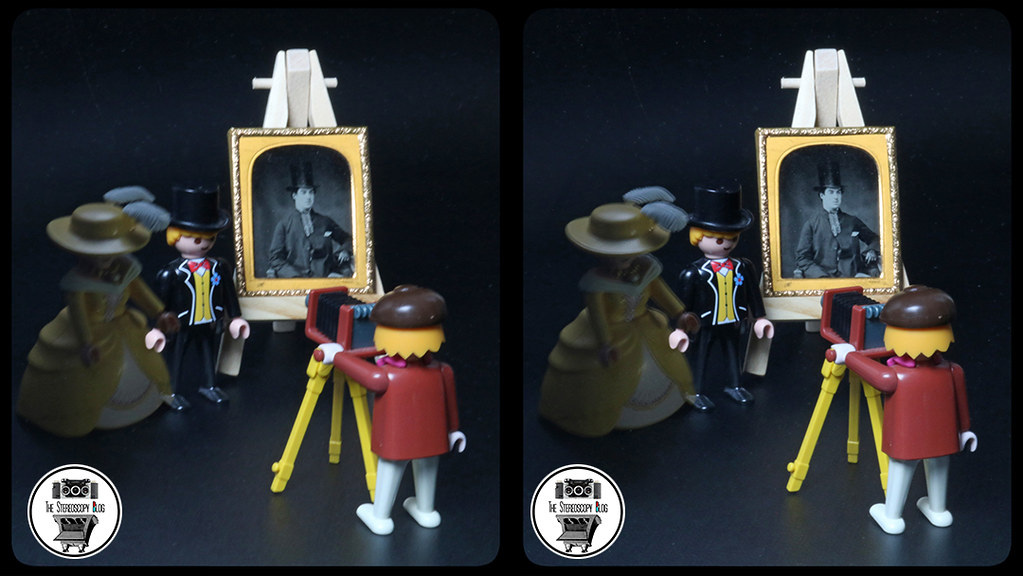
If you want to be even more creative with a single-lens or stereo camera, both digital and analogue, you could also consider using the Pepper’s Ghost illusion which relies on reflections, I found a nice tutorial here. The sequential stereoviews below were made using a DSLR camera on a tripod with a slider bar to keep it secure and level for the left and right images. The first stereoview shows the setup and how the ghostly reflection was made with a glass panel and a light source, the second is without this reflection and the third is with the ghostly toy lit up and reflecting (this was just to demonstrate the technique but, as mentioned before, this effect would look much better with a background).

Denis also mentioned that some of the Victorian stereoviews used painted gauze or translucent fabric to make a flat see-through ghost effect; maybe you can also use this technique or try something similar with shadows instead of painting.
PHOTOSHOP/IMAGE EDITING SOFTWARE GHOST STEREOVIEWS
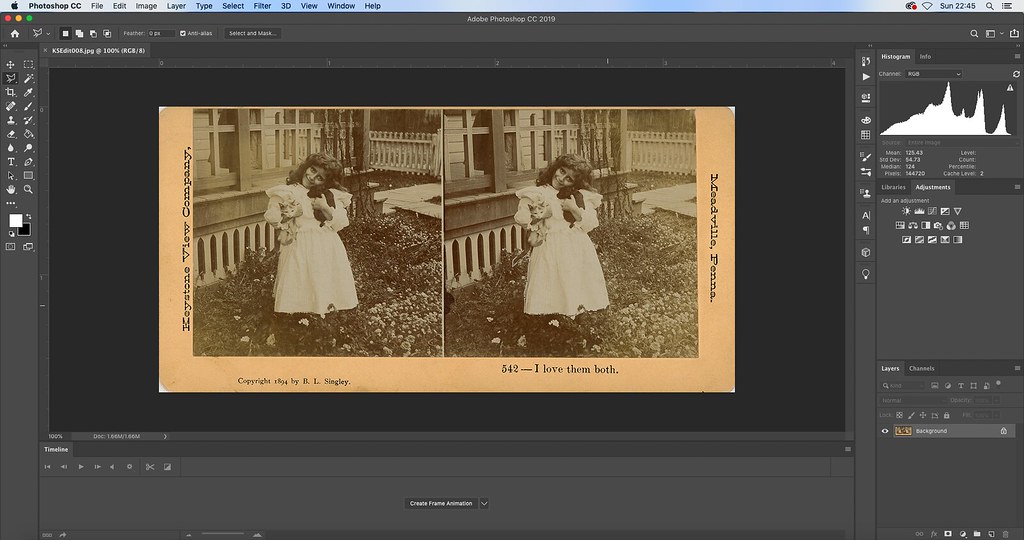
I had a comment on a Keystone stereoview which I posted previously that someone found the poor lass in one of them ‘creepy’ so I thought she’d make a good candidate for a ghost. This method will work with any images though, you just need two or more separate stereoviews – one for the background, which will be solid, and one or more for the ghost/ghosts (which could even be yourself!), which can be cut out if necessary, made more transparent by reducing the opacity, and pasted on to each half of the background.
I used my smartphone to make a sequential stereoview to use as the background, but you can use any camera to do this (tutorials for making Android and iPhone smartphone stereoviews or using StereoPhoto Maker for stereoviews from any camera are available on this blog). I then used the Photoshop polygonal lasso tool to cut the left and right images of the creepy crazy cat gal out and pasted them as layers on to my background stereoview. If you’re pasting your ghost from a stereoview make sure you have the correct left image on the left-half of the background and the right image on the right-half of the background (click on the images to see them enlarged in Flickr):
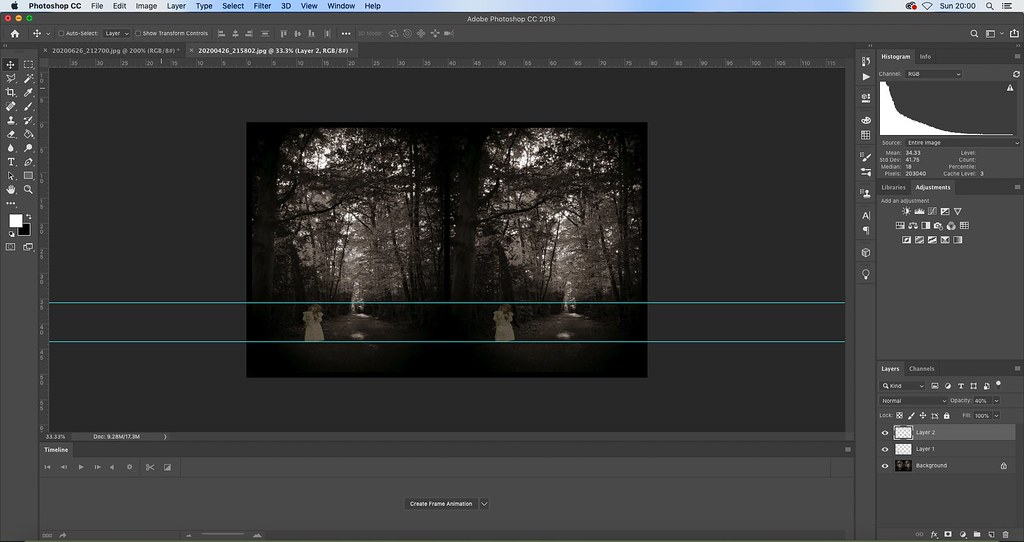
I dragged the ruler guides and used them to make sure the images I pasted were the same size and aligned horizontally. I then carefully used the nudge tool and arrow key and moved the right image to the right to push it behind the ‘stereo window’, until I felt she was in the right-ish place (understanding the stereo window tutorial can be found here). I also reduced the opacity of both sides right down to 23% so she looked more transparent and ghostly:

I decided to increase the ghost’s size so she was more visible and then saved it:
You can also use this technique with any image editing software/app that allows layers, or ones which allow you to make stickers more transparent and paste the same sticker on the left and right image and carefully align them – it will look more cardboard cut-out-y though (yes that’s a word, kinda).
It’s also possible to make ghost stereoviews sequentially with a single camera (including a smartphone) and four shots; the most important thing is to keep the camera steady on a flat surface (or on a tripod and a slider bar) at all times to ensure it’s in exactly the same position, and then level when moved, and finally carefully combining them for the ghostly effect. Take the first image of the scene without whatever you want to be the ghostly object/person, then take the same image again in exactly the same position but with the added object or ghost. Move the camera to the left/right across a flat surface or a slider bar and take the 3rd of the 4 images with the object/person still in position, then for the next and final photo, carefully remove the object/person and take your image in exactly the same position. Then, as above, open the left images as two layers in Photoshop, use the first image without the object/person as the first layer and the one with as the second layer. Reduce the opacity of the second layer to around 30%, or until you feel the object/person is transparent enough to look ghostly, make sure they’re perfectly aligned, and then flatten the layers to save the image. Do the same with the two right images. Use StereoPhoto Maker to align the left and right images and you have yourself another 3-D ghost! A nice pictorial tutorial of this technique by Gordon Au can be found on Instagram.
SOME OTHER DIGITAL EXAMPLES
I used a synchronised twin camera rig and some of the above Photoshop methods to make the following stereoview:

And then I tried with a Fujifilm Finepix Real 3D W3 camera, on a tripod taking three separate exposures and then combining them in Photoshop:

ANALOGUE CAMERA GHOST STEREOVIEWS
I have to admit that I absolutely love using analogue cameras, much more than digital; I find it really enjoyable and more fulfilling, but everyone has their own preference. Analogue allows you to make ghost stereoviews using both long exposures and double exposures. For the long exposure I used a 1950s Sputnik 120 stereo camera, slower 100 ASA film, a friend to manually press and release the shutter button so the exposure could be for 10 seconds, and a tripod to make sure the camera stayed perfectly still for the length of the exposure. I have to point out this was made with my first roll of film through the camera so I wasn’t aware that one of the lenses was out of focus – it still kind of works as a stereoview though. You’ll be pleased to know that I’ve since managed to fix it using ground glass and manually adjusting the focus of the lenses – if anyone is interested I can write a tutorial on how it was done, huzzah! Anyway, long exposure, faulty lens, analogue pirate ghost:

Most analogue stereo film cameras also allow you to take double exposures, if you’re not sure if yours does try and find it in the instruction booklet or look online. I originally wanted to use a TDC Stereo Vivid camera for this but you have to do it in such a way that you may accidentally open the back of the camera and expose and ruin the film. I was brave and used other cameras…
I used my trusty 1950s Iloca Stereograms 2.8 camera for the next image. The camera has a lever on the front which allows you to override the film winder and take the next left and right images on the same frames of film to make the double exposure. I took the first exposure of the sky and some trees and the second exposure of a WW1 tribute with a fence and trees behind and it made it look transparent, almost like you’re looking through it at smoke. I used 400ASA film so it’s rather grainy:

WET PLATE COLLODION
I also went ultra old school and used wet plate collodion to make a ghost tintype stereoview with a twin-lens camera. This was my first attempt at using this technique so you can see the result leaves a bit to be desired. The instructor asked me what I wanted to take my first tintypes of and thought I was a bit loopy when my immediate reply was ghosts!
Wet plate collodion typically needs a long exposure to produce the image, especially in shadow, so I asked the instructor to remove the lens caps to expose the plate for half of the full exposure whilst I posed in quite an awkward position, then he replaced the lens caps, I moved off the bench and removed the lens caps again to complete the rest of the exposure then replaced them. After the wet plate collodion is developed, dried, and in this case varnished, the left and right images have to be transposed, or swapped, to make it a parallel stereoview, or you can leave them to make a cross-view:

There are definitely more ways to make ‘Ghost in the Stereoscope’ stereoviews but I hope you’re inspired by the few techniques here to try and make your own ; it may also be worth doing a search on Google images under (you’ve guessed it!) ‘ghost stereoviews’ to see some amazing Victorian ones or Instagram under #ghostinthestereoscope for more recent versions. If you have any questions or need any help please get in touch.
Have fun in the ‘spirit’ of stereo-photography and don’t forget to share your spook-tacular results (pun-tastic).

Copyright © The Stereoscopy Blog. All rights reserved.
