

I’m sorry to write this so soon after Nintendo announced the discontinuation of their 3DS after 10 years of production but you can still find the last few in stock at some retailers and also easily find second-hand and refurbished ones if you don’t have one already. I thought I’d explain how to use the Nintendo 3DS to take and display stereo images without glasses, so if you or your children have one tucked away in a drawer now is the time to dig it out and show some love for these amazing and innovative little stereoscopic devices.
THE GLASSES-FREE 3-D SCREEN
The top Nintendo 3DS screen uses a parallax barrier which displays a stereoscopic image without the need for glasses. A barrier is used in front of the LCD screen and contains a series of spaced slits which allows each eye separately to see a different set of pixels, creating the 3-D depth using parallax, much like a lenticular screen. If you have seen a FujiFilm W1 or W3 camera you will be familiar with the display as they use the same technology. This screen also allows you to use the Nintendo 3DS to display images which have been taken with a different device but they do need some editing before they can be used – see below.
The ‘New’ 3DS also includes amazing face-tracking which automatically adjusts the top screen image to the player’s viewing angle, allowing you to to tilt and move the screen (within reason – maybe not throw it across a room!) and still be able to view the 3-D. The recommended viewing distance for your eyes from the screen is approx. 30cm for the Nintendo 3DS and 35cm for the Nintendo 3DS XL.
THE 3DS STEREO CAMERA

I’ll be talking about the Nintendo ‘New’ 3DS XL as it’s the model I have and am most familiar with. The two 0.3 megapixel cameras are found on the lid and are 3.5cm apart, so the best depth in the images is achieved about 105cm away from the subject (this is according to the 1/30th rule – please see this post for information under the ‘Making Images Comfortable to View’ section) but seeing as the 3DS screen is quite small you don’t have to lose too much sleep over this; the app itself recommends a distance of 30cm or more from the subject. I wouldn’t advise projecting the images you make with the 3DS as the resolution is too low to be shown enlarged but for most social media platforms used on small smartphone screens they work just fine. The stereo image file types made by the 3DS are MPOs (like the Fujifilm W1 and W3 cameras) and the video file types are AVIs.
MAKING STEREOVIEWS WITH THE 3DS STEREO CAMERA

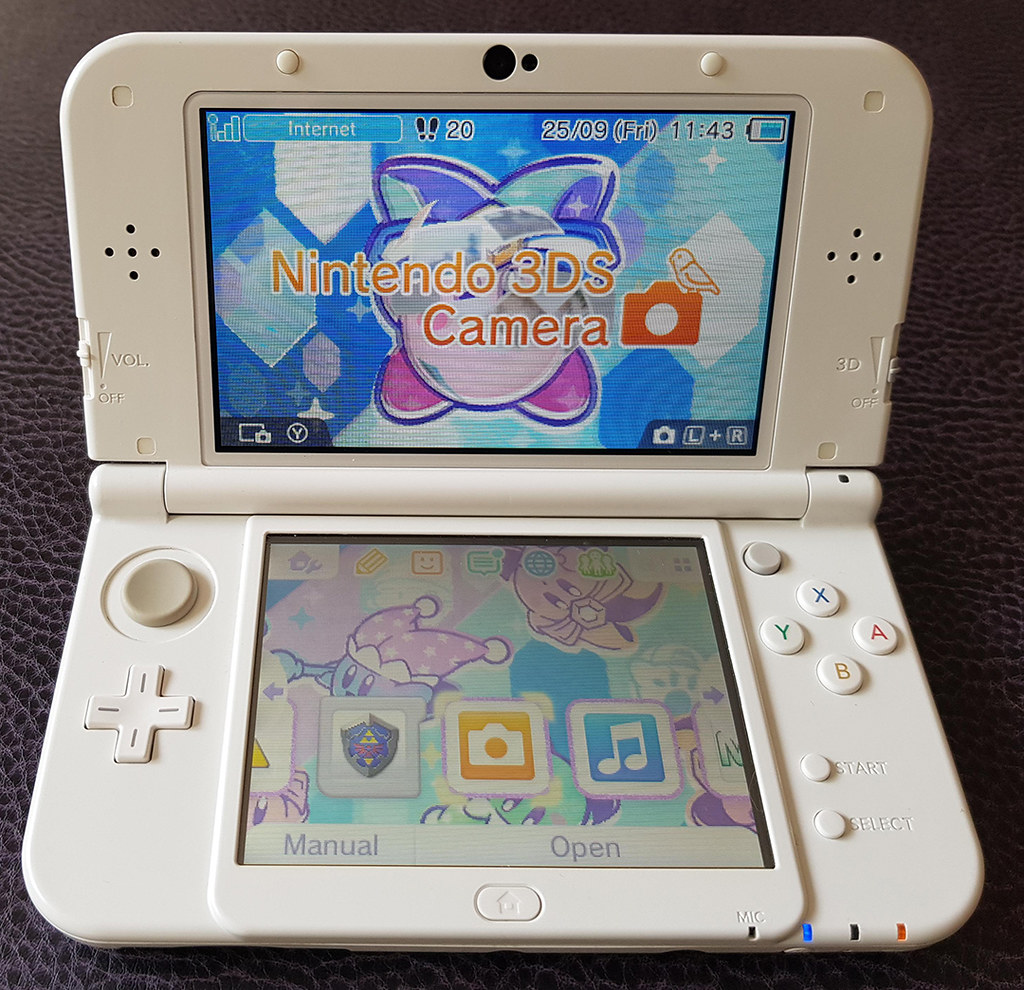
In the main menu screen go to ‘Nintendo 3DS Camera’ and if it’s not already selected press ‘Shoot’ on the bottom left to open the cameras and make sure the two forward facing cameras are selected by clicking on the top left camera icon and select ‘Outer’. I prefer to shoot directly to the microSD card in the 3DS so I can upload the images to my Mac or Windows laptop; to do this go to bottom right ‘Settings’ and ‘Photo Save Location’ and ensure ‘SD Card’ is selected. If you already have some images saved on the System you can transfer them in this menu by clicking ‘Data Management’ and ‘Copy All Photos -System to SD Card’ and when you’re finished press ‘Back’ to take you back to the shooting screen. Once you’re ready to photograph click on L, R or A to shoot the photo, remembering not to get too close to the subject and the images are automatically saved. You can view your stereo images and videos in the image gallery, where you can also ‘graffiti’ an image. One of the options I like the most is the 3D Tool to raise parts of an image so in theory you could turn a 2-D image into a 3-D one with a lot of time and patience (but real stereoscopic 3-D photos are sooooo much better 😉 ). The only thing I find lacking is an Undo tool to reverse any mistakes you’ve made part way through – it’s too late now though to hope that Nintendo will fix this!
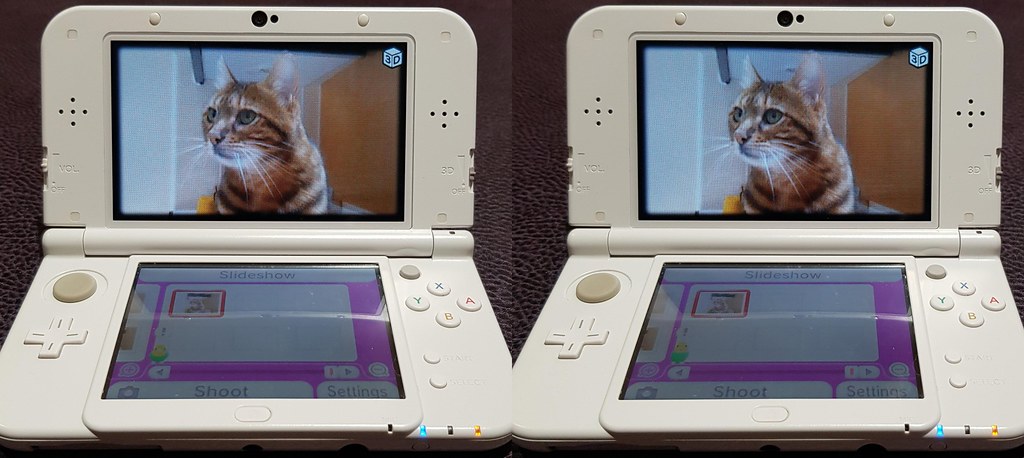
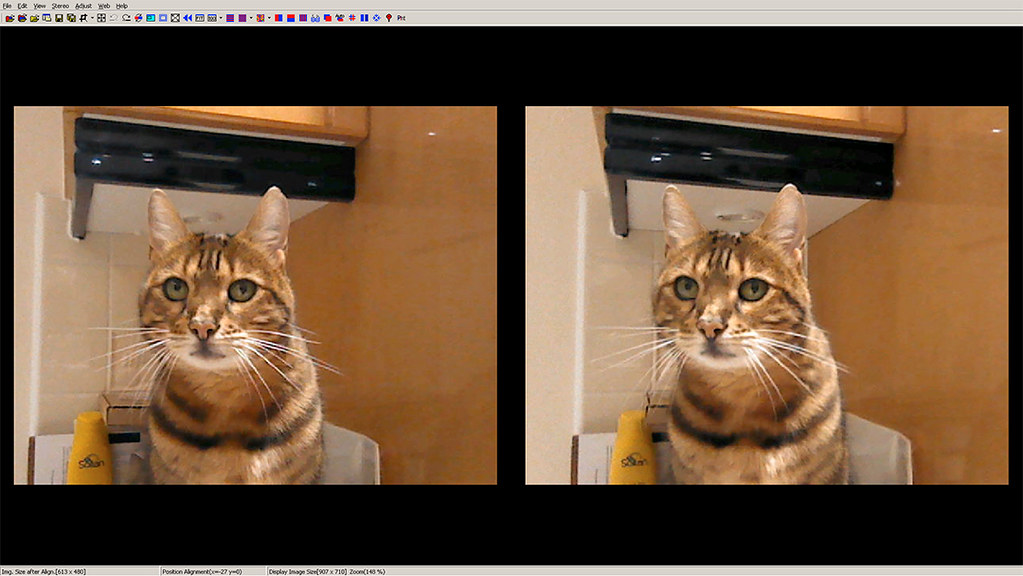
I took the following image of a kitty using the 3DS’ stereo-camera but I was far too close, but you know, cat. The stereo-photo also doesn’t do the glasses-free display justice but you can see a similar stereo-photo I took with the 3DS below as a stereo card to see the depth from the cameras.
Parallel-view

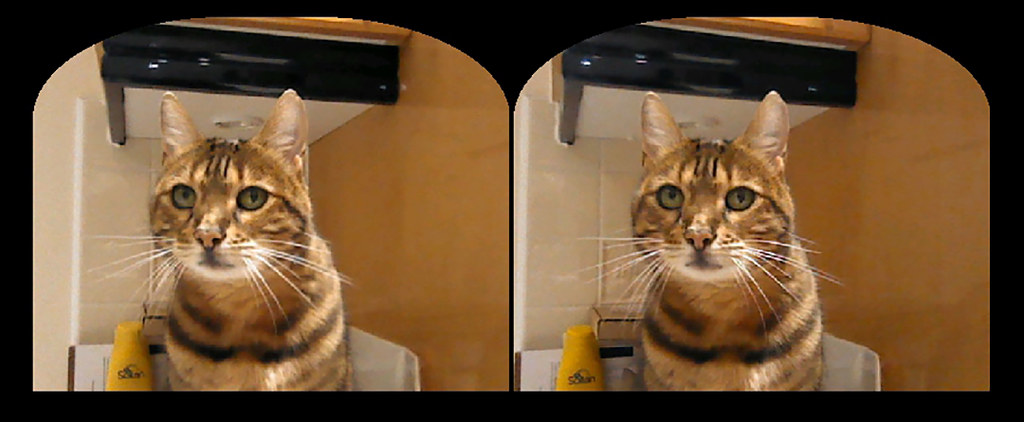
Cross-view

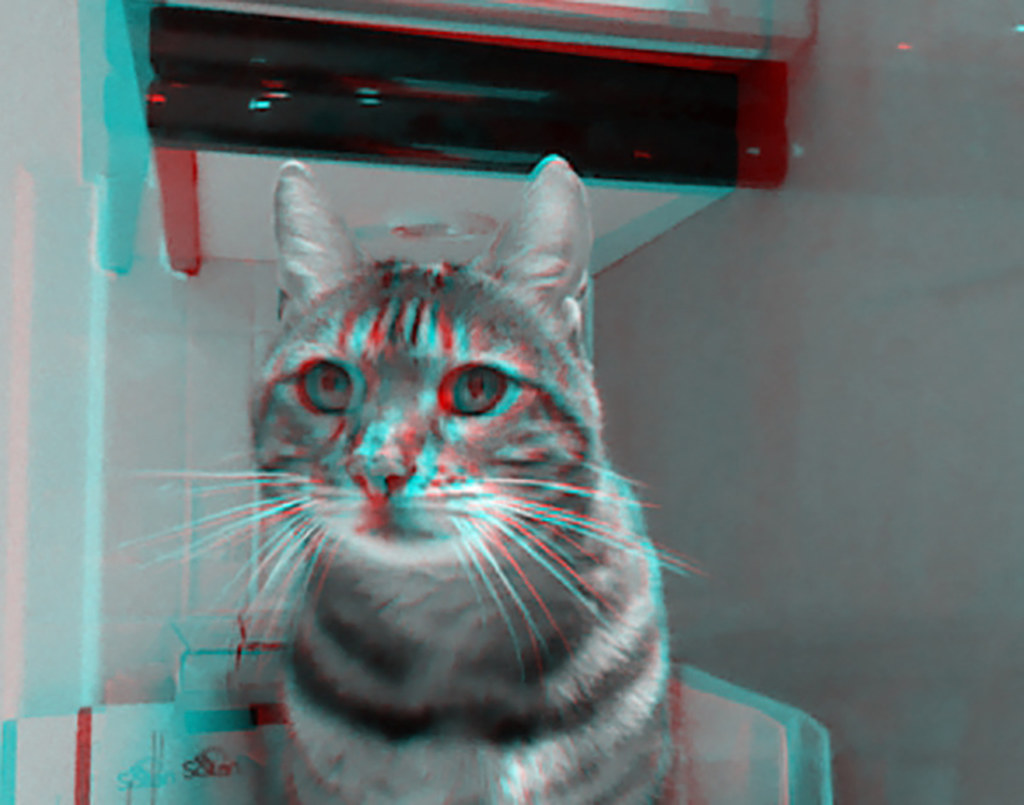
Anaglyph
TRANSFERRING 3-D IMAGES FROM A NINTENDO 3DS
Now you have your saved stereo images on the 3DS’ SD card you can then transfer them to another device with a bit of faffing about depending on which 3DS you have – earlier models allow you to access the SD card easily on the side to remove it and insert in to a card reader on your Windows device or Mac. This is far too easy and definitely not the case with the New 3DS XL.
For Windows 7 or 8 you can do a direct transfer – go to the 3DS System Settings (the spanner icon), Data Management, microSD Management and with the Windows laptop or PC connected to the same Wifi Network as the 3DS follow the on-screen instructions from the 3DS to set up the Access Point, User Name, Password and Name. After a while the 3DS will appear on the Windows device under ‘Network’ (you may need to refresh) where you can access the files on the microSD card and directly transfer them.
If like me you have a Windows 10 device you will need to edit the settings to allow access to the 3DS Network: in the Windows 10’s search bar search for ‘Windows Features’, click ‘Turn windows features on or off’, find ‘SMB 1.0/CIFS File Sharing Support’, expand the folder, enable SMB1.0/CIFD Client and SMB1.0/CIFD Server, click OK and restart (you may want to change these settings back after you’ve finished).
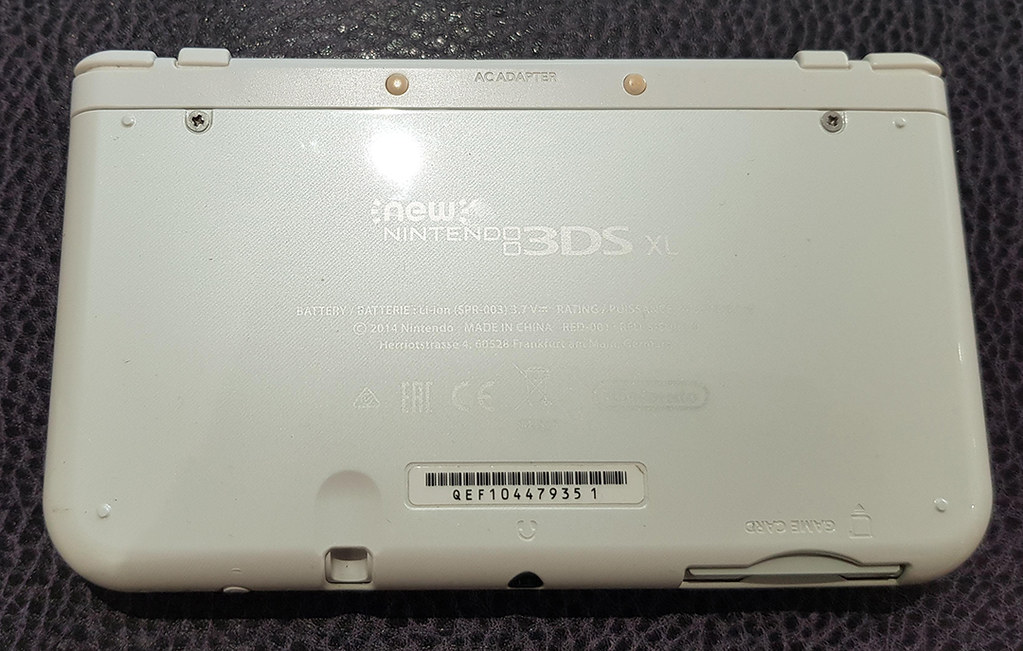
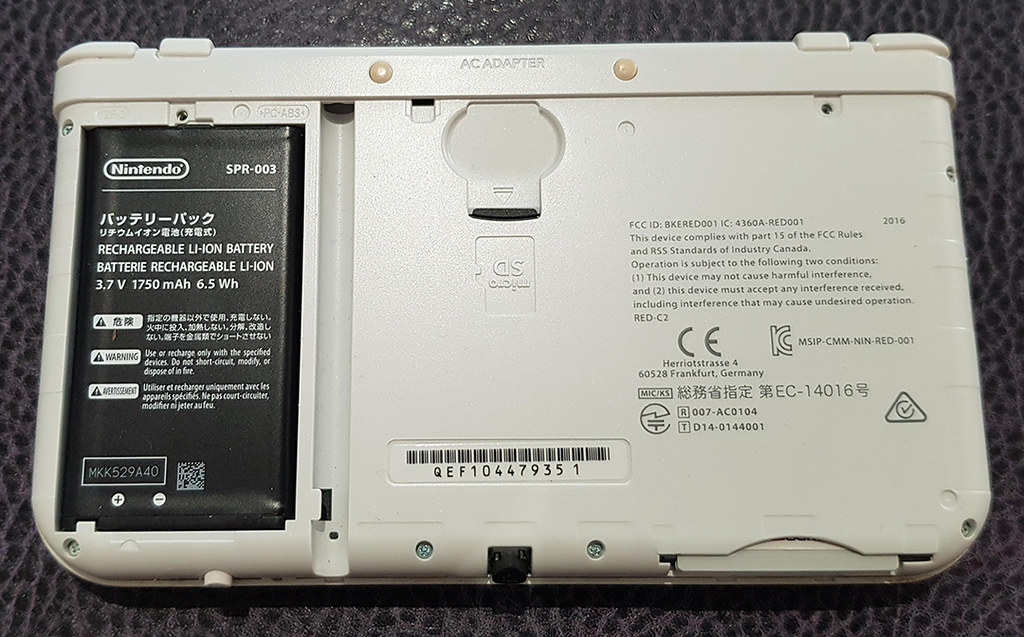
If you have a Mac or you just can’t get a Network connection you can also do this the DIY way: With the New Nintendo 3DS XL there are two screws on the backplate which need loosening and then the backplate pops off by unfastening either side with the top of stylus in the recesses.
You’ll find the micro SD card in the middle near the top and it needs pushing in for it to pop out.
Make sure you have a micro SD card reader on your PC or Mac (you can easily buy these inexpensively on Amazon or eBay) and insert the card to show the file folders from the 3DS.

Much like a smartphone or digital camera the image files are in the DCIM folder and, like the default settings on a Fujifilm 3D camera, each image is saved both as an MPO file and a mono JPG file.

I used StereoPhoto Maker to open and edit the MPO files, please see this tutorial for an explanation.
For this kitty image I used SPM to realign the images and push her body behind the stereo-window (no kitties were harmed in the process), add a nice border and to make different types of stereoview:

Parallel-view (images taken with a New Nintendo 3DS XL)
Cross-view (images taken with a New Nintendo 3DS XL)
Anaglyph (images taken with a New Nintendo 3DS XL)
USING A NINTENDO 3DS TO DISPLAY STEREO-IMAGES
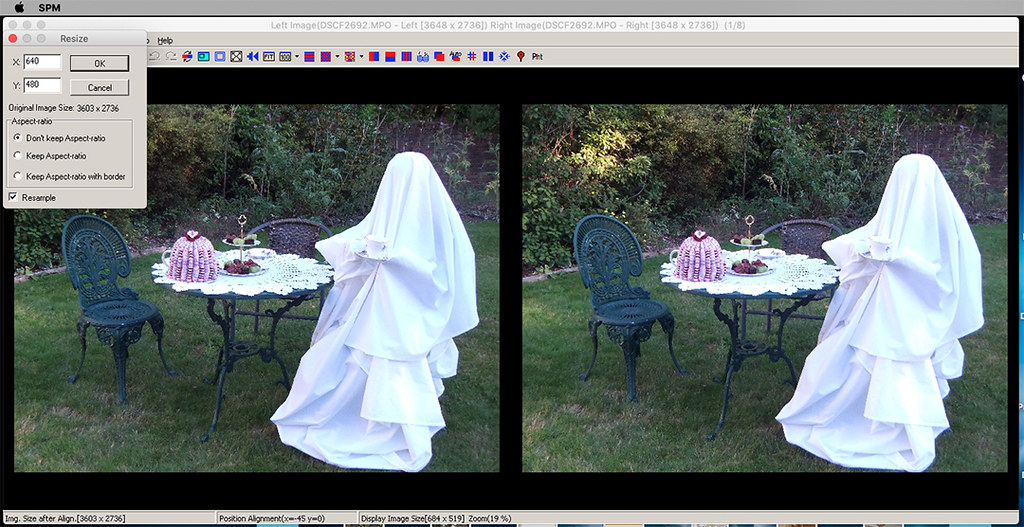
You can also use the 3DS to display images made on another device as long as they are in the correct format and again I use StereoPhoto Maker for this. StereoPhoto Maker allows you to open different format stereoviews, such a a left and right JPG image, a JPG stereoview, an MPO file, etc. so you can use it to open files from a smartphone, digital camera, a scanned image, etc. I used an MPO file from a Fujifilm W3 camera and with StereoPhoto Maker I changed the dimensions to be New 3DS XL-friendly by going to the Menus: Edit, Resize and changing X to 640 and Y to 480 – the same as the images taken with the 3DS. (Just as a side-note, the native resolution of the Nintendo 3DS XL screen is 800 x 240, or 400 per eye when viewed in 3-D, so not amazing but good enough for its size).
If you’re able to connect to the 3DS’ Network you can wirelessly transfer the files across from a Windows device (see above). On my Mac I saved the file to the microSD card in the DCIM folder as an MPO file.

Once the microSD card is reinserted into the 3DS or the file is transferred you should be able to view the stereo-image in 3-D without glasses in the Nintendo 3DS camera app Slideshow. I should point out though that the file size is much larger than the native 3DS stereo images so you must be patient whilst it takes an age to open, you can of course reduce the size further.

Please note that the screen doesn’t photograph well because of the parallax barrier, you have to see one in person to really appreciate them but being able to view 3-D images and show them to others without glasses really is awesome.
With the 0.3 megapixel cameras and low resolution of the screen don’t expect too much from the Nintendo 3DS and its stereoscopic image capabilities, just remember to have fun and it really is! It could be a great way to introduced stereoscopy to newbies or children; apparently you can also play games on the 3DS 😉

Copyright © The Stereoscopy Blog. All rights reserved.

I am a 3D photographer who’s main camera is the 3DS. I would love to hear a follow-up about your experience shooting photos on the 0.3 megapixel cameras and the advantages of being able to test depth as you take the pictures. Feel free to get in touch if you want to hear more about my years with the 3DS camera.
Pro tip: When viewing pictures in the gallery you can slide the circle pad left and right to change the focus of depth!
LikeLike
Good morning Shane. I have to confess, I checked the photos on my 3DS yesterday and they’re almost exclusively of my cats, so I’m probably not the best to write about my experience of using it since, as I’ve only used it for cat portraits – but it is AWESOME for cat portraits. If you’d like to write about it and share some of your images, please just let me know. I saw recently that people are using the ‘Virtual Boy’ as a VR headset: https://www.youtube.com/watch?v=9gX_cRp52iA
LikeLike