

The quadrascopic lens cameras of the 1980s such as the Nimslo and Nishika N8000 were quite redundant after lenticular printing became obsolete. No-one knew what to do with them and many ended up in charity shops. Then along came the Wigglegram, an animation made from the frames of film taken by the four lenses, swiftly followed by the incredible price increases in these cameras! Recently there was even a Kickstarter to make a modern triple lens film camera at a more affordable price(?!), the RETO3D (which I haven’t tried myself yet, but I recommend looking for reviews on Youtube).

I thought it was about time I wrote a tutorial showing how to make your own Wigglegrams seeing as they are quite popular now, especially on Instagram. I’m aware that RETO3D offer an app to make Wigglegrams but currently it’s only available on the Apple store (but they have told me that they plan to bring it to Android too). For this tutorial I’m using Photoshop CC because being able to use layers makes creating Wigglegrams on Mac and PC possible and you can also have fun with adding extras.
USING DIGITAL FILES TO MAKE WIGGLEGRAMS
It’s also possible to use files taken with a digital camera to make Wigglegrams; using a slider bar to move the camera left to right whilst taking two, three or four photos with an equal distance between each image (the Nishika N8000’s lenses are 18.5mm apart) would work perfectly (depending on how close you are to the subject).

FILM PROCESSING FOR WIGGLEGRAMS
I do not develop colour negative films myself (C41 process) so I use a lab in the UK which does and sends them back uncut (I can highly recommend Kirklees Photographic for colour negative films in the UK, their services are available by post and they are very professional, great prices, always helpful, always return the films uncut on request and just generally really lovely to deal with; they also now offer scans of the quadrascopic frame format too!). It’s always worth checking with the processing lab first what they offer for different format camera films. The Nimslo and Nishika N8000 take four 35mm half-frame images for each click of the shutters, i.e. two full frames – so from a 36 roll film you’d get 18 captures. A standard 35mm single lens full-frame camera’s film format is much different to that of a quadrascopic lens camera’s so if the lab cuts the film it may actually chop some of your frames in half, I always ask for it to be uncut to play it safe. Some labs also offer scanning but again it’s worth checking beforehand if they just scan it in the standard full frame 35mm format, which can be a waste of time and money for half-frame films. I scan mine at a minimum of 2400 dpi with an Epson V800 Photo flatbed scanner. The film below is Kodak Color Plus 200 ASA used with a Nishika N8000 (for information on the Nishika N8000 please see my previous post).

USING PHOTOSHOP TO MAKE WIGGLEGRAMS
Please note that this tutorial is using four-frames, it can definitely be done with at least two or more.
One of the big advantages of using wigglegrams is that they’re a way of presenting 3-D depth to stereoblind people so they may be able to perceive it.
And now we finally get to opening the images in Photoshop CC.
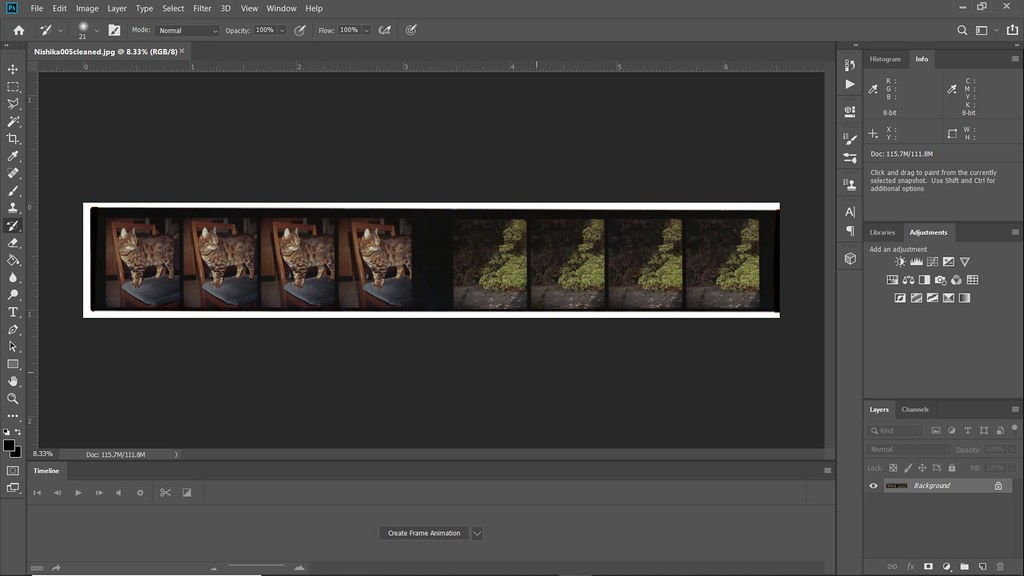
Use the rectangular marquee tool to make an initial crop of the four frames which you’ll be using.


And then use the rectangular marquee tool again to make an outline for the first individual frame, copy it, open a new file and paste the single frame there.
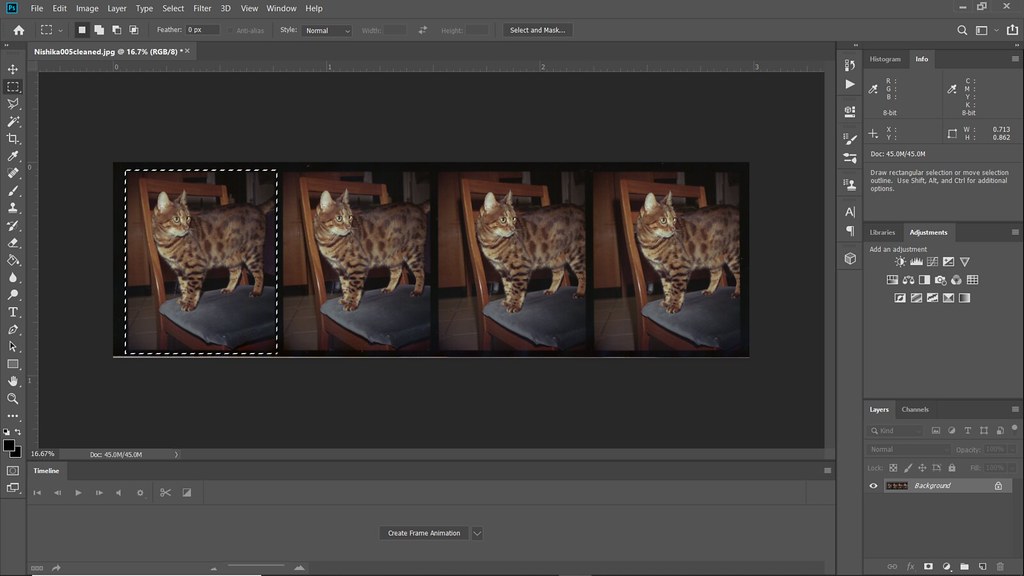


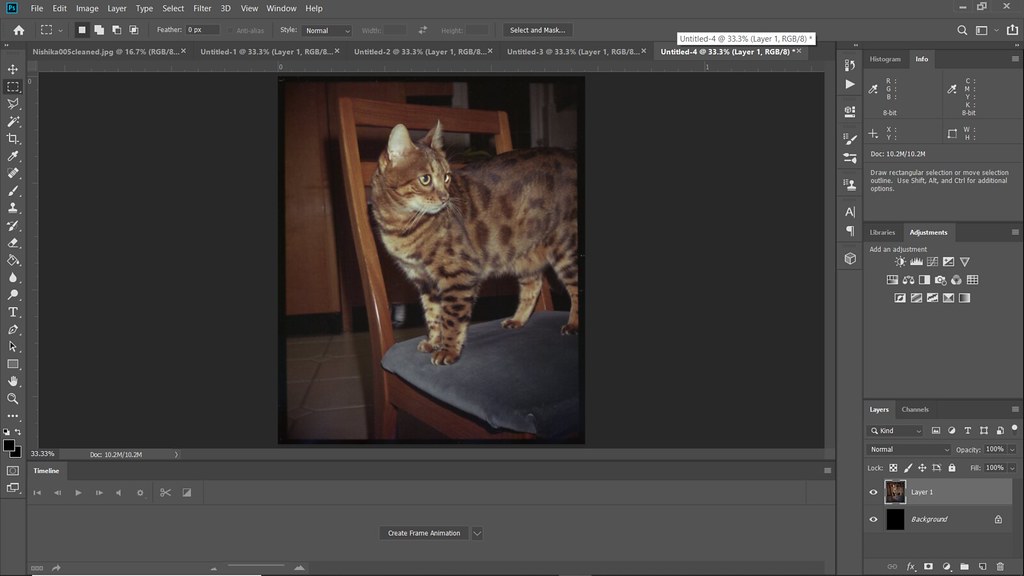
Do this for each frame so there is a separate file window for each one of the four.*
*You can, to save time, also just copy and paste each frame as a layer in sequence on top of the first frame, instead of pasting them in separate tabs. Skip straight to the next step and just do it directly from the full-scan of all the frames.
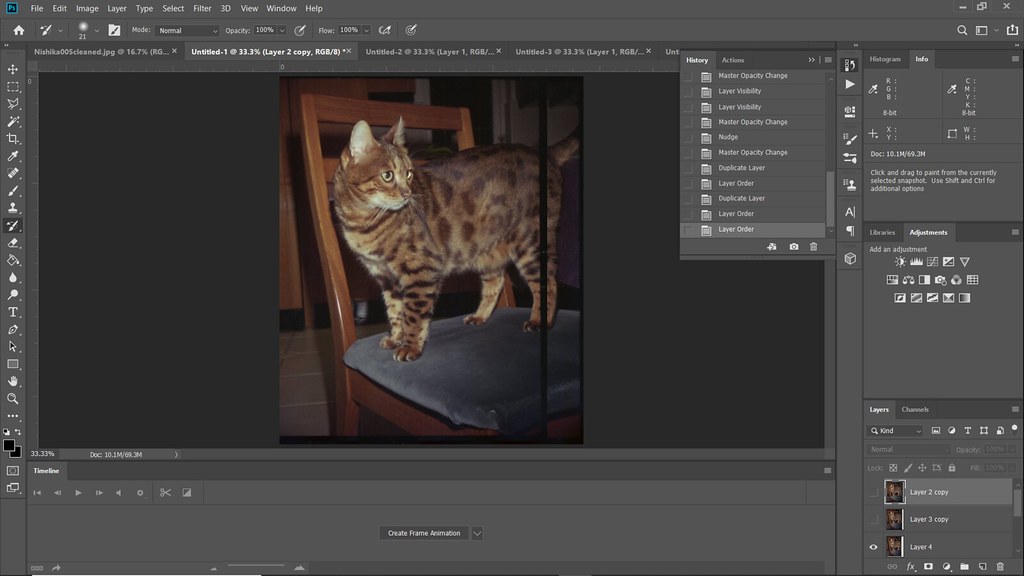
Go to frame 2, copy it and paste it as a layer in frame 1. Do this for frames 3 and 4 so that the frame 1 file now has all the four images as separate layers. If you’re using digital files, just open them, and copy and paste them as layers in sequence on top of the first frame, in the same way.

Uncheck frames 3 and 4’s visibility in the Layers panel so frame 2 is showing. Reduce the opacity of frame 2 to 50% so you can see frame 1 through it. Choose a point on frame 1 as the centre of rotation for the Wigglegram – I try and find something in the middle but when there’s nothing in the image there to act as an anchor I use something which could be a pivot – in this image I used one of kitty’s paws (if you try one place as the centre of rotation and it just doesn’t look right, you can realign the images to a different point afterwards). Make sure layer 2 is highlighted in the panel and use the move tool and arrow keys to nudge and align it to the centre of rotation on layer 1, you can use rulers to help with this alignment. When layer 2 is aligned, return the opacity to 100% again then uncheck its visibility and make layer 3 and 1 visible. Reduce layer 3’s opacity and align it to layer 1 as you just did for layer 2, then do the same for layer 4.

Now you have your four layers (you can remove the background layer in the panel if you haven’t already) you need to duplicate two of them so when the animation is made it will run smoothly back and forth between frames. First right click on layer 3 and select duplicate layer.

Move this layer so it’s above layer 4.

Duplicate layer 2 then move it so it’s at the top of the layer’s panel.
Now you have your 6 layers click on the ‘Create Frame Animation’ tab.
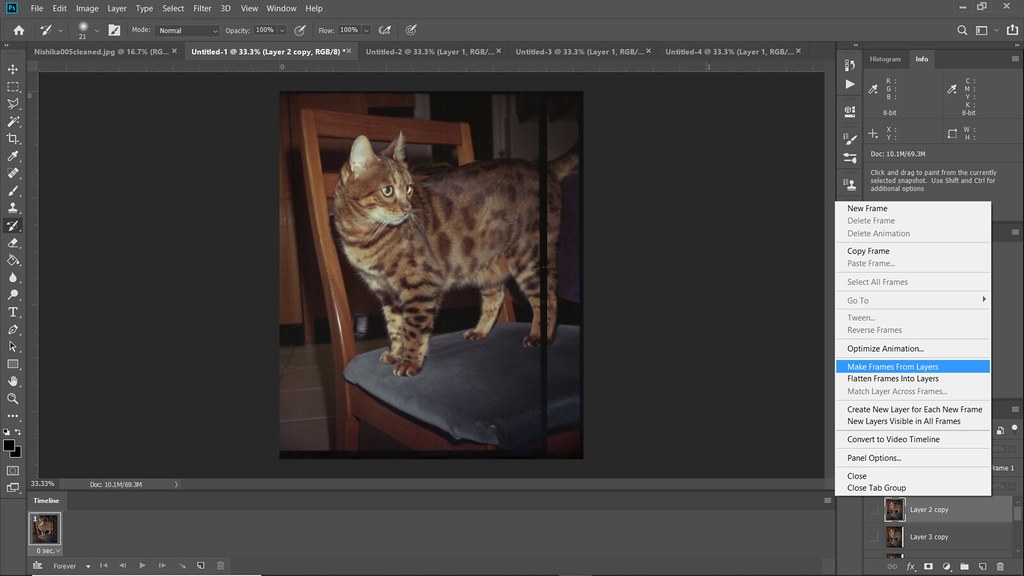
At the top right of this Timeline box is an options tab, click on it and select ‘Make Frames From Layers’.
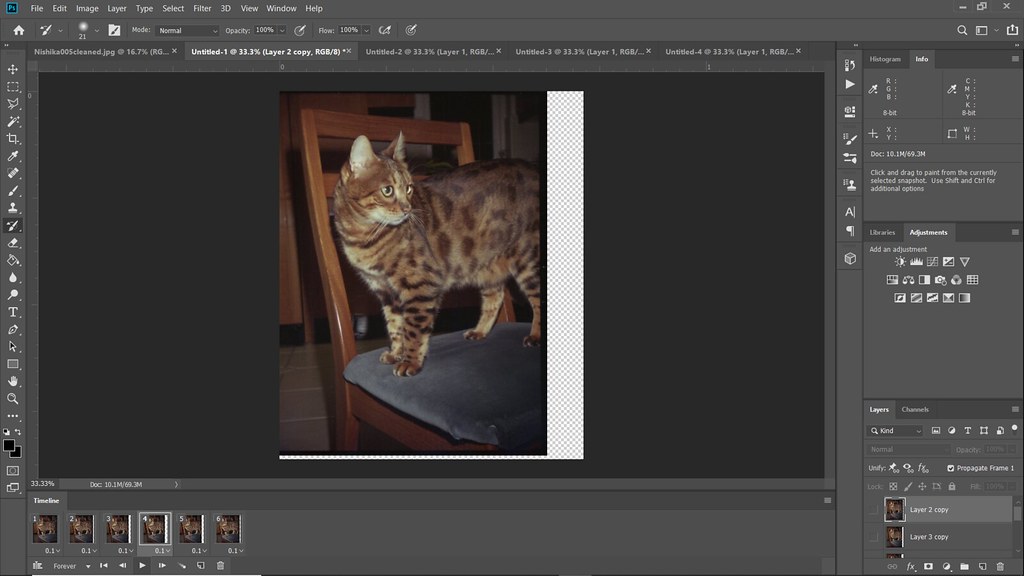
Make sure you just have your 6 frames in the Timeline window, otherwise just click on the extra one (usually in position 1) and click on the delete bin icon.

Select all of the layers in the Timeline window then right-click on a time on one of them and it’ll bring up different length options – I think 0.1 seconds works well for Wigglegrams and it’ll change this for all of them.
Now you can have a sneek peek of the Wigglegram by pressing play. If you find you’re not happy with the alignment then delete the Timeline frames and go back to your layers panel and re-jig the alignment as you did previously. When you’re happy start again by making frames from the layers in the Timeline.
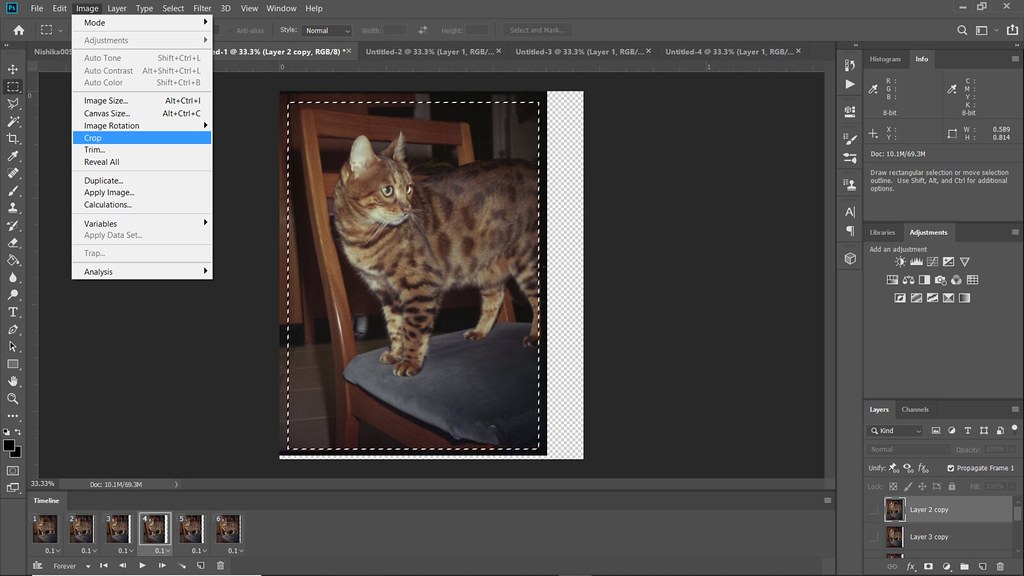
You’ll see now everything is aligned that there are big borders on some of the images. I use the Timeline panel and click on frame 4, which is usually the layer with the biggest border, and use the rectangular marquee tool to select the area I want to keep and then crop it. All of the layers will now be cropped.

I save the whole project as a PSD file so I can go back and edit it if I want at a later date.
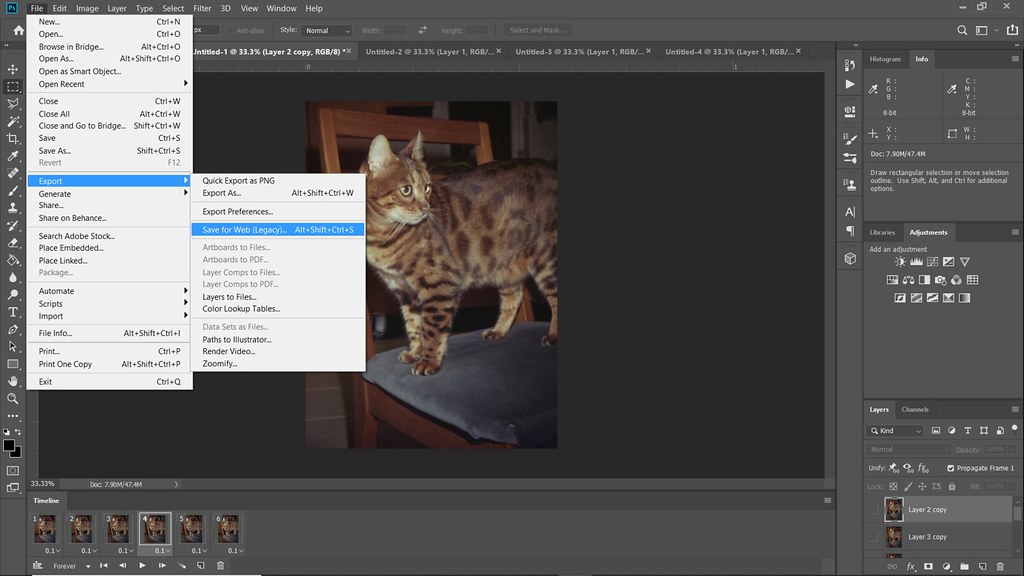
If you also want to save your file as a GIF (which is not suitable for your Instagram feed though – see below) click on File, Export, Save for Web (Legacy) and make sure GIF is selected.

And now you have a GIF Wigglegram, huzzah! If you’re wanting to share this on Instagram be aware that it will only allow GIFs in the stories, not the Feed. For a feed-friendly video, you need to make an mp4 and make it longer than 3 seconds.
Photoshop also allows you to render an MP4 video in the File – Export – Render video menu, so you can create the length of the animation you want and then render it directly through Photoshop as an MP4. I usually copy and paste the layers several times in the correct sequence and then make a frame animation to render a video from, it means then that it’s long enough to share directly on Instagram.

Now you have your Wigglegram and the adoration of the 3Dphoto folk on Instagram, congratulations! Even if you don’t decide to share it on social media I still think it feels like magic to see your still photos come to life in the animations, especially when they involve cats 😉 Please note that my beloved Nishika N8000 has a faulty lens which is unsharp so the fourth frame always looks a bit strange in my Wigglegrams from that camera (sometimes I just miss out this frame completely).
Using Photoshop also means you can create multiple sequences of Layers and edit them to add extras to your Wigglegrams, such as text, drawing, other images, etc. I did this with another Wigglegram of a cat from my Nimslo, because cat.

I hope you find this tutorial useful if you’re considering making Wigglegrams, either from film or digital images. Don’t forget to also check on Instagram for some inspiration and I look forward to seeing your results. If you have any questions or feedback please get in touch.

Copyright © The Stereoscopy Blog. All rights reserved.

4 thoughts on “How to Make Wigglegrams Using Photoshop”