
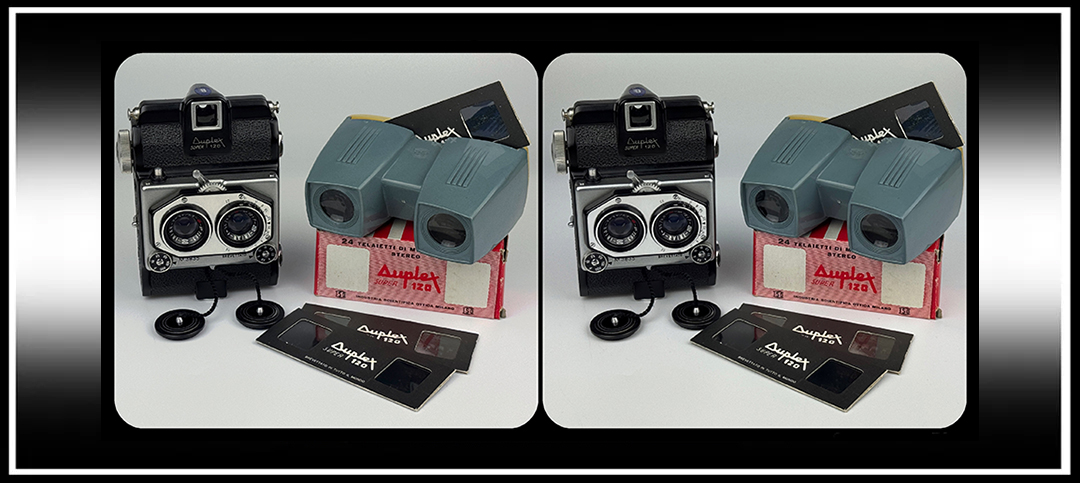
To celebrate World Photography Day and 71(ish) years of this beautiful stereoscopic camera, I’d like to introduce you to the Duplex Super 120. I bought mine in 2019, and it still remains one of my favourite stereoscopic cameras to use; it is small and perfectly formed with its high quality optics, and produces quite a unique but versatile stereo image format from 120 film.
The History
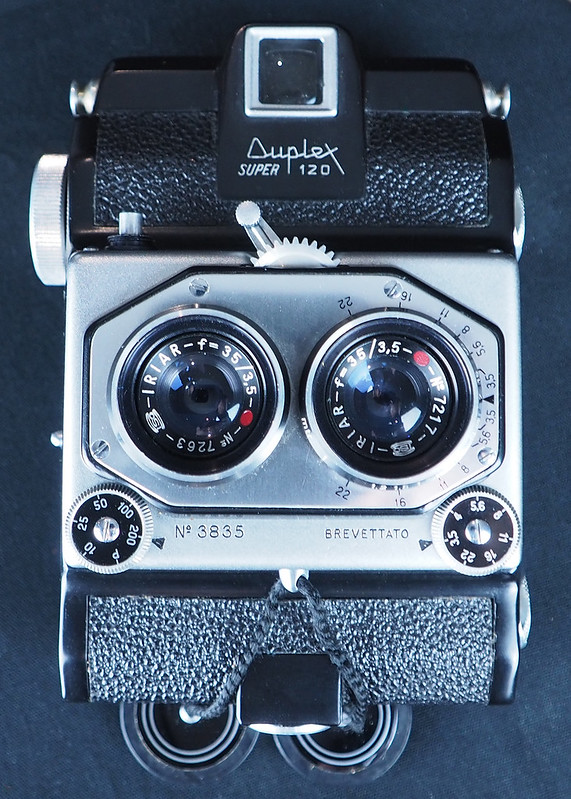
The Duplex Super 120 camera is said to have been first released around 1955 by Industria Scientifica Ottica S.R.L. (ISO), Milan, Italy, about a year before the more economic Duplex 120 model. The ISO company itself was founded around 1947, and its history and examples of its cameras can be found here (in Italian): https://bencinistory.altervista.org/002B%20fotocamere%2047/02B%20ISO%20milano.html
What makes the ISO Duplex 120 and Duplex Super 120 so special as medium-format cameras, along with the quality of the lenses, is the way the 120 film winds up the camera, and the twin-lens spacing, which is quite close for a stereo-camera, gives a resulting format of 24 stereo-pairs per standard roll of 120 film. The frame size is similar to those produced on 35mm film, but without the sprocket holes. The lens spacing means this camera can be great for 3-D portraits, and photos of cats, so it is most definitely ideal for 3-D cat portraits. The manufacturer described the cameras’ purposes as: ‘For 3D colour photography within everyone’s reach’, due to their economic way of producing so many images per roll of 120-film.
When the cameras were being produced, up until around 1971, accessories were readily available, both for the cameras and for the stereo slides produced from them. However, these can be particularly difficult and expensive to find now, and this is definitely one of the few downsides of the camera.

When production ceased, ISO were said to have manufactured around 10,000 – 11,000 Duplex Super 120 cameras, and about half of that number for the inferior Duplex 120 model. This may seem surprising, but when you see the camera comparison further down this post, it makes sense.
Specifications for the ISO Duplex Super 120
| Camera Size | 93 mm width, 127 mm height, 56 mm depth |
| Weight | Approx. 430g |
| Film Format | 120 roll film |
| Stereo Image Format | 24 pairs of stereo images per standard 120 film roll. Individual film chips are 24 mm wide x 26 mm high. |
| Lenses | Iriar 35mm f/3.5 |
| Lens Separation | 30 mm |
| Apertures | f3.5 – f22 |
| Shutter Speeds (s) | 1/10, 1/25, 1/50, 1/100, 1/200, B |
| Marked Focusing Distances (m) | 1, 1.2, 1.5, 1.7, 2, 2.5, 3, 4, 7, 15, inf. |
| Viewfinder | A reverse-Galilean optical magnifying viewfinder |
| Rangefinder? | No, distance set manually on wheel |
| Special feature | A stereo/mono switch that disables the double exposure prevention for use when taking a mono image (you will need to cover one lens at a time with a lens cap for a mono image). The lever on mine just seems to wobble on its own accord, however, so I haven’t tested this feature. |


Duplex 120 vs Duplex Super 120
I don’t have an example of the ‘standard’ Duplex 120 to photograph, however, I do believe any extra investment for a Super 120 is worth it when comparing the specs, especially if you’re buying the camera to use. The ‘standard’ Duplex 120 is a slightly lighter camera at 380g, and slightly smaller at 83 x 123 x 40mm. The lenses are inferior Iperang 25mm f/6.3 fixed-focus, with the same separation of 30mm. Available apertures are f6.3 – 16, and shutter speeds 1/25, 1/50, 1/100, B. The image format is the same. An example can be seen on Camera-Wiki: https://camera-wiki.org/wiki/Duplex_120
Manual and Step-by-Step User Guide
A massive thank you, as ever, to Butkus.org, who offers the original instruction manual free to download for personal use: https://www.cameramanuals.org/stereo/duplex_super_stereo_120_italian.pdf Please note that some pages are in the reverse order, and it’s in Italian, so I’ll reproduce some of the images from my copy with my bestest English translation.


| 1 – Lenses. | 8 – Mount for electronic flash. | 15 – Lower film advance (number) window. |
| 2 – Focus control wheel. | 9 – Mount for flash bulb. | 16 – Upper film advance (number) window. |
| 3 – Aperture control wheel. | 10 – Focus scale. | 17 – Removable backplate. |
| 4 – Shutter speed control wheel. | 11 – Depth of field scale. | 18 – Viewfinder eyepiece. |
| 5 – Shutter cocking lever. | 12 – Viewfinder. | 19 – Shoulder strap attachment button. |
| 6 – Shutter release button | 13 – Film advance wheel. | 20 – Spring-loaded spool retaining rings. |
| 7 – Threaded mount for special-fitting cable release. | 14 – Back-opening release tab. | 21 – Tripod screw mount. |
“The Duplex Super 120 is designed for dual use as a normal [mono] photographic camera and as a stereoscopic camera, in both cases, normal 6 x 9 (120) film is used. When the camera is used for single photographs, 48 frames of 23.5 x 25mm format can be obtained on a 120-film. When used as a stereoscopic camera, it will produce 24 pairs of stereoscopic frames of the same format. Naturally, both single photographs and stereoscopic images can be taken on the same roll of film.
To use this camera:
1 – LOAD THE FILM. Detach the back by lifting and pulling the back opening tab (14). Place the empty film reel in the upper slot. To make it easier to insert the reel, you can push the spring-loaded spool retaining ring (20) outwards. Now insert the film into the lower chamber with the paper tongue facing the empty spool, and insert the paper tongue into the slot of the empty spool in the usual way (winding slightly to make sure the spool has taken it up). Close the camera by first placing the lower edge of the backplate into the corresponding groove of the camera body back, and then pressing upwards until you hear it lock in place.


2 – ADVANCE THE FILM. To advance the film, turn the film advance wheel (13). Check the advance by looking at the numbers printed on the film protection paper through the control windows 15 & 16. The first frame will be in place when frame ‘1’ appears in the lower window.
The Duplex Super 120 is equipped with a double exposure safety device, located on the side of the camera, under the film advance button. When the lever of this device is in the “stereo” position, the shutter button cannot be pressed until the film has been advanced to the next position, and the shutter cocked.
a) For stereo photography: turn the film advance button until the number 1 appears in the lower window (15). Take the stereo photograph by checking the desired distance from the subject [90cm when going by the rule of thumb], set the distance focusing wheel, set the optimal shutter speed and aperture for the scene, cock the shutter, check the framing through the viewfinder, then press the shutter release (see 3 below). Once the stereo photograph has been taken, advance the film until film frame number 1 appears in the upper window (16). In this position, take the second stereo photograph. No advance the film until the number 2 of the film is visible in lower window 15. Continue in this manner with each stereo photograph. When the last photograph has been taken with the number 12 visible in the upper window (16), keep advancing the film until it is all spooled onto the upper film reel and no more protective paper is visible through the upper window, ensuring it is tightly wound around the reel. Open the camera back in low light and remove the film for development.
b) To take single photographs, turn the film advance until the number 1 appears in the lower window (15). Cover one of the two lenses using a lens cap and take the photograph. To take the next photograph, move the safety lever to the ‘single’ position, place the lens cap over the other lens and release the shutter. Only once both mono photos have been taken, use the film advance to move to the next frame so the number 1 appears in the upper window (16). After having the next two mono photographs, as described above, advance the film until the number 2 appears in the lower window (15). Continue in this way until the last two shots have been taken with the number 12 visible in the upper window (16). Advance and remove the film as described in a) above.


3 – TAKING THE PHOTOGRAPH. After choosing the subject, prepare and take the photograph using the following instructions:
a) Diaphragm and shutter: based on the photographer’s experience, or according to an exposure meter, the aperture and shutter speed are chosen which correspond to the sensitivity of the film and light conditions. To adjust the aperture, the aperture adjustment control wheel (3) is turned so the chosen value is aligned with the arrow. In the same way, the desired shutter speed is selected on the shutter speed control wheel (4). If the shutter is set to <P> exposure, it opens when the shutter button (6) is pressed all the way down and remains open until the shutter button is released. For long exposures, the camera can be fixed to a tripod using the trip screw mount (21), or placed on some other stable support. Failure to make the camera stable during a long exposure will result in blurry photographs.
b) Focusing: The two lenses of the Duplex Super 120 are focused simultaneously by means of the focus control wheel (2). The distance scale is located on the mount around one of the lenses (10), and the relative index is engraved on the camera’s front plate. Around the lens, on both sides of the focusing index, there is a depth of field scale (11). This indicates at what distance the objects must be located from the camera in order to appear sharp in the photograph. This depth of field scale shows the distance index with the corresponding apertures around the lens. First, focus on the main object you want to photograph. Then, on the depth of field scale there are numbers to the right and left that correspond to the aperture that will be used for the shot. Corresponding to these numbers, on the distance scale, there are two numbers that indicate the field of focus. An object must be located within these limits in order for it to be reproduced sharply at a given aperture and a given distance.
c) Shutter release. To cock the shutter, push the shutter cocking lever (5) to the left. Observe the subject through the viewfinder and when you see it framed as desired, press the shutter release button (6) all the way down. If you take a photo where you need to keep the camera as still as possible, it is advisable to use a compatible shutter release cable, which is screwed onto the threaded attachment (7) which surrounds the shutter release button (6).
d) Flash. The Duplex Super 120 is equipped with two synchronised contacts for the flash. The connection cable for the electronic flash should be inserted into the mount marked X (8). Mount M (9) is used for flashes which use flash bulbs.

4 – SOME TIPS. One of the greatest advantages of the Duplex Super 120 is that the film is used so economically that the cost of each photograph is extremely low. We therefore recommend using colour slide film [this was written in the days before a single roll of 120 colour slide film cost around £25 GBP like they do currently, ouch!!!], which produces photographs that appear infinitely superior in beauty and naturalness to the usual black-and-white copies on paper. It is colour that gives life to your photographs, and if you add the three-dimensional aspect of stereoscopic shots, you will have the maximum perfection that photography can offer today.
In the stereoscopic photographs, you will notice that subjects which are closer seem more in relief than those in the background.
For stereo photography, and even for single shots, get used to advancing the film to the next position as soon as the photograph is taken. For stereo shots, the camera can be tilted forward or backwards, but not sideways.
5 – VIEWING THE PHOTOGRAPHS. Single shots taken with the Duplex Super 120 will be treated like any other two-dimensional photograph [with distain]. Stereo shots, on the other hand will be viewed in a stereo viewer or projected with a special stereo projector. Stereo shots must be mounted in special frames [see next section]. You can always purchase the mounts you need at a very modest price from your photographic equipment supplier [anyone got a time machine?]. The assembly, which is extremely simple, is performed with the aid of a cutter with the utmost speed and precision.” [I used a pair of scissors, or a metal ruler and craft knife, as the original ISO Duplex film cutters are like rocking horse poop]

Processing the Film and Making Stereo Images
If you’re sending your films away for development, as ever, as this is quite an unusual format, it’s best to inform the lab in advance if you don’t want your film cut and check if they offer that service. However, the frames should be evenly spaced on the 120 film if you’ve aligned the image frame numbers with the rear windows of the camera, so even if they cut the film, it shouldn’t slice through any images, just the borders (famous last words!). If I send mine away for development, I prefer to keep them uncut so I can scan/cut/enlarge them myself, depending on the film I’ve used and how I want to view/display the images. If you’re having the film scanned, some labs, however, might insist on cutting the film; it’s always worth checking. Also keep in mind, if the lab scans the film, you will get two stereo-pairs per standard 120 full-frame, but with a free app like StereoPhoto Maker, you can digitally separate, align, transpose, and enlarge them for printing/digital viewing. If you’re looking to start out in analogue stereoscopic photography or just want a few pointers, there’s a post elsewhere on this Blog about getting started in stereo film photography.
One thing I should also mention here is that the image size of each stereo half (film chip) this camera produces is approx. 26 mm high by 24 mm wide (some reviews say 24 mm x 24mm, and the manufacturer states 25 mm x 23.5 mm but I measured mine to double check). I’m lucky to have some original card mounts, with slip-in plastic sleeve windows, made especially for this camera, however, you could also, with some of the image hidden, use Stereo Realist-format (5P) mounts, with windows that measure approx. 23 mm high x 21 mm wide, and archival-quality tape to hold the film chips in place. As it’s 120-film the camera uses, the usual film sprocket holes you’d have from 35mm film chips aren’t present, so RBT-type mounts which use pin-bars and sprocket holes to hold and align the film aren’t going to cut it, but you can still use these mounts without the pin-bars inserted, and just carefully tape the image in place. I very much advise, if you’re going to tape the film chips into mounts, leaving enough black film border around the images themselves where possible so you have somewhere to adhere the tape to, instead of on the image itself. These reproductions are not perfect, but I’m going to include scans of an original Duplex card mount, and one of a folder-over Stereo Realist-format mount, so you can at least use them as rough templates if you can’t get hold of any originals.
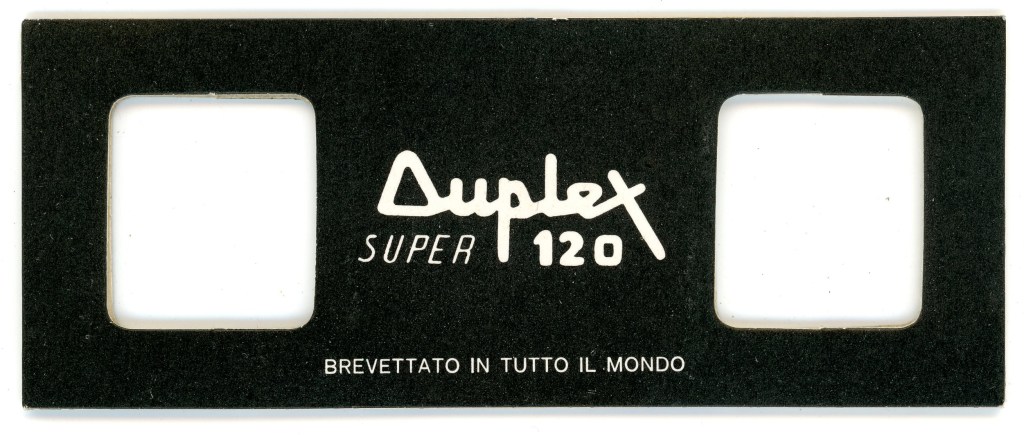
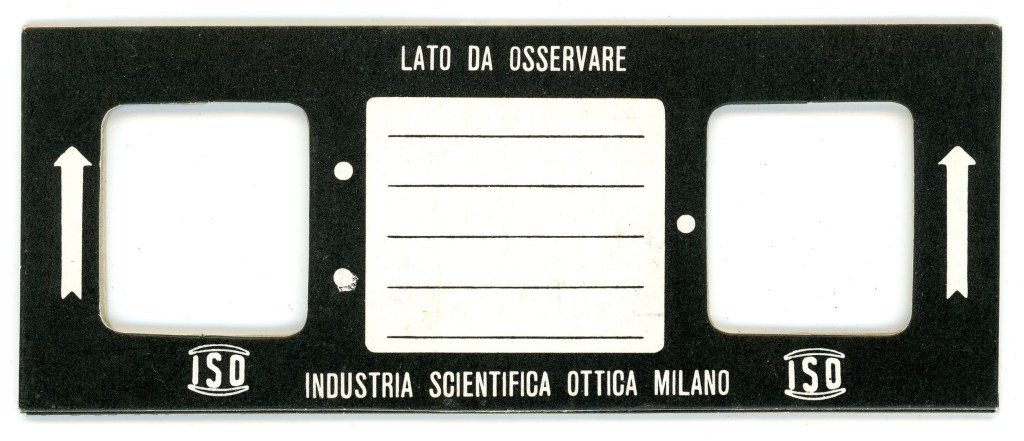
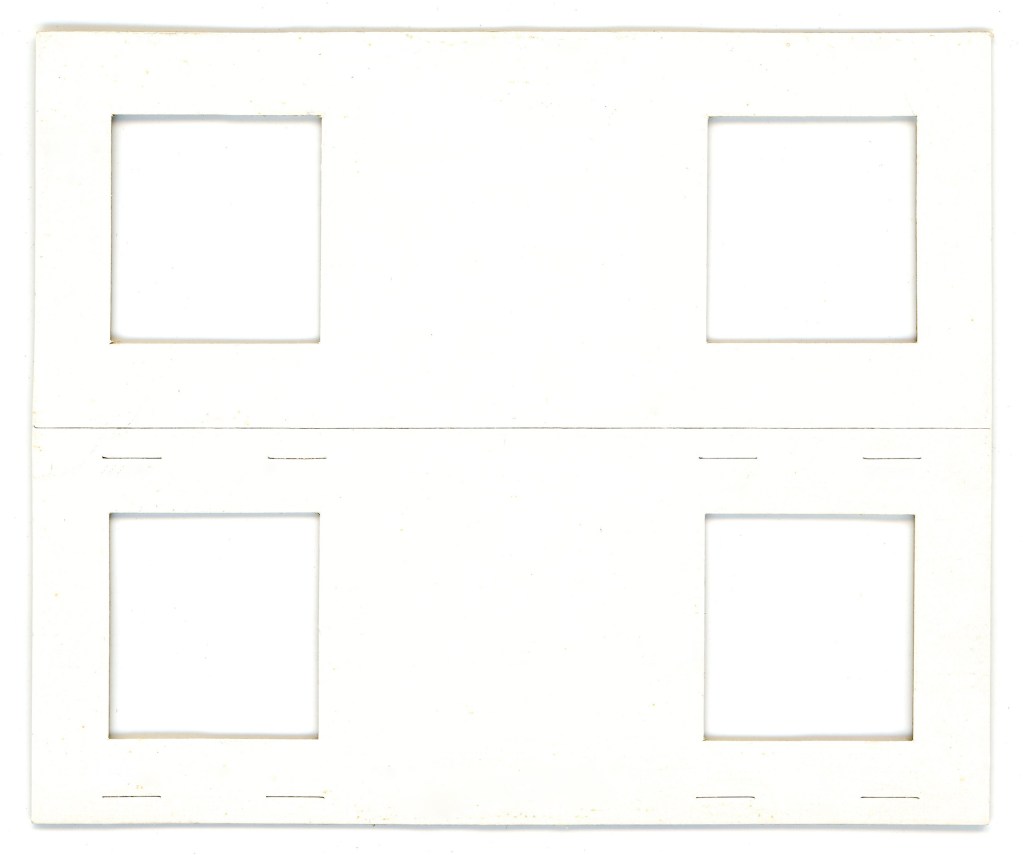
You could also contact-print from the negatives, but the resulting images will be very small, so enlarging them is possible too.
Once you’ve got your fabulous stereo slides, or stereo cards, all that’s left to do is view them in a suitable stereoscope and admire both the quality of the camera and your skillz in 3-D.


Review
As I said at the beginning of this post, this remains one of my favourite stereoscopic cameras to use. It’s because of its image quality, ease of use, range of settings, which allow you shoot in varied conditions, and, I’m going to be superficial, the camera looks absolutely adorable. I also like the format of the images to work with, but this is very much a personal preference.
As also previously mentioned, one of the biggest downsides is getting hold of accessories for this camera. I lucked out when I found mine in Italy as it came in a presentation box with all of its original accessories still together – I’m unsure if the camera had ever actually been used, or just sat in a damp attic for a rainy day that never happened (which came with its own issues!). One accessory which I personally feel would detrimentally affect my user experience if it wasn’t present is the leather carry case, as it’s so convenient to sling around my neck and have it there just in case there’s something I want to capture in 3-D quite quickly. If you get the opportunity to buy the camera with the case included, I’d jump at it. I do think without the case it might be difficult to find a strap which would fit the camera, as the attachment buttons for a strap seem quite unique. Mine also came with a vinyl strap with two slots for these attachment buttons, but everything in the presentation box was quite damp and musty, so this strap is quite ridged in its curled-up state by now. You’ll see in the images of the set, that there was also a flash and a flash-arm attachment present, neither of which I’ve attempted to use. The stereo-viewer is one of the most basic versions of the ISO ones available, but works well with the accompanying slide mounts, with the optics being surprisingly good. I always prefer to view stereoscopic images on slide film with a stereoscope, so this camera is a real treat for me, but, again, this is very much a personal preference. By the way, if anyone has any of the original ISO Duplex mounts that are gathering dust, please let me know.

As ever with analogue photography, one of the biggest factors in its accessibility is the cost of using the camera and film. The Duplex Super 120s do seem to retain quite a high price, reflecting the quality of the camera, but you can sometimes, by pure luck, pick up a very good example at auction at a relatively low price. I bought the presentation set for about the same price as a good example camera with no accessories. My excitement at seemingly bagging a bargain, however, was short lived when I found the shutters weren’t opening at the higher speeds, through the expensive medium of slide film (ouch!). I was lucky, and PPP Cameras managed to fix this for me by repairing a broken shutter arm, removing the old grease, and servicing the camera, and it’s never looked back since. Knowing a good repair technician who is not phased by quite obscure cameras most definitely helps when you’re into analogue stereoscopic photography! These unexpected repairs and servicing costs should be factored in, especially if you’re buying an old camera ‘blind’ online without testing it first.
Slide film is currently extortionate to buy, sadly. A single roll of Ektachrome 120 is around £25 GBP, and there do not seem to be any black and white 120 slide films being made at the moment, although, with patience, practice, enough suitable space, equipment and chemicals, you can make slide film from standard B&W negative film. The running costs of analogue photography can be brought down by using black and white negative film, and by home development, depending on what you have available, but obviously it can sometimes limit you to the images that are produced. Some people may also feel limited by the lens separation, as 3cm is closer than a ‘standard’ stereoscopic camera, which will also affect what subjects you photograph, but for me this is another feature which makes the camera different and useful when compared to others.
In conclusion, as an avid appreciator of viewing stereoscopic slides, I love the high-quality images that ISO Duplex Super 120 can produce. I understand that the optimal distance from the subject is closer than for other standard stereoscopic cameras, but I also enjoy it for this exact reason, it allows me to get closer to subjects, even ones I don’t particularly like, and gets me thinking about composition specifically for this camera, which I don’t always get right. I also appreciate that the camera tends to cost more now, as compared to other ‘standard’ 35mm stereoscopic cameras, but the quality, practicality and user experience more than compensate for this. If I’m going on a trip anywhere and I can take a small selection of stereoscopic cameras, this one is always there amongst them, with its adorable little features, and uniqueness, which is a very good sign indeed.


Copyright © The Stereoscopy Blog. All rights reserved.

